This episode is freely available thanks to the support of our subscribers

Subscribers get exclusive access to new and all previous subscriber-only episodes, video downloads, and 30% discount for team members. Become a Subscriber

We add support for vertical alignment to our Layout protocol-based Flow layout implementation.

00:06 A long time ago, we implemented a flow layout for the first time. Then, we did it again in SwiftUI, and, after making some improvements, we revisited the concept when the Layout protocol came out.

00:23 Today, we want to talk about flow layout once again and add support for vertical alignment of the views within a line, leveraging the Layout protocol's ability to ask views for their alignment guides. We can use this, for example, to align text views by their first baselines.

01:02 Our implementation will play nicely with SwiftUI's alignment system, which is always an interaction between a container and its subviews. Thus, our flow layout will respect any overridden alignment guides on the subviews.

Setting Up

01:27 Our code from last time was written when the Layout protocol was just released, and it's now broken in a few places, e.g. we should now use VStackLayout instead of VStack. But we actually don't need to switch between different layouts anymore, so we can comment out a lot.

01:49 We'll want to switch between different vertical alignments, so we need to store the selected alignment in a state property. Since VerticalAlignment itself isn't Hashable, we need to create our own wrapper, an Align enum:

enum Align: String, CaseIterable {
    case top, bottom, center, firstTextBaseline, lastTextBaseline
}

02:20 We add a computed property, alignment, that produces a VerticalAlignment value for each case:

enum Align: String, CaseIterable {
    case top, bottom, center, firstTextBaseline, lastTextBaseline

    var alignment: VerticalAlignment {
        switch self {
        case .top:
            return .top
        case .bottom:
            return .bottom
        case .center:
            return .center
        case .firstTextBaseline:
            return .firstTextBaseline
        case .lastTextBaseline:
            return .lastTextBaseline
        }
    }
}

02:47 To conform to Identifiable, we need to return a unique Hashable ID, and we can actually just use the Align value itself for this:

enum Align: String, CaseIterable, Identifiable {
    case top, bottom, center, firstTextBaseline, lastTextBaseline

    var id: Self { self }

    var alignment: VerticalAlignment {
        // ...
    }
}

03:11 We create a picker to change the alignment. We also add a property to FlowLayout so that we can pass the selected vertical alignment into it. And we generate a few more items to be laid out — maybe 20:

struct ContentView: View {
    @State var align = Align.top
    
    var body: some View {
        VStack {
            Picker("Alignment", selection: $align) {
                ForEach(Align.allCases) { a in
                    Text("\(a.rawValue)")
                }
            }
            .pickerStyle(.menu)
            
            let layout = FlowLayout(alignment: align.alignment)
            layout {
                ForEach(0..<20) { ix in
                    Text("Item \(ix)")
                        .background(Capsule()
                            .fill(Color(hue: .init(ix)/10, saturation: 0.8, brightness: 0.8)))
                }
            }
            .animation(.default, value: align)
            .frame(maxHeight: .infinity)
        }
    }
}

struct FlowLayout: Layout {
    var alignment: VerticalAlignment

    // ...
}

04:21 As we resize the window, we can see how items flow from one line to the next. We add one more item that's a bit longer, with multiple lines of text so that we have something to test the alignment with. We also add some random padding to the other items to shift their baselines:

struct ContentView: View {
    @State var align = Align.top
    
    var body: some View {
        VStack {
            // ...
            let layout = FlowLayout(alignment: align.alignment)
            layout {
                Text("Longer Item\nwith second line")
                    .padding()
                    .background(Capsule()
                        .fill(Color(hue: .init(99)/10, saturation: 0.8, brightness: 0.8)))
                    .alignmentGuide(.top) { $0[.bottom] }
                ForEach(0..<20) { ix in
                    Text("Item \(ix)")
                        .padding(CGFloat.random(in: 10...25))
                        .background(Capsule()
                            .fill(Color(hue: .init(ix)/10, saturation: 0.8, brightness: 0.8)))
                }
            }
            .animation(.default, value: align)
            .frame(maxHeight: .infinity)
        }
    }
}

Collecting View Dimensions

05:49 By default, the items are top-aligned due to our implementation. We keep track of a current position, where X is the position on the current line, and Y is the line's position. We start out with zero for the Y position, and as we move to a new line, we add the maximum height of the subviews of the current line, plus some spacing. This current Y position is used as the origin.y for all subviews on the current line, thus aligning the items by their tops.

06:22 To enable different alignments, we need to take a look at our algorithm. There are two parts to it: we have the FlowLayout struct, which conforms to the Layout protocol, and we have a layout function that takes an array of sizes and computes both the offsets for the subviews and the overall size of the container view.

06:49 In the sizeThatFits method of FlowLayout, we receive a collection of subviews, and we currently ask these subviews for their ideal size, but we now also need to know each subview's alignment guide for the specified alignment. We could choose to extract this specific alignment guide and pass it on in our own struct together with the view's size, but it's simpler for now to just pass on the entire ViewDimensions value of the view.

07:35 We can think of the ViewDimensions struct as a CGSize with some extras. It gives us a width and a height, but we can also subscript it with an alignment guide to get the view's alignment value for that guide. For instance, if we ask a view for its top alignment, it'll usually return 0. And if we ask for the bottom alignment, it'll return its height. But this also takes any overridden alignment guides into account, so we don't have to worry about those — as long as we read alignment values through the ViewDimensions, we should be good.

08:12 So, we update both methods of FlowLayout to collect ViewDimensions for the subviews:

struct FlowLayout: Layout {
    var alignment: VerticalAlignment
    
    func sizeThatFits(proposal: ProposedViewSize, subviews: Subviews, cache: inout ()) -> CGSize {
        let containerWidth = proposal.replacingUnspecifiedDimensions().width
        let dimensions = subviews.map { $0.dimensions(in: .unspecified) }
        return layout(dimensions: dimensions, containerWidth: containerWidth, alignment: alignment).size
    }
    
    func placeSubviews(in bounds: CGRect, proposal: ProposedViewSize, subviews: Subviews, cache: inout ()) {
        let dimensions = subviews.map { $0.dimensions(in: .unspecified) }
        let offsets = layout(dimensions: dimensions, containerWidth: bounds.width, alignment: alignment).offsets
        for (offset, subview) in zip(offsets, subviews) {
            subview.place(at: CGPoint(x: offset.x + bounds.minX, y: offset.y + bounds.minY), proposal: .unspecified)
        }
    }
}

08:26 We also change the layout function to take an array of ViewDimensions as a parameter:

func layout(dimensions: [ViewDimensions], spacing: CGFloat = 10, containerWidth: CGFloat, alignment: VerticalAlignment) -> (offsets: [CGPoint], size: CGSize) {
    // ...
    for size in dimensions {
        // ...
    }
    // ...
}

09:15 We're now working with dimensions instead of sizes, but the algorithm still works because ViewDimensions also has width and height properties, just like CGSize does.

Placing Views in a Line

09:29 Next, let's think about how the layout algorithm should change. Instead of always appending each new item to a result array, we should collect the subviews of a single line. Once the current line is full, we have to position the line relative to the previous one, taking into account that the line's subviews can be vertically aligned in all kinds of ways — depending on the selected alignment and the views' alignment guides, the origin of a subview could be negative, or perhaps the origin of the entire line could be 100, for example.

In other words, after we lay out the views of a line, the line's origin could be non-zero. That's why we need to collect the subviews of a single line and find the line's origin by taking the minY of the union of the subviews before we can add the subviews to a result array.

10:45 We replace the maxX and lineHeight properties with currentLine, which is an array of rects for the views of the current line we're laying out:

func layout(dimensions: [ViewDimensions], spacing: CGFloat = 10, containerWidth: CGFloat, alignment: VerticalAlignment) -> (offsets: [CGPoint], size: CGSize) {
    var result: [CGRect] = []
    var currentPosition: CGPoint = .zero
    var currentLine: [CGRect] = []
    
    // ...
}

11:13 Looping over the dimensions, we need to add to the currentLine array while the line isn't overflowing. The rect's X is the current position, and its Y is no longer zero, but rather the subview's alignment value for the current alignment:

func layout(dimensions: [ViewDimensions], spacing: CGFloat = 10, containerWidth: CGFloat, alignment: VerticalAlignment) -> (offsets: [CGPoint], size: CGSize) {
    var result: [CGRect] = []
    var currentPosition: CGPoint = .zero
    var currentLine: [CGRect] = []
    
    for dim in dimensions {
        if currentPosition.x + dim.width > containerWidth {
            // ...
        }
        
        currentLine.append(CGRect(x: currentPosition.x, y: dim[alignment], width: dim.width, height: dim.height))
        currentPosition.x += dim.width
        currentPosition.x += spacing
    }

    // ...
}

Flowing to the Next Line

13:22 If adding a next view would overflow the current line, we need to start a new line. And, after we loop over all the dimensions, there might still be some rects in currentLine. In both cases, we need to add the contents of currentLine to our result, so it makes sense to write a local method for this, flushLine.

14:16 In flushLine, we first reset the current X position to zero. Then, we need to map over the rects in currentLine to adjust their Y positions for the line's origin. Let's say the line's minY is 100 points. In that case, we need to move all views of the line up by 100 points. To find the line's minY, we could write a union helper that combines an array of rects:

func layout(dimensions: [ViewDimensions], spacing: CGFloat = 10, containerWidth: CGFloat, alignment: VerticalAlignment) -> (offsets: [CGPoint], size: CGSize) {
    var result: [CGRect] = []
    var currentPosition: CGPoint = .zero
    var currentLine: [CGRect] = []
    
    func flushLine() {
        currentPosition.x = 0
        let minY = currentLine.union.minY
        result.append(contentsOf: currentLine.map { rect in
            var copy = rect
            copy.origin.y += currentPosition.y - minY
            return copy
        })
        
        // ...
    }
    
    for dim in dimensions {
        if currentPosition.x + dim.width > containerWidth {
            flushLine()
        }
        
        currentLine.append(CGRect(x: currentPosition.x, y: dim[alignment], width: dim.width, height: dim.height))
        currentPosition.x += dim.width
        currentPosition.x += spacing
    }
    flushLine()
    
    // ...
}

16:06 We extend sequences that contain CGRects with the union helper. In union, we reduce the sequence's rects into a single value. For the initial value, we don't use CGRect.zero, because that would create a union with the zero origin, which we don't necessarily want. Rather, we should choose .null as the initial value:

extension Sequence where Element == CGRect {
    var union: CGRect {
        reduce(.null, { $0.union($1) })
    }
}

16:56 Next, we need to add the line's height to the Y of currentPosition, which is the height of the union of the rects:

func layout(dimensions: [ViewDimensions], spacing: CGFloat = 10, containerWidth: CGFloat, alignment: VerticalAlignment) -> (offsets: [CGPoint], size: CGSize) {
    var result: [CGRect] = []
    var currentPosition: CGPoint = .zero
    var currentLine: [CGRect] = []
    
    func flushLine() {
        currentPosition.x = 0
        let union = currentLine.union
        result.append(contentsOf: currentLine.map { rect in
            var copy = rect
            copy.origin.y += currentPosition.y - union.minY
            return copy
        })
        
        currentPosition.y += union.height + spacing
        // ...
    }
    
    for dim in dimensions {
        if currentPosition.x + dim.width > containerWidth {
            flushLine()
        }
        
        currentLine.append(CGRect(x: currentPosition.x, y: dim[alignment], width: dim.width, height: dim.height))
        currentPosition.x += dim.width
        currentPosition.x += spacing
    }
    flushLine()
    
    // ...
}

17:26 At the end of flushLine, we reset currentLine to an empty array:

func layout(dimensions: [ViewDimensions], spacing: CGFloat = 10, containerWidth: CGFloat, alignment: VerticalAlignment) -> (offsets: [CGPoint], size: CGSize) {
    var result: [CGRect] = []
    var currentPosition: CGPoint = .zero
    var currentLine: [CGRect] = []
    
    func flushLine() {
        currentPosition.x = 0
        let union = currentLine.union
        result.append(contentsOf: currentLine.map { rect in
            var copy = rect
            copy.origin.y += currentPosition.y - union.minY
            return copy
        })
        
        currentPosition.y += union.height + spacing
        currentLine.removeAll()
    }
    
    // ...
}

17:36 Before returning the result, we need to map the collected rects to their origins, and we return the union's size as the container size:

func layout(dimensions: [ViewDimensions], spacing: CGFloat = 10, containerWidth: CGFloat, alignment: VerticalAlignment) -> (offsets: [CGPoint], size: CGSize) {
    var result: [CGRect] = []
    // ...
    
    return (result.map { $0.origin }, result.union.size)
}

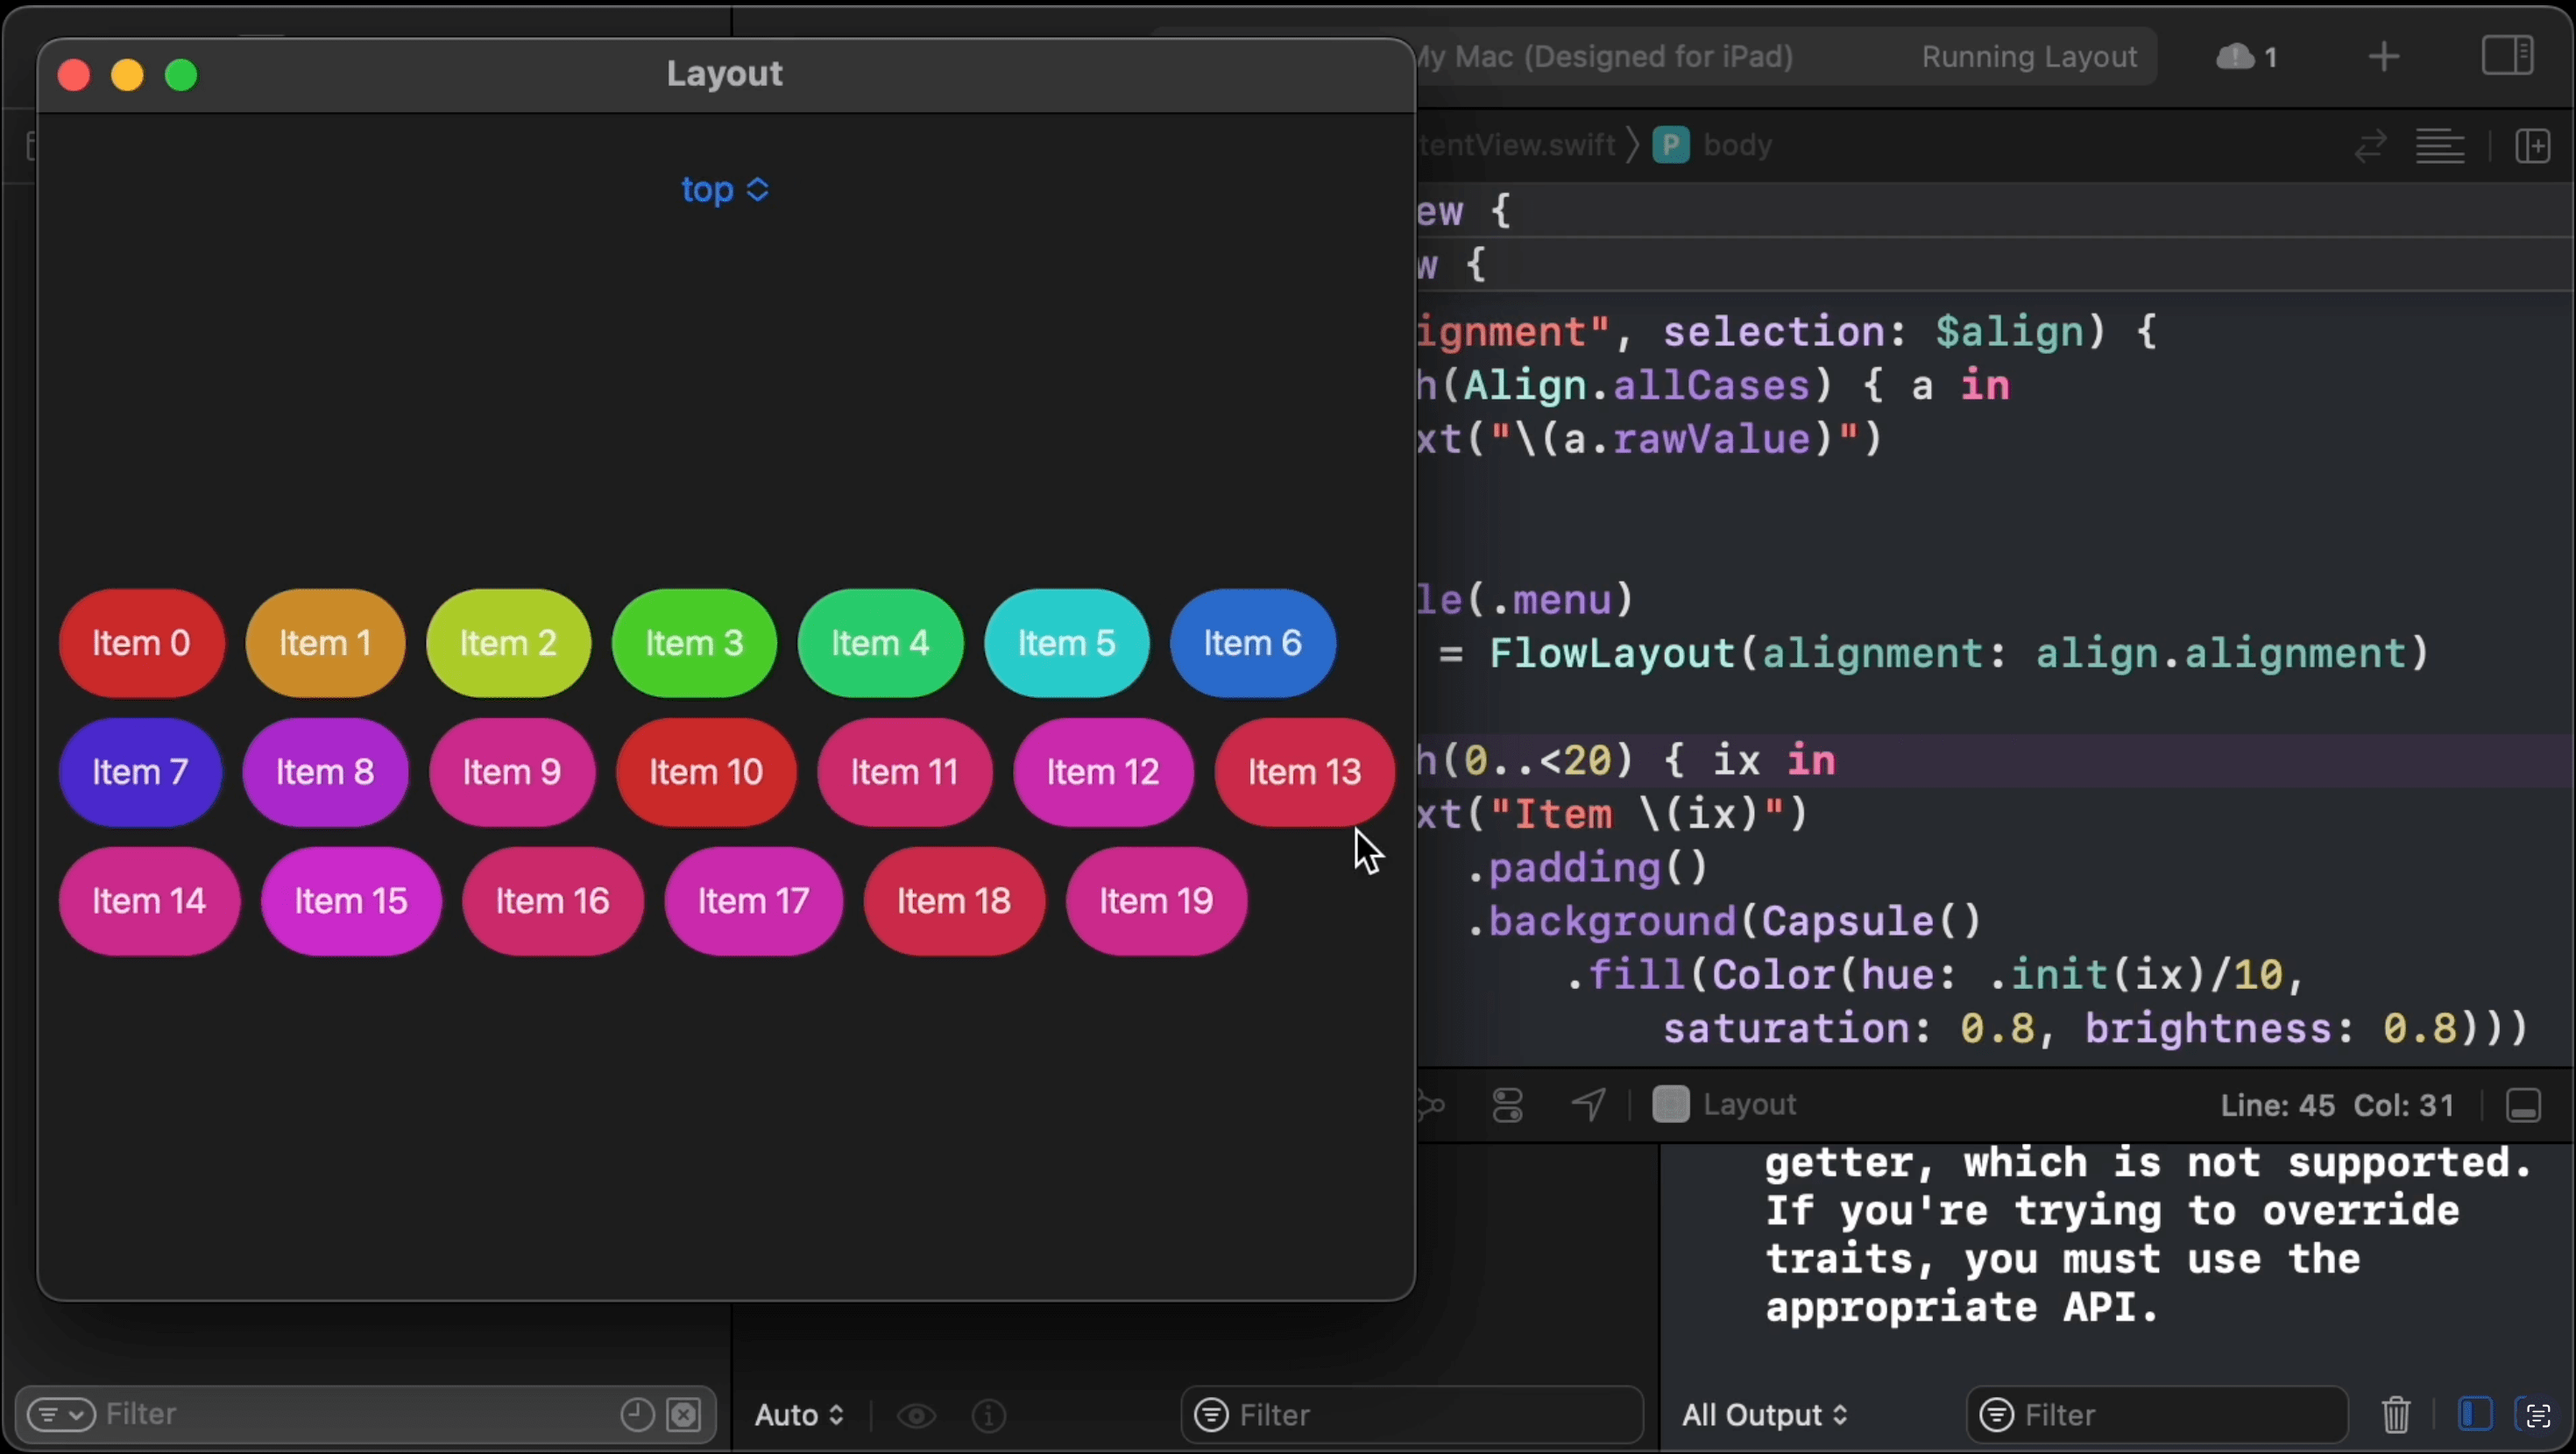
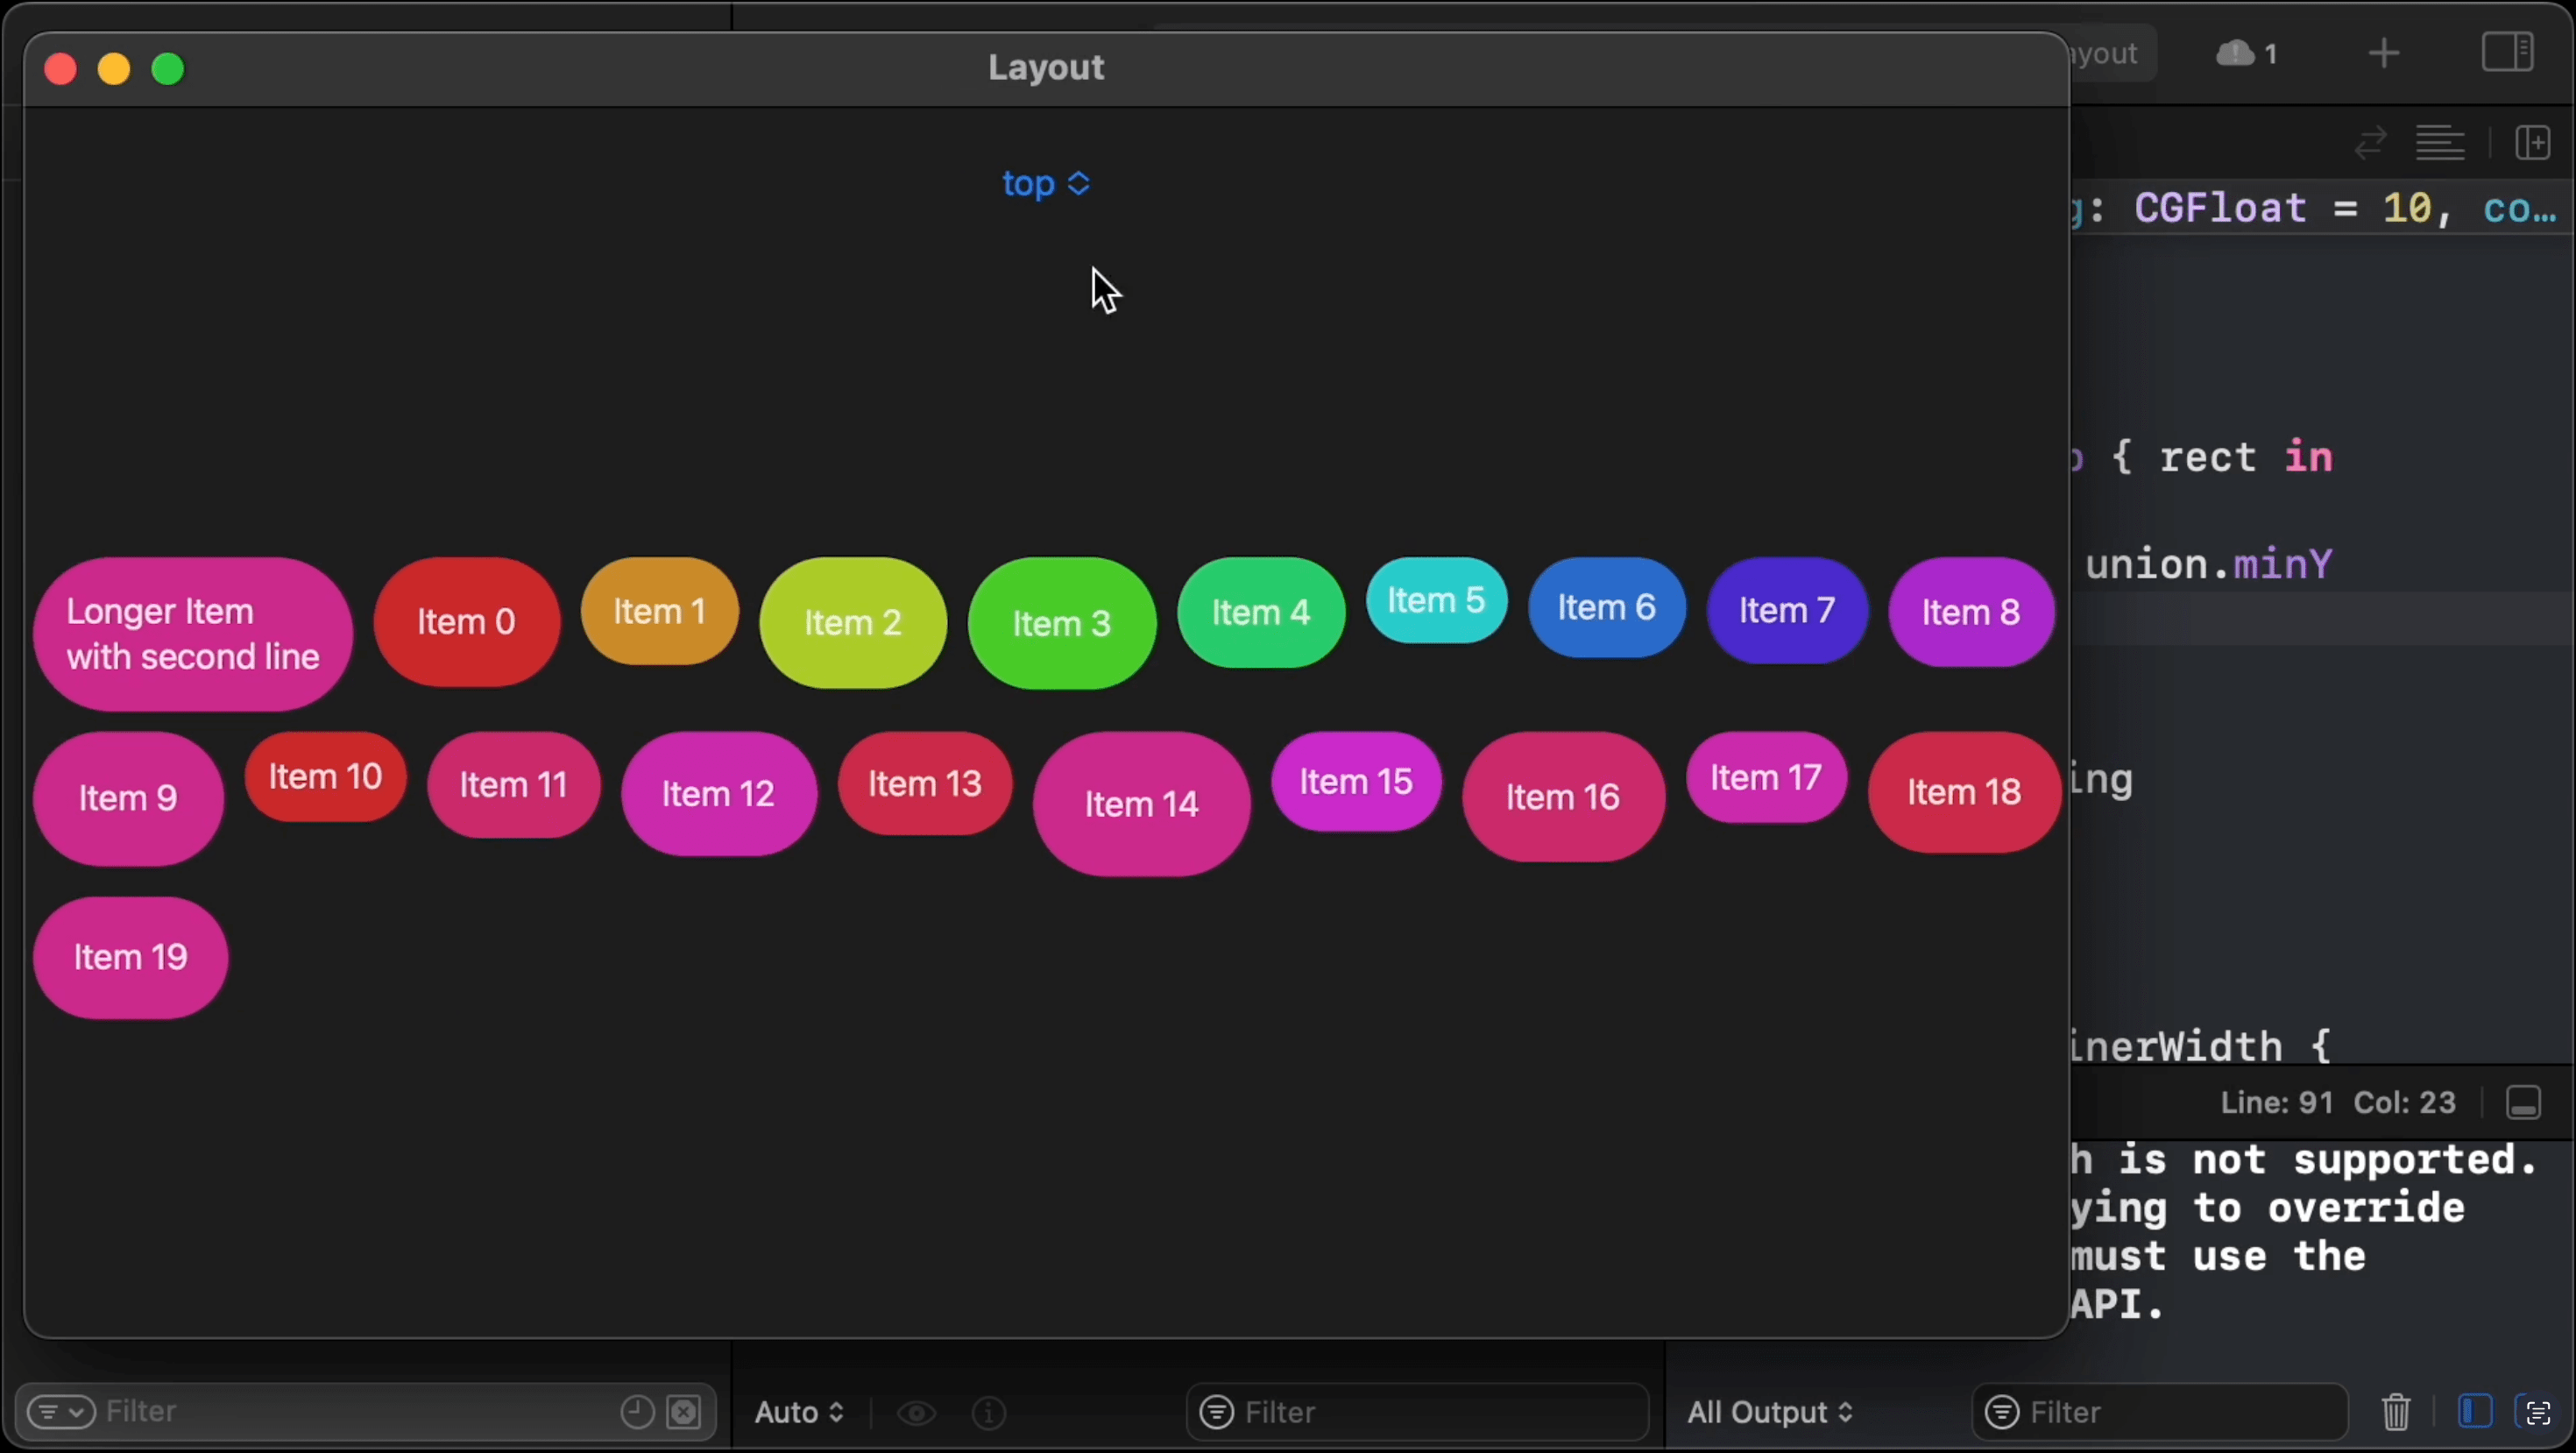
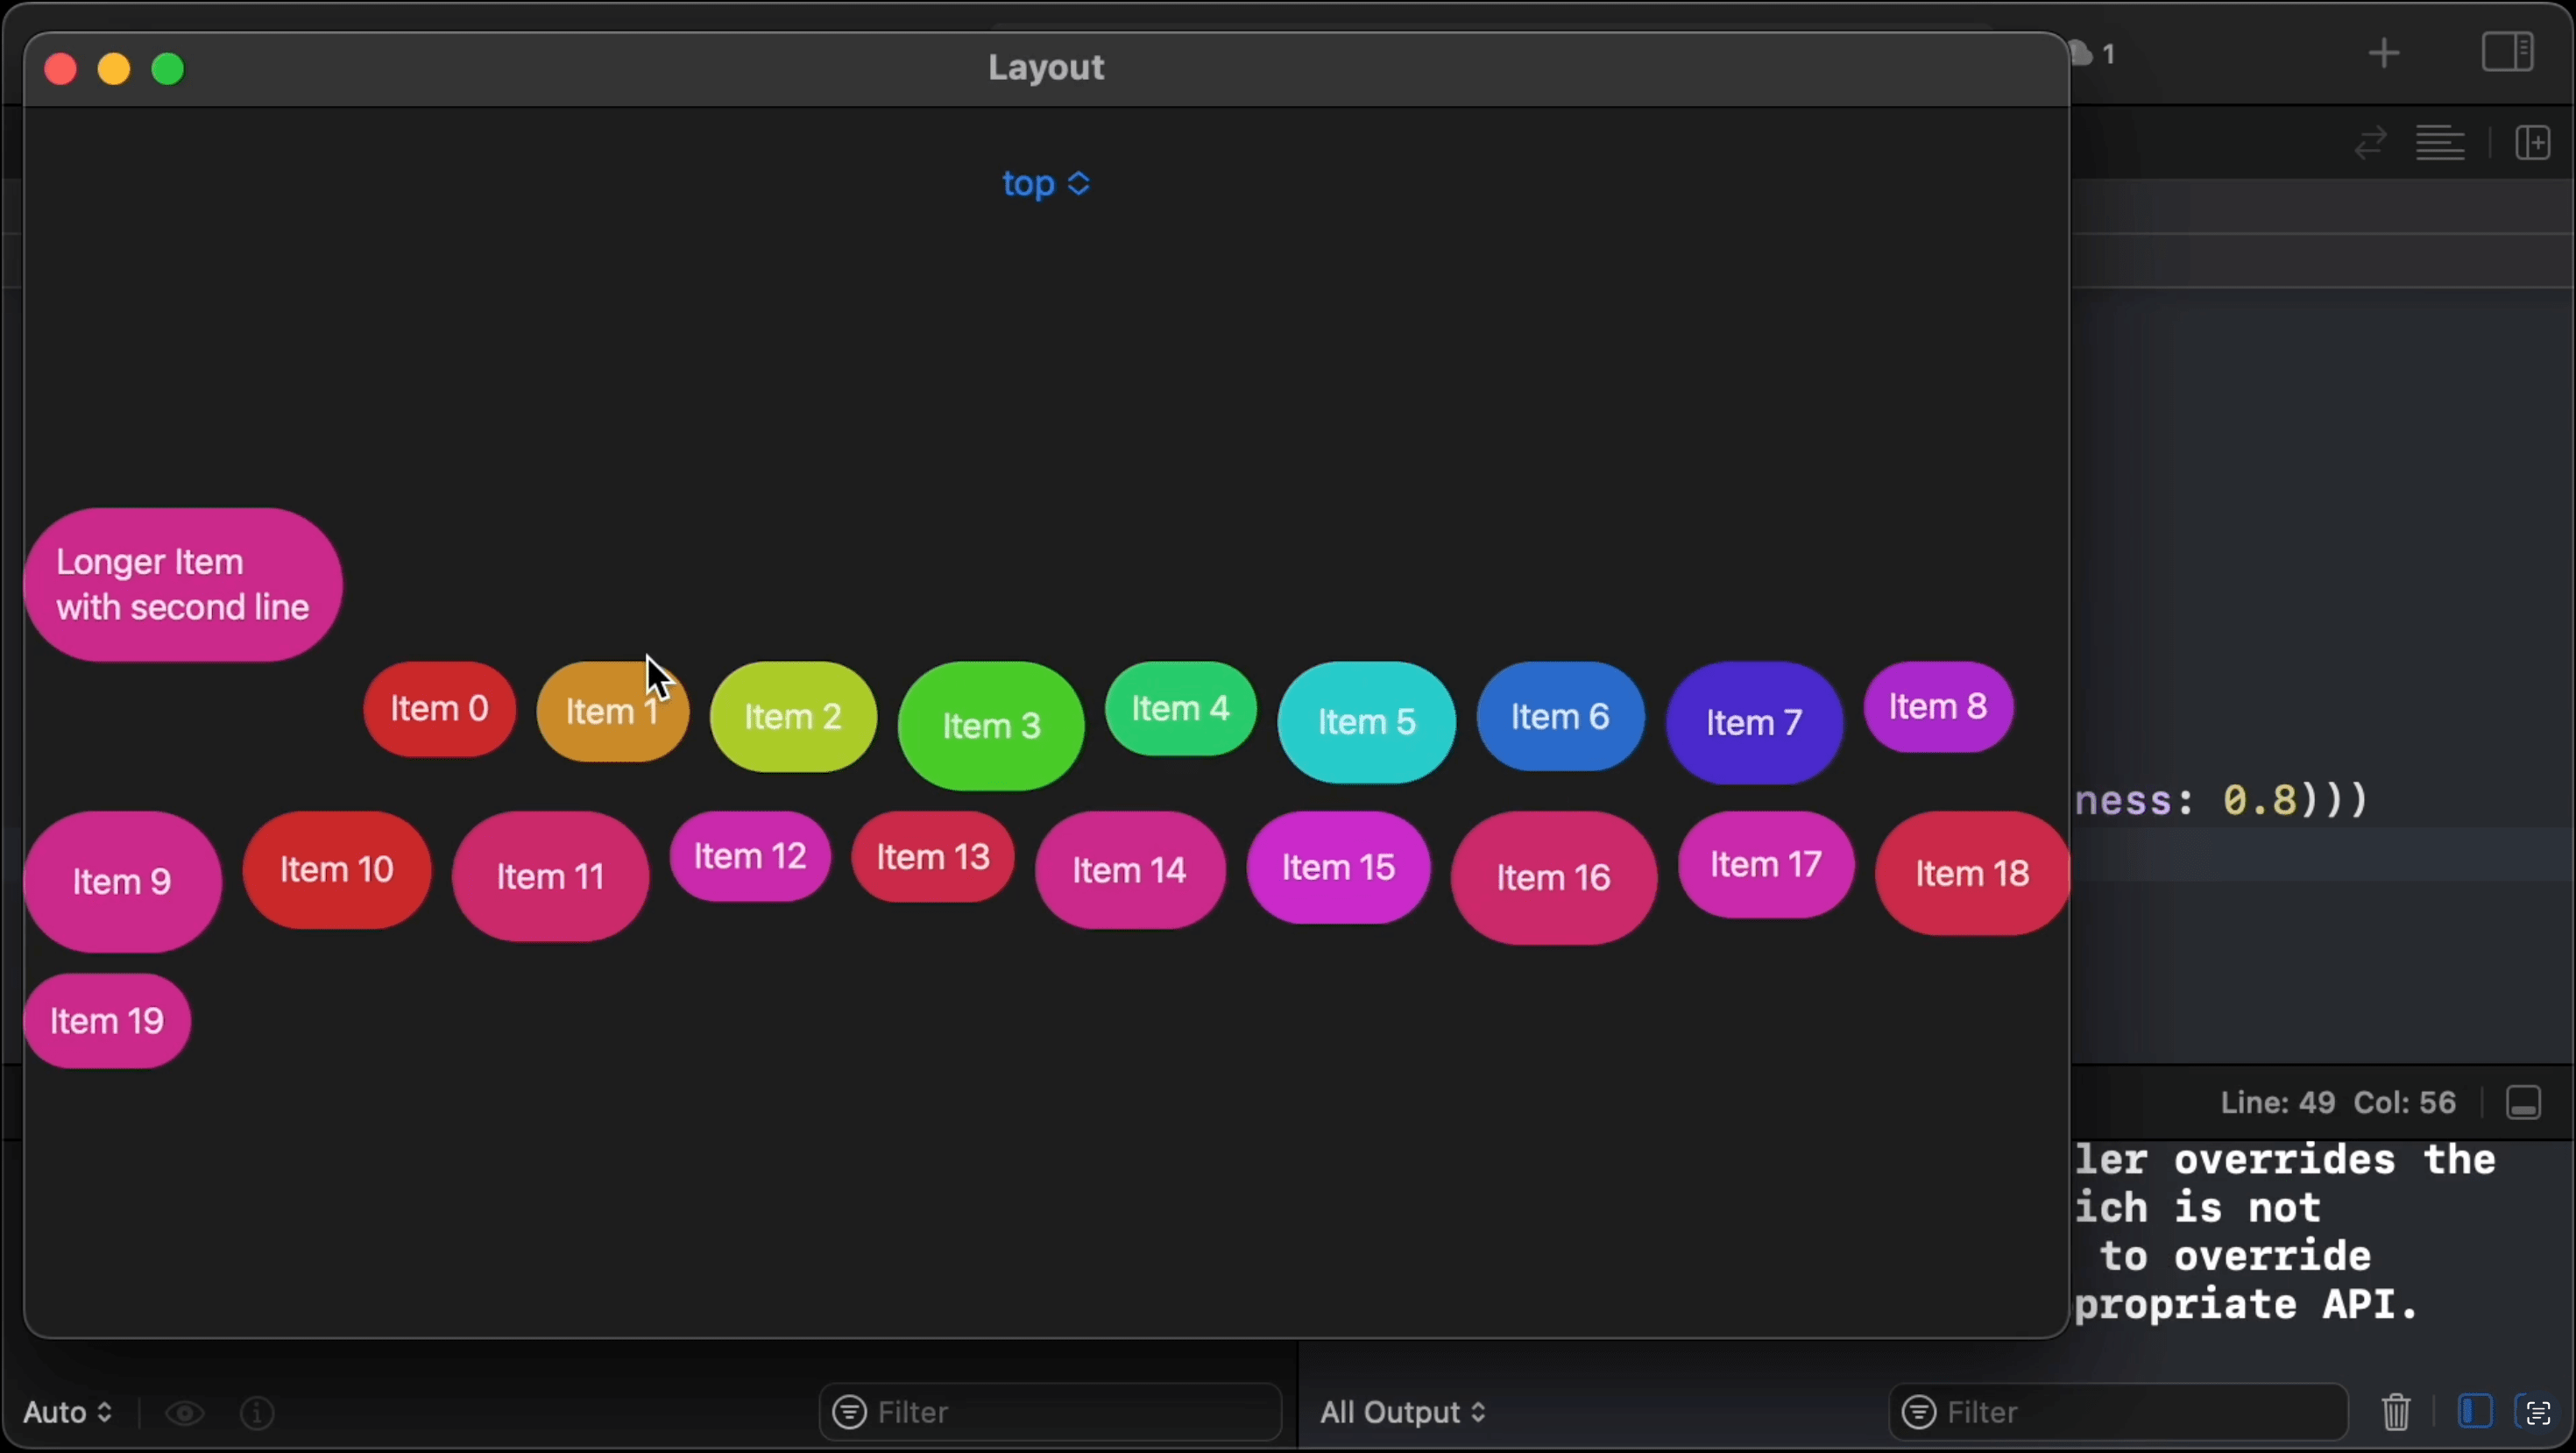
18:13 The default top alignment still works, and the items are still flowing from line to line:

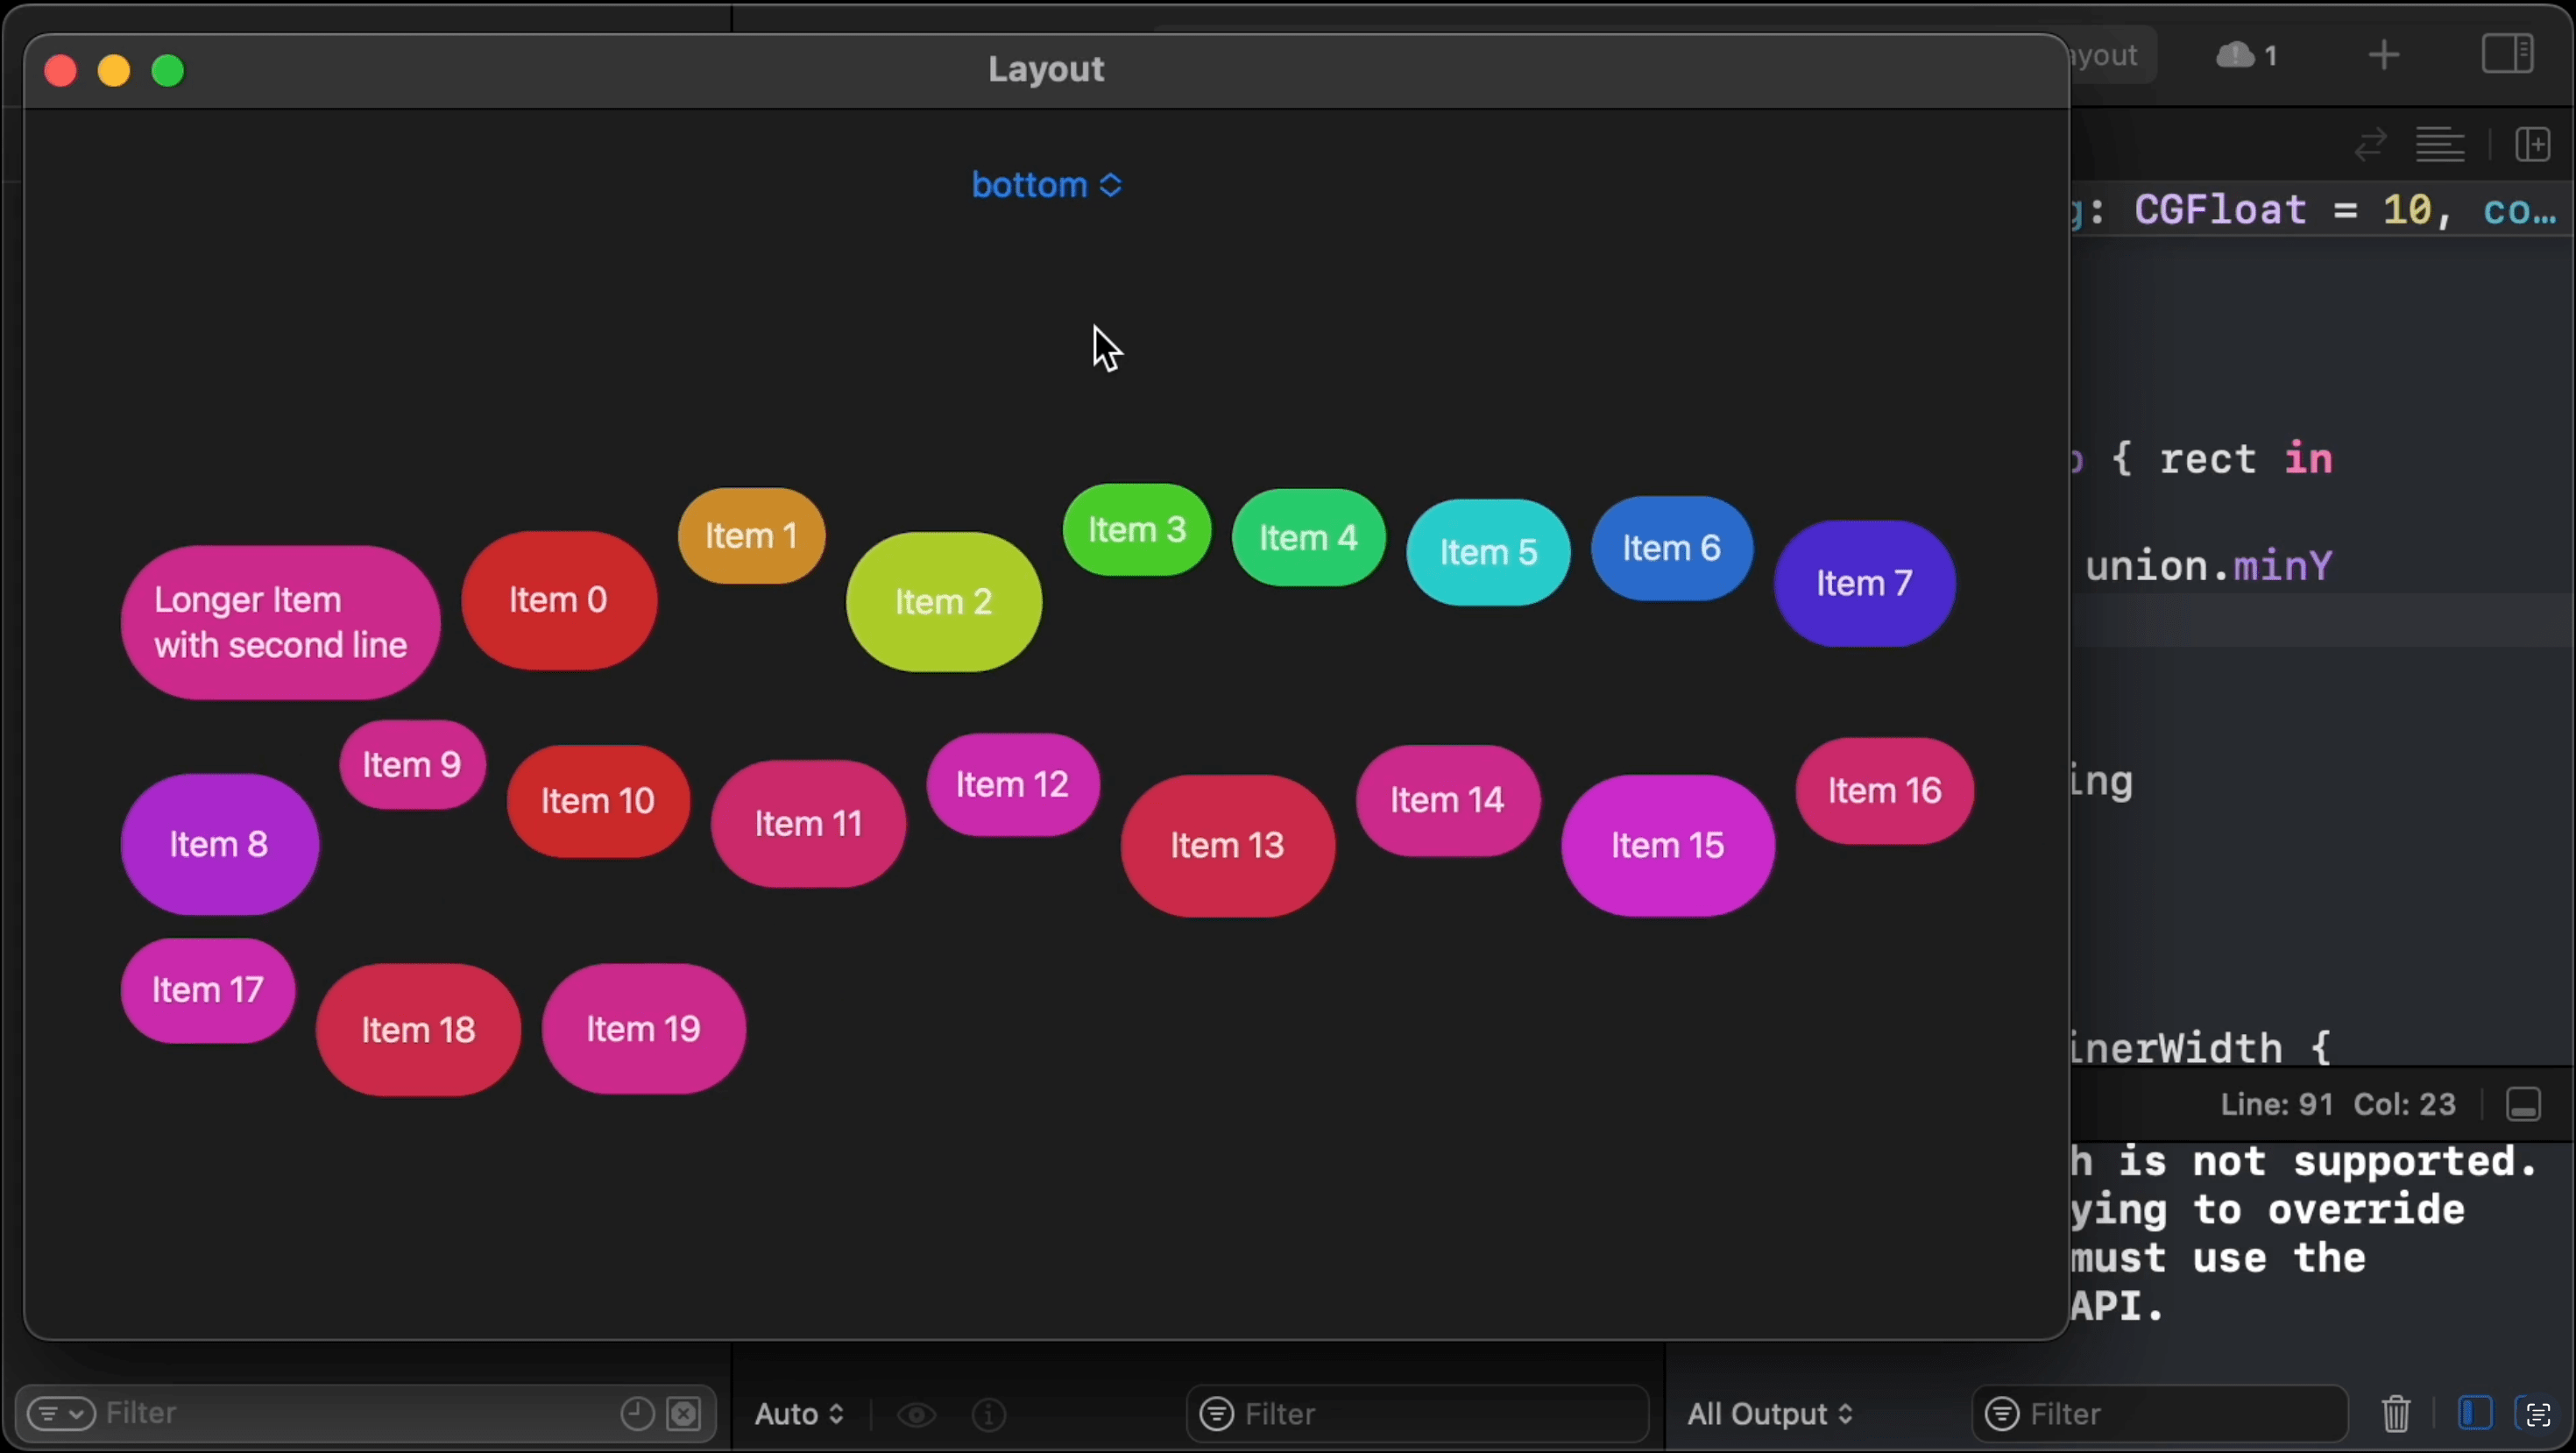
18:25 Unfortunately, changing the alignment to bottom doesn't quite work:

18:41 It looks like the subviews move in the wrong direction: smaller items move up instead of down when we switch from top to bottom alignment. So, where we append a subview's rect to the result, we should add a minus sign in front of the Y position. This makes sense if we think about it. If we want to, for example, bottom-align our items, then the alignment value for an item that's 100 points high would be 100, and we'd want to move this item up by that value so that it sits at the origin:

currentLine.append(CGRect(x: currentPosition.x, y: -dim[alignment], width: dim.width, height: dim.height))

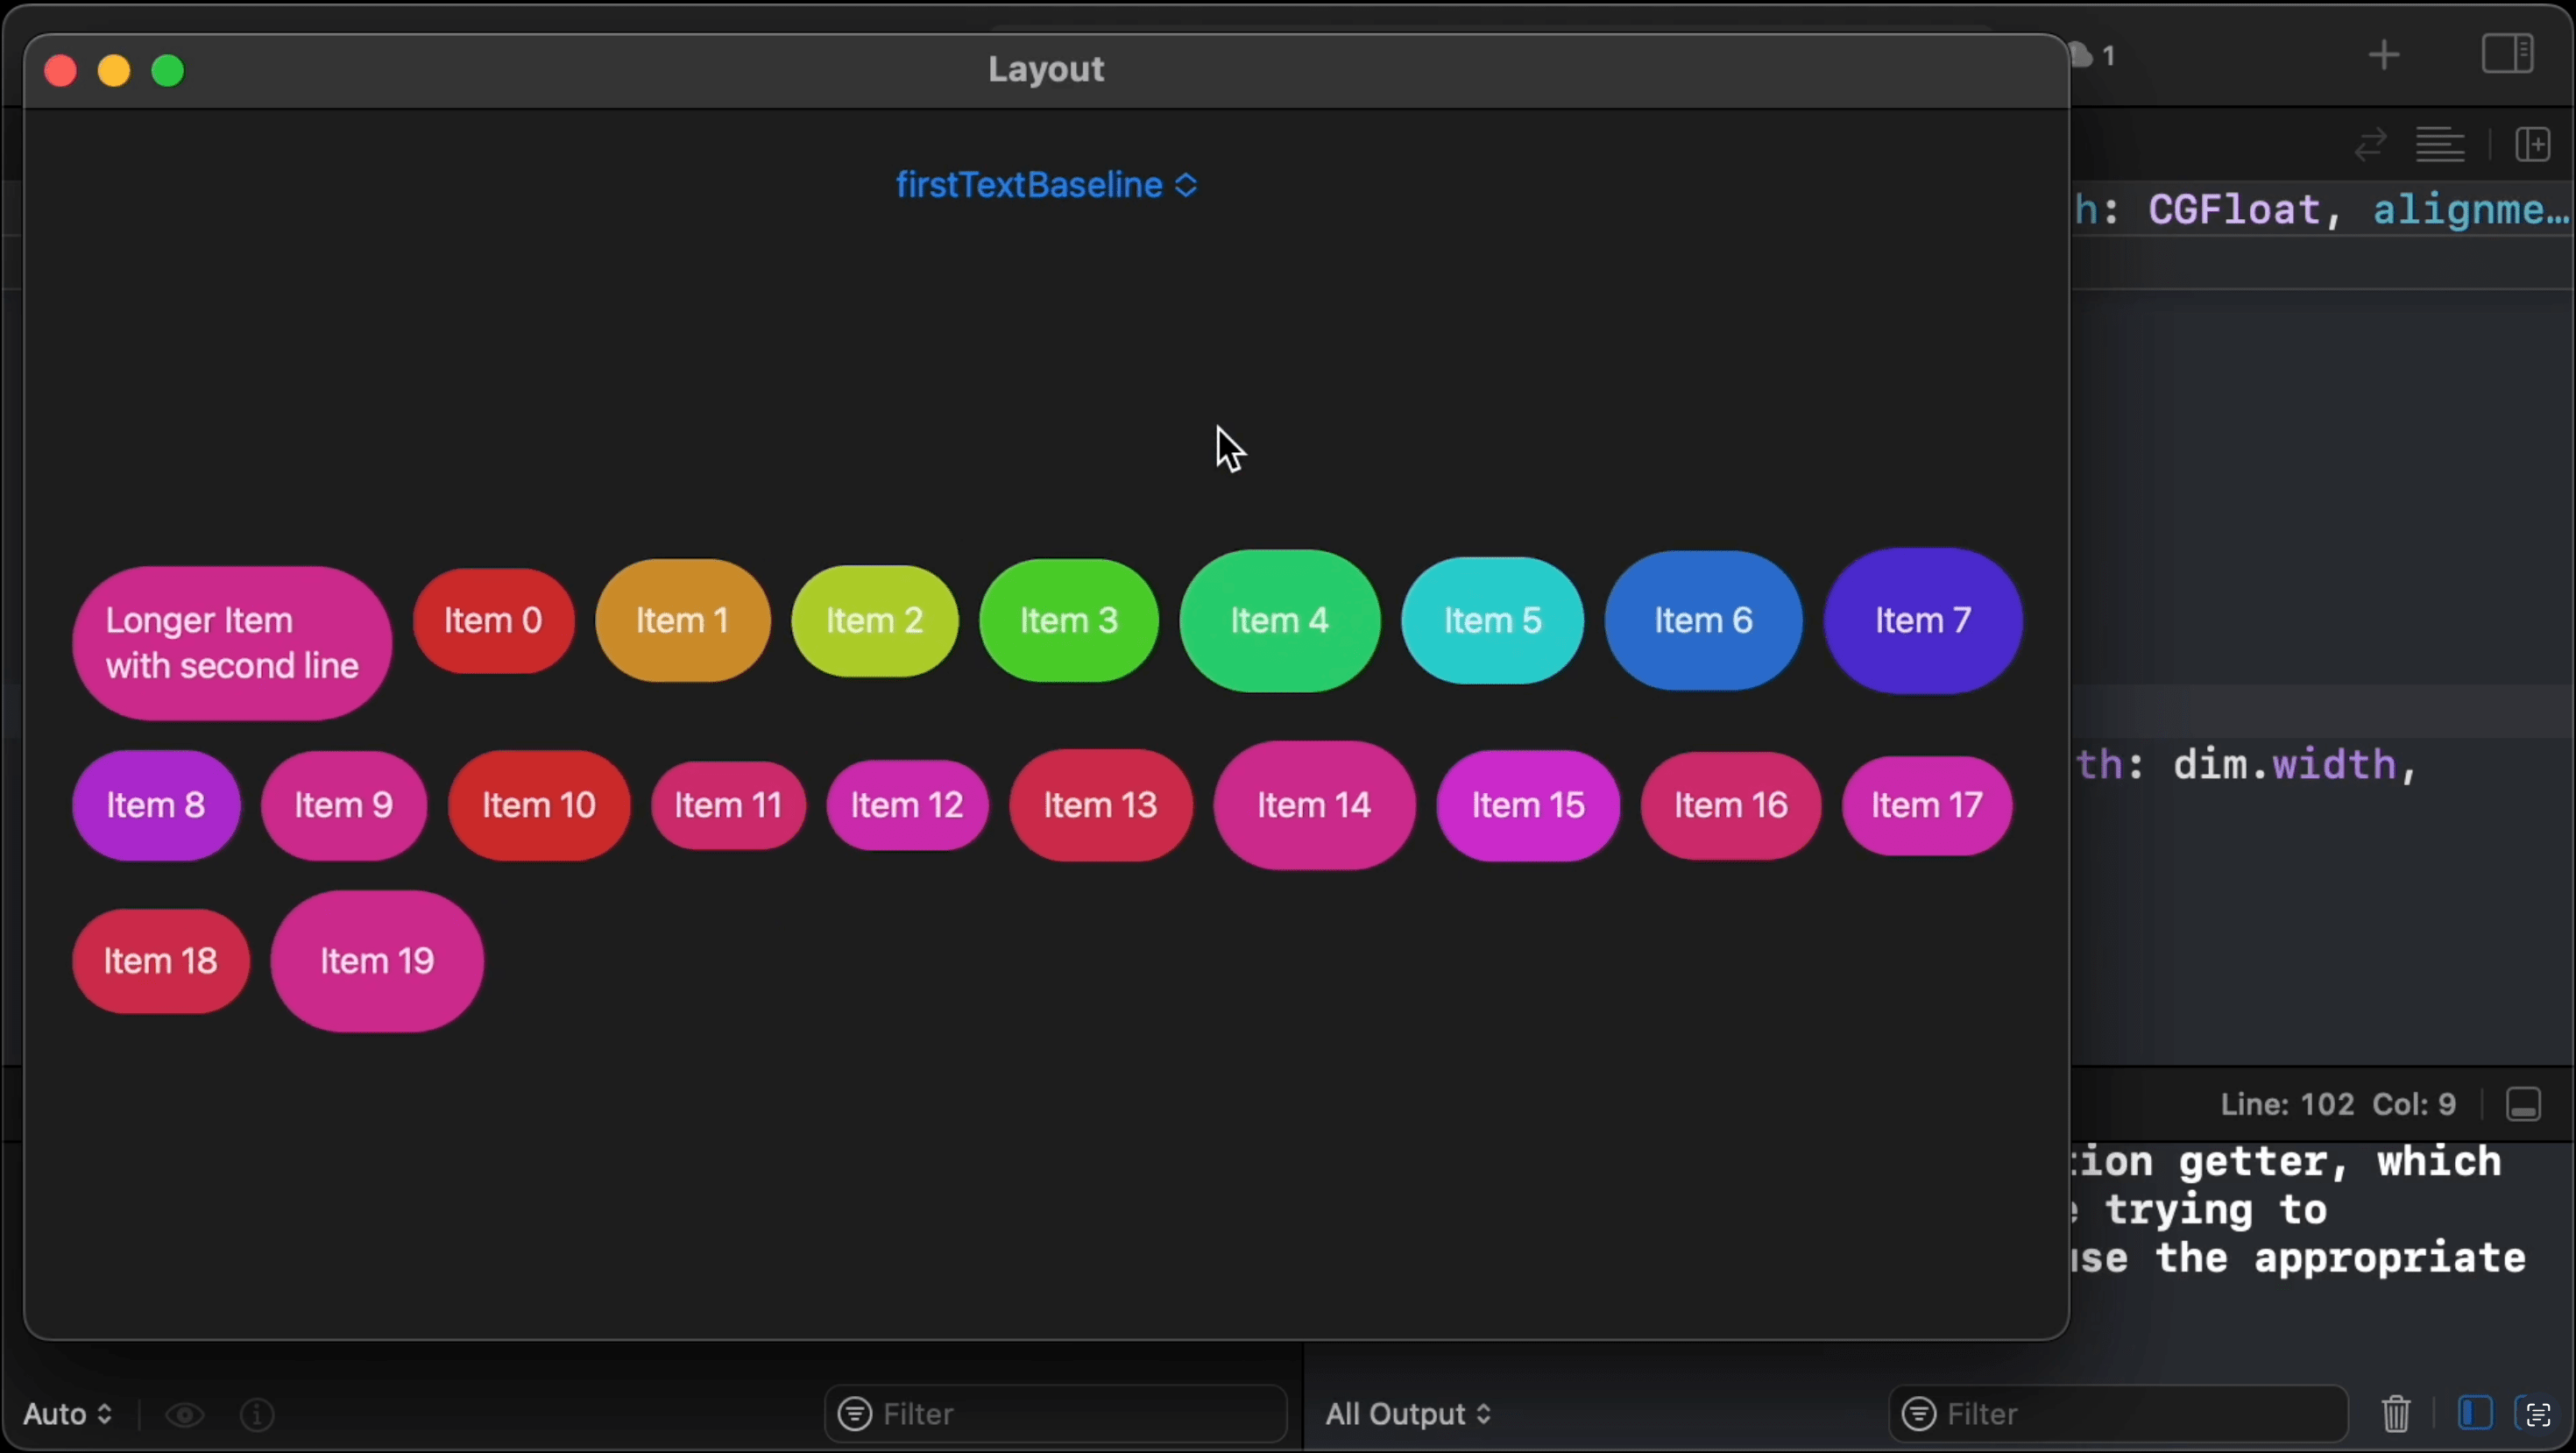
20:09 That's better. Aligning items to their first or last text baseline now also works:

Overriding Alignment Guides

20:30 Finally, let's try to see if we can override a view's alignment guide. For the first item, which we've inserted manually, we call alignmentGuide to define its top alignment value as 100 points:

Text("Longer Item\nwith second line")
    .padding()
    .background(Capsule()
        .fill(Color(hue: .init(99)/10, saturation: 0.8, brightness: 0.8)))
    .alignmentGuide(.top) { _ in 100 }

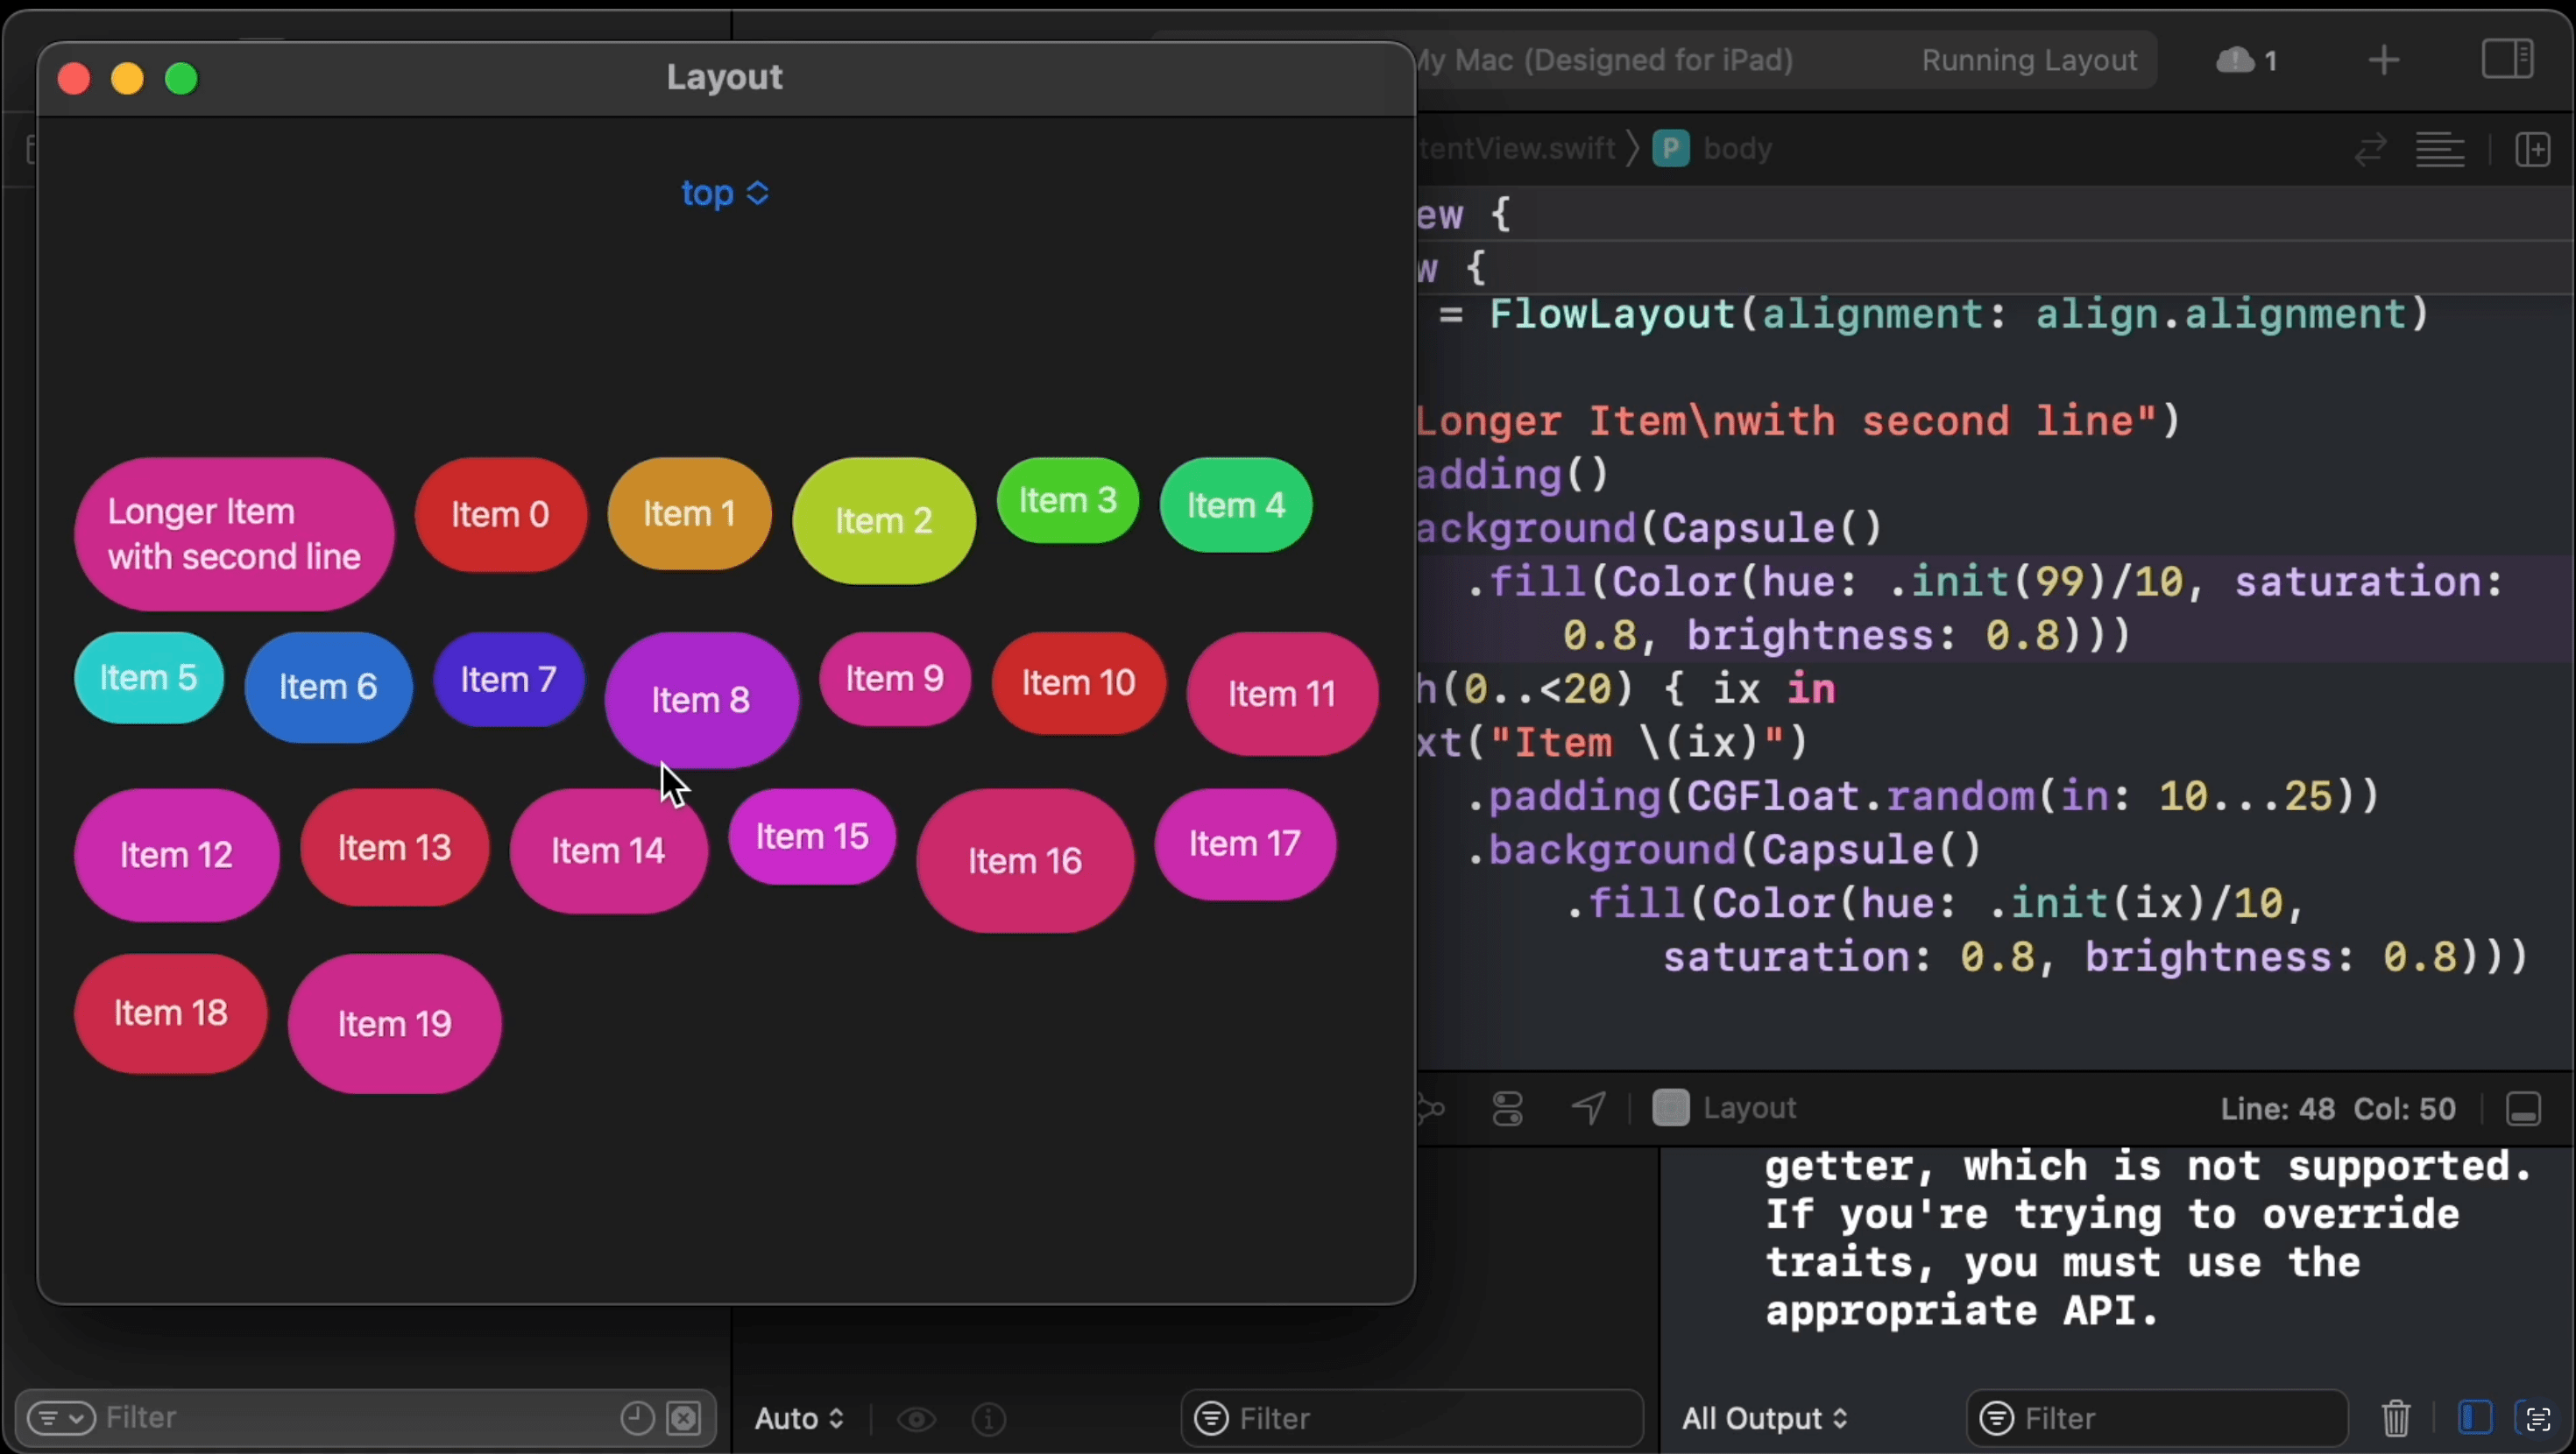
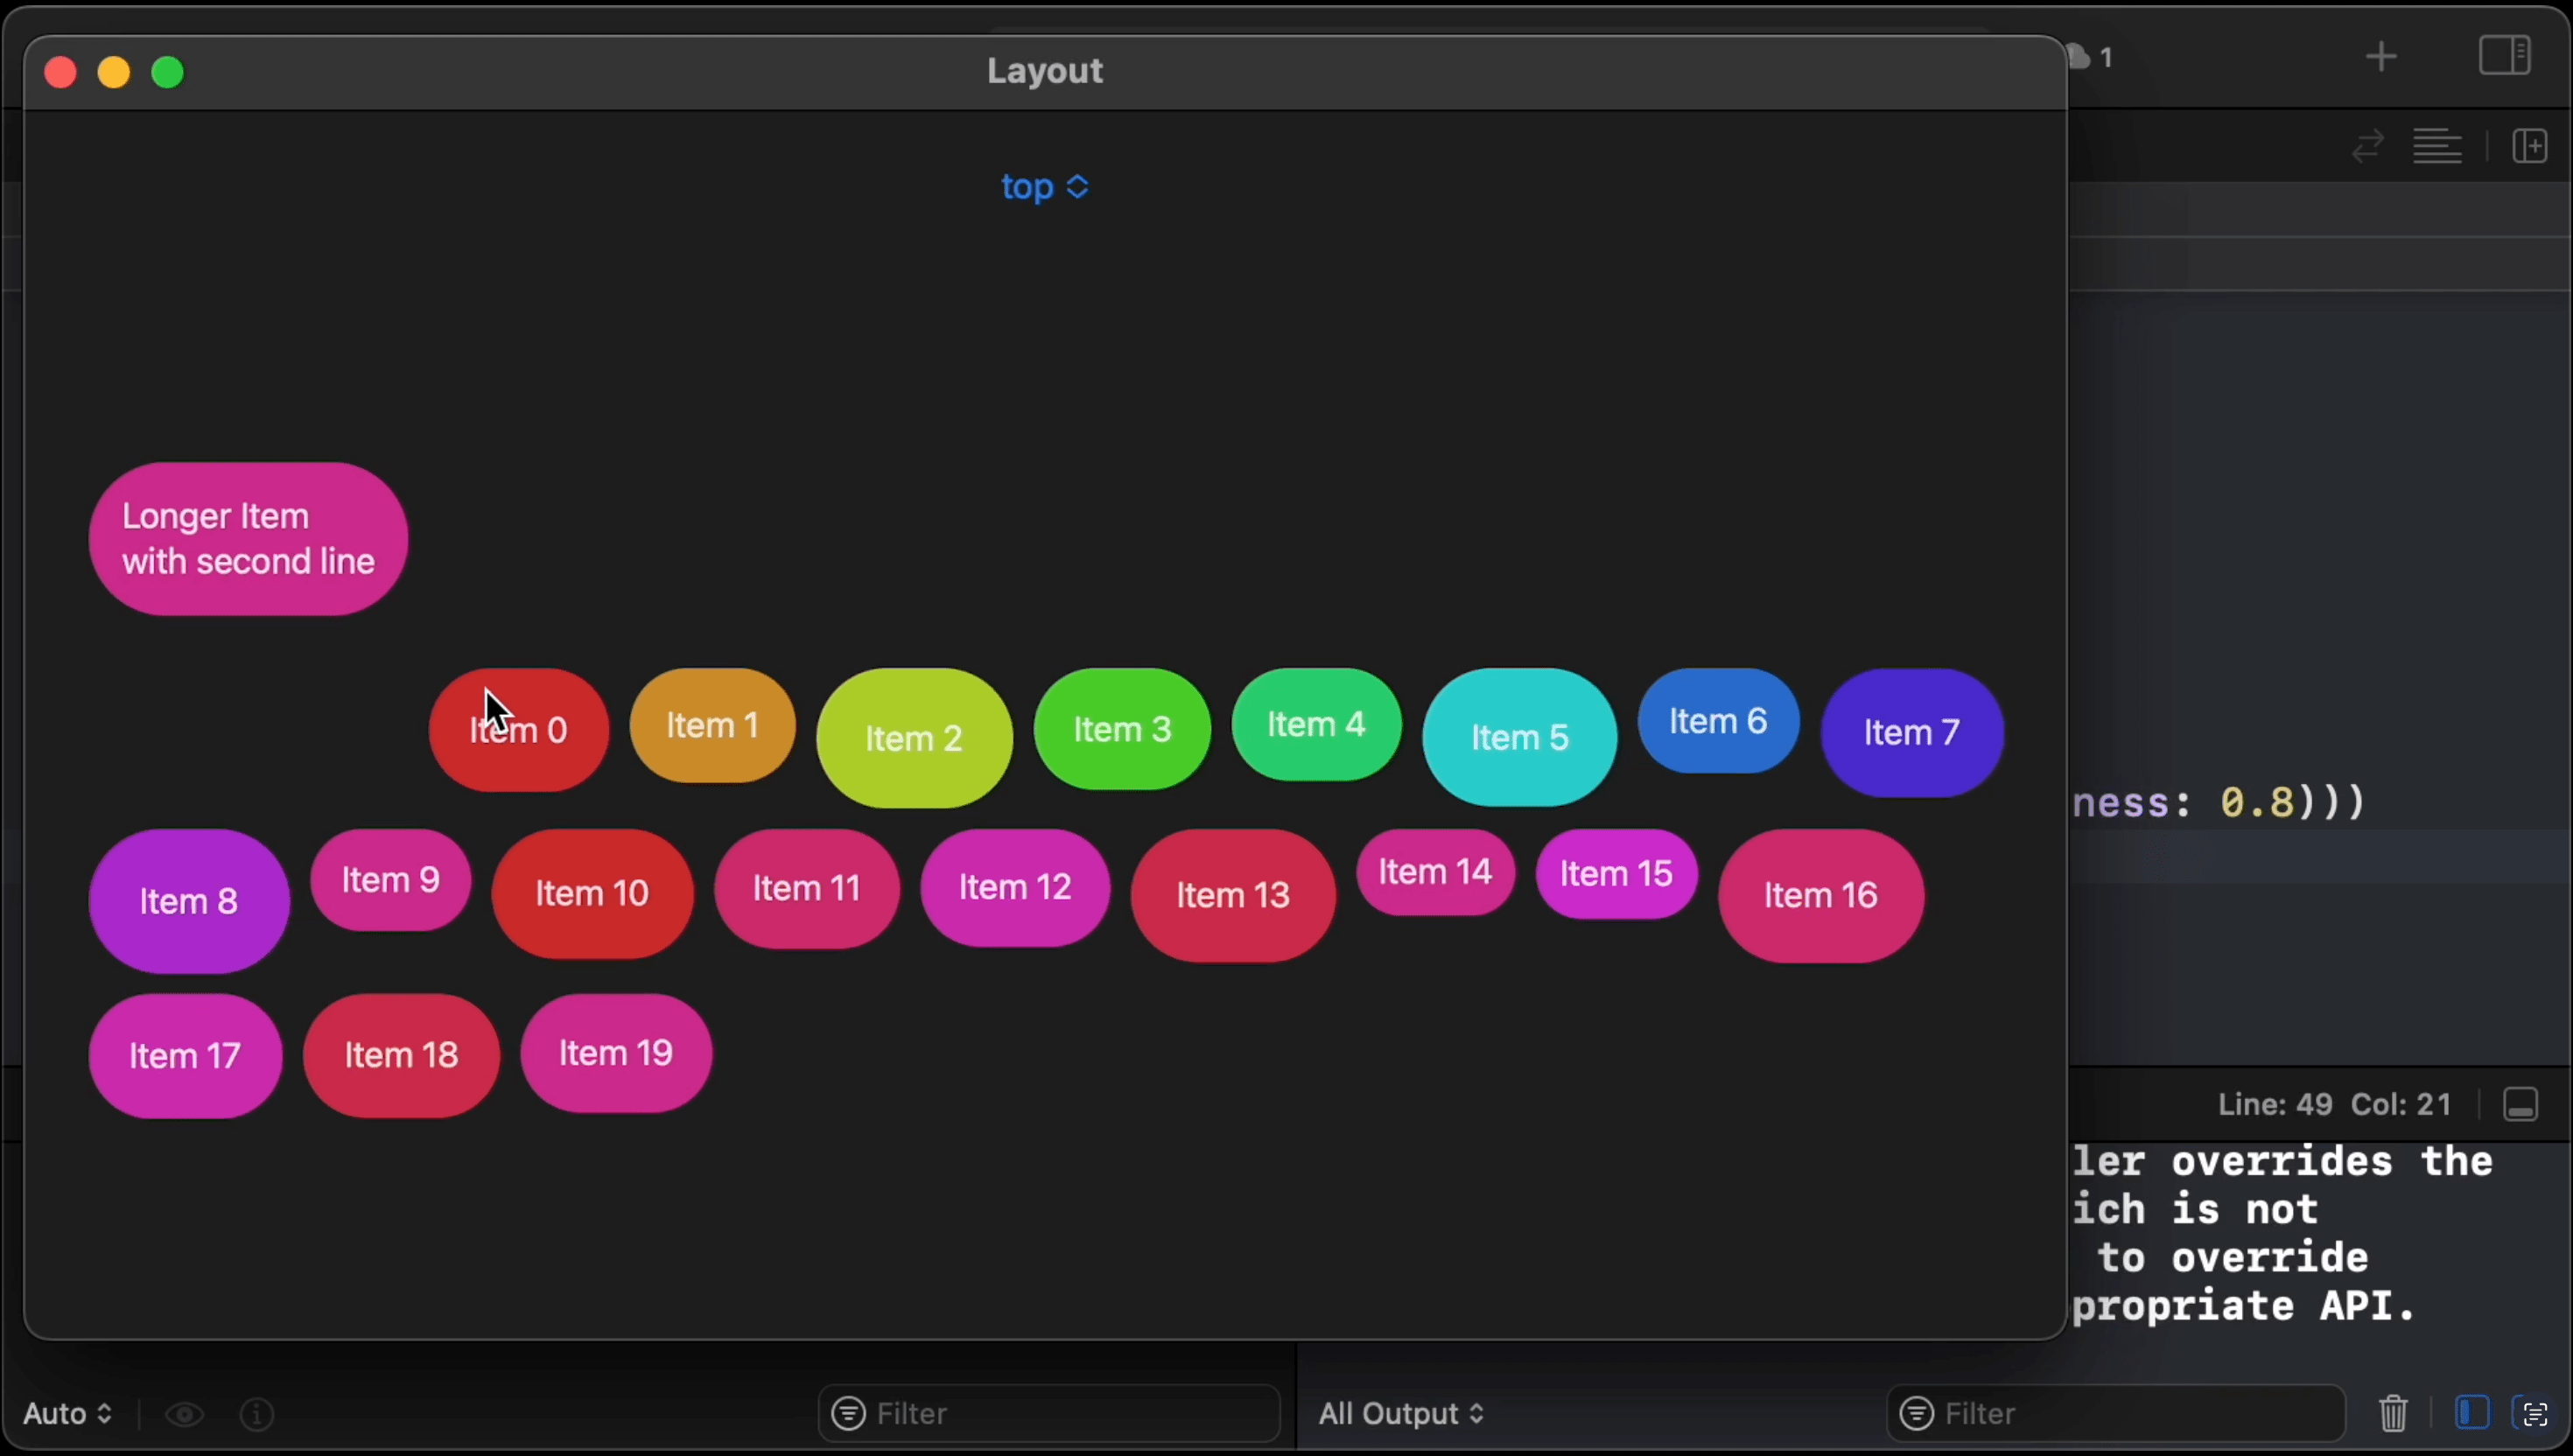
21:00 This should have the effect that the item moves up by 100 points, relative to the other top-aligned items. And that's indeed what happens:

21:20 If we return the item's height for the top alignment guide, the view's bottom edge is aligned to the top edges of the other items:

Text("Longer Item\nwith second line")
    .padding()
    .background(Capsule()
        .fill(Color(hue: .init(99)/10, saturation: 0.8, brightness: 0.8)))
    .alignmentGuide(.top) { $0.height }

21:42 Returning the bottom alignment guide has the same effect as returning the item's height:

Text("Longer Item\nwith second line")
    .padding()
    .background(Capsule()
        .fill(Color(hue: .init(99)/10, saturation: 0.8, brightness: 0.8)))
    .alignmentGuide(.top) { $0[.bottom] }

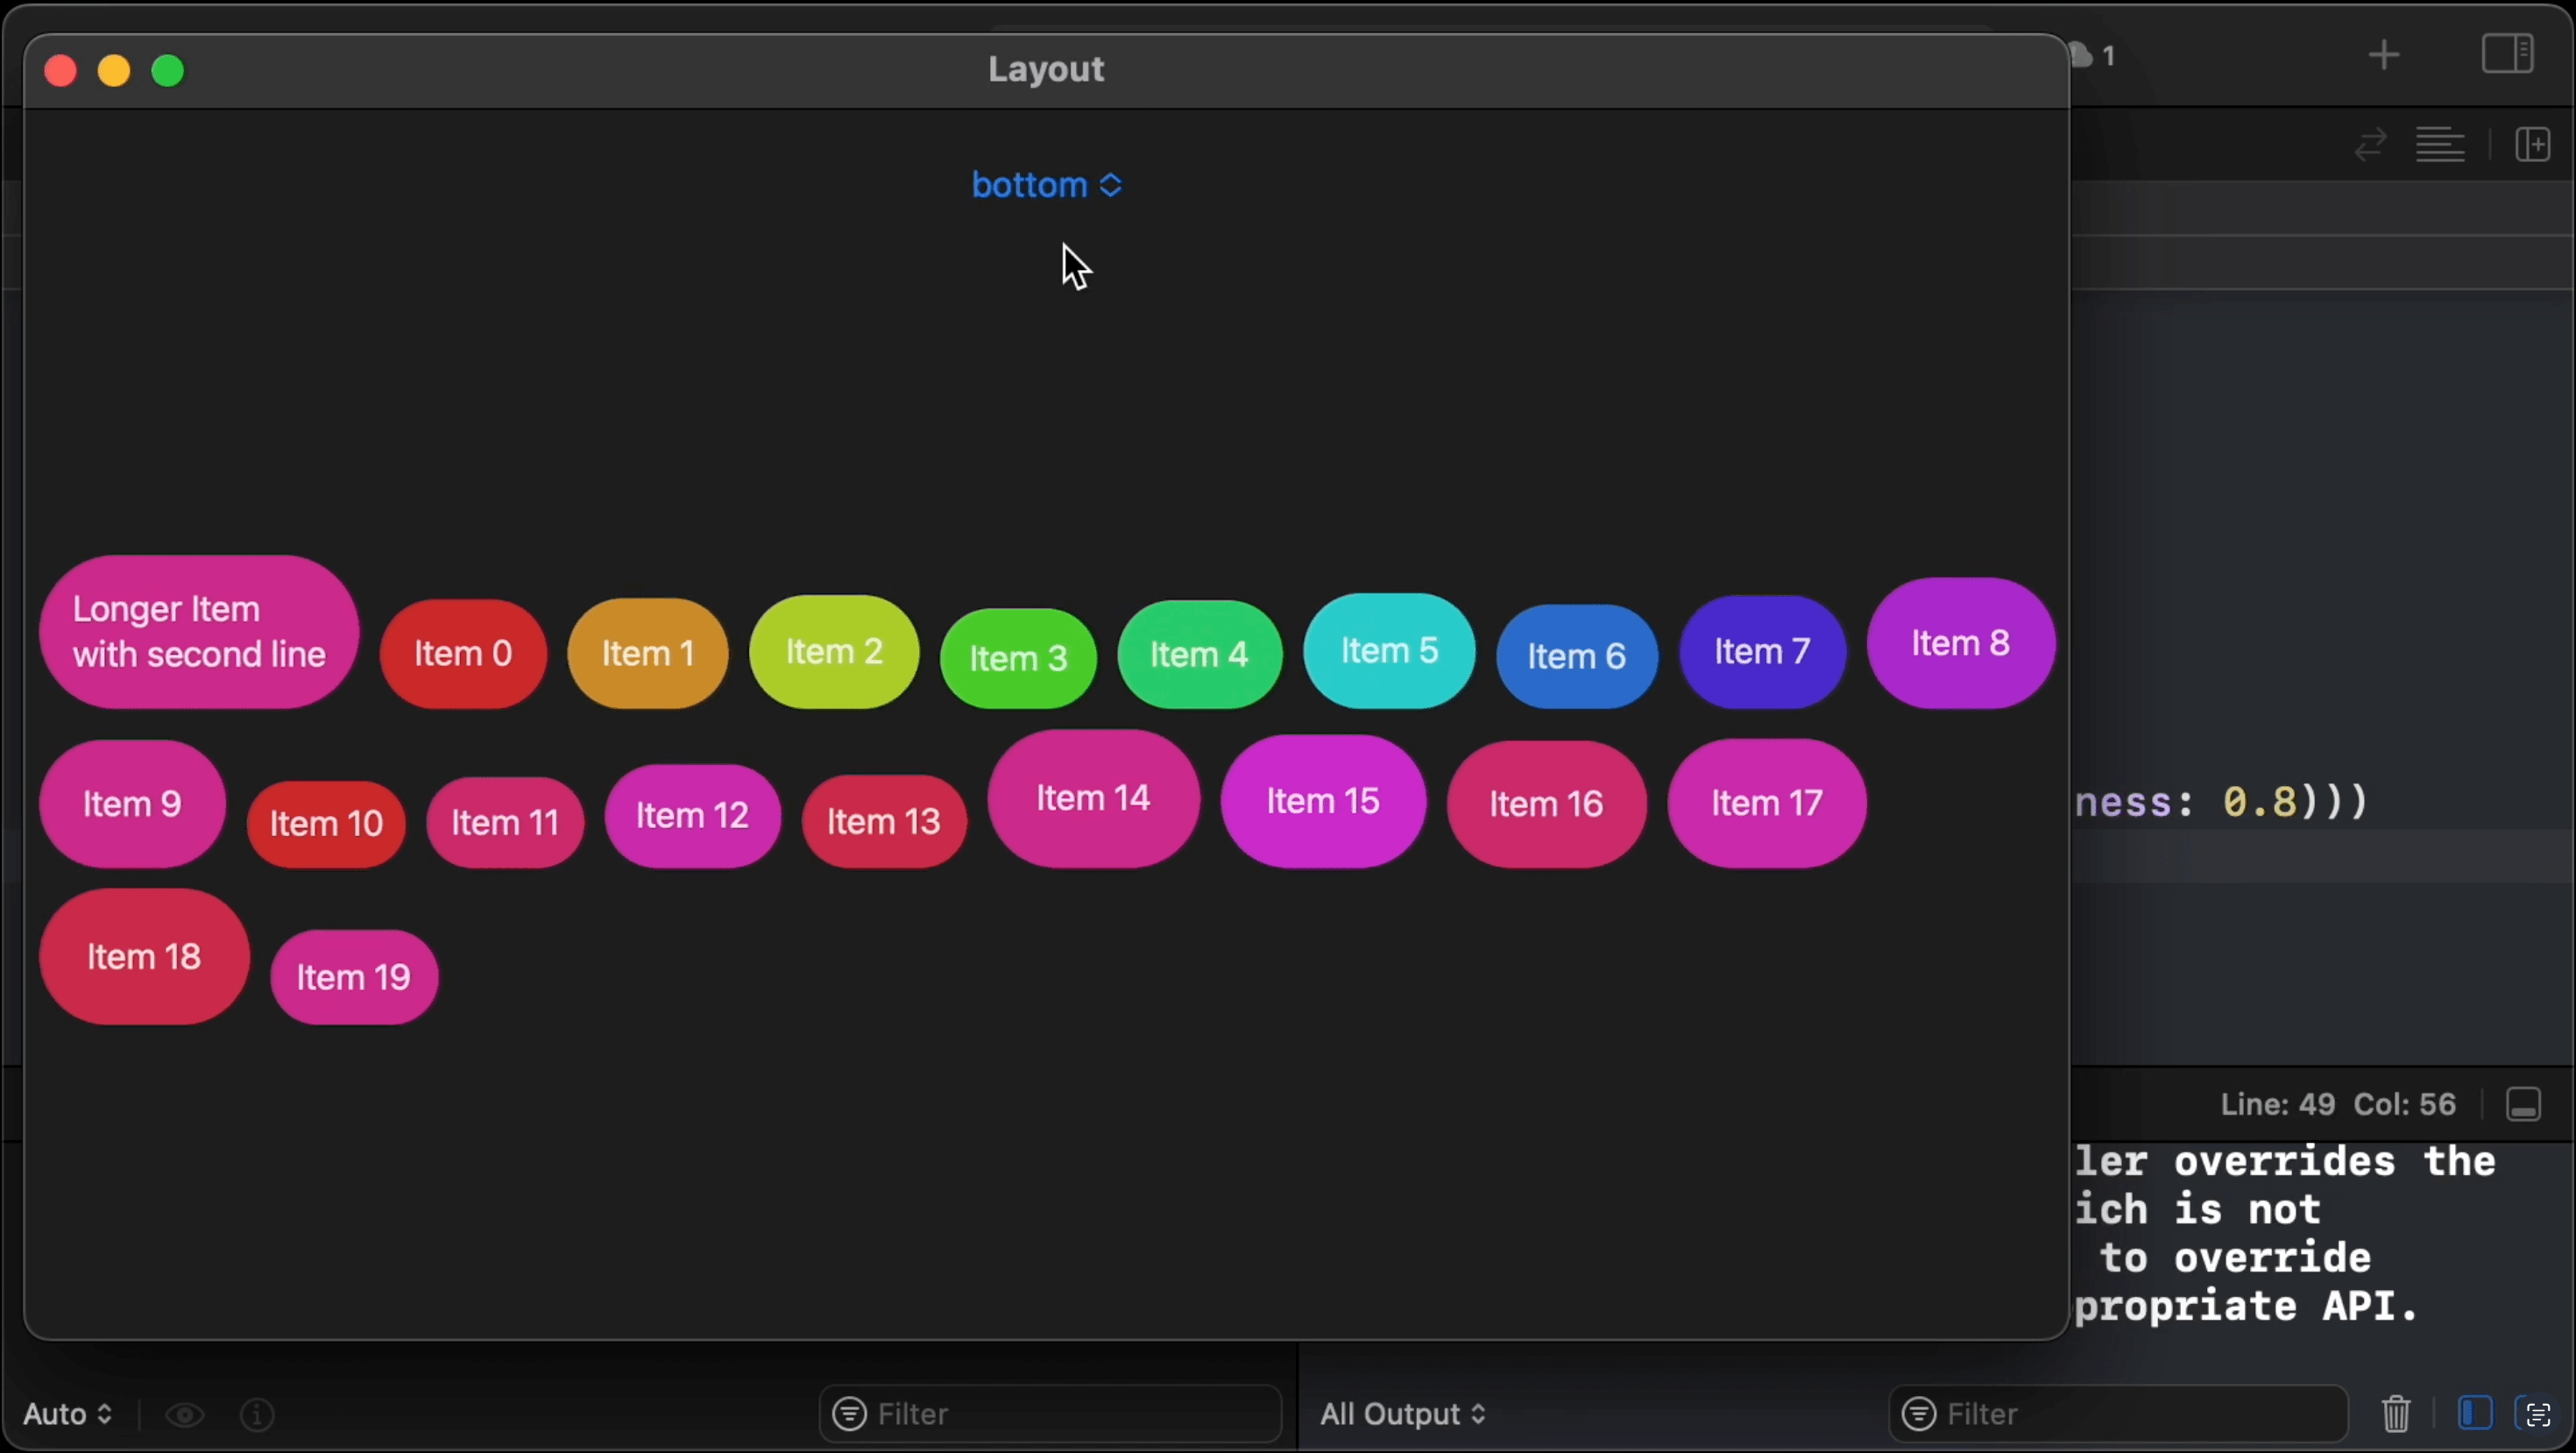
21:47 And just to be clear, this only affects the top alignment. If we switch the alignment to bottom, all views are still bottom-aligned:

More to Explore

22:01 We could also look at implementing horizontal alignment for the flow layout to align the lines to each other. But that isn't all that interesting, because the horizontal alignment is only defined by the container view itself. For the vertical alignment, we ask the subviews for their specific vertical alignment guides, and we align the subviews relative to each other. Meanwhile, horizontal alignment just refers to the alignment of the lines relative to each other.

22:50 We also tried implementing this using a VStack of HStacks. In that approach, the HStack would take care of the alignment of the items of a line. But that resulted in a lot more code. And we don't really want the behavior of an HStack in a flow layout, since we have all fixed-sized views that should break to the next line. We don't need any dynamic sizing or space distribution.

23:31 On the other hand, space distribution can be interesting to think about. Flow layout is closely related to how text is laid out: words flowing from line to line. Perhaps there are some ideas we could steal from text layout, like justification or tab stops. Although it's maybe pointless to translate these concepts to our layout algorithm, they could be interesting to play with.

Resources

  • Sample Code

    Written in Swift 5.7

  • Episode Video

    Become a subscriber to download episode videos.

In Collection

158 Episodes · 55h00min

See All Collections

Episode Details

Recent Episodes

See All

Unlock Full Access

Subscribe to Swift Talk

  • Watch All Episodes

    A new episode every week

  • icon-benefit-download Created with Sketch.

    Download Episodes

    Take Swift Talk with you when you're offline

  • Support Us

    With your help we can keep producing new episodes