00:06 Today we're going to draw binary trees. We want to feature tree
diagrams in our slides
framework,
but what we build today can also be used independently.
00:26 For the illustrations in our Thinking in
SwiftUI book, we built tree
layouts using VStacks and HStacks. However, this produced trees with
suboptimal space use, because subtrees would never overlap in any way, leaving
more spaces empty than necessary. It worked fine for what we needed in the book,
but more complex trees can be laid out in a more optimal way.
01:19 There's a great article that discusses drawing neat trees in
Python: Drawing Presentable Trees by Bill
Mill. We'll use some of the principles and algorithms described in there.
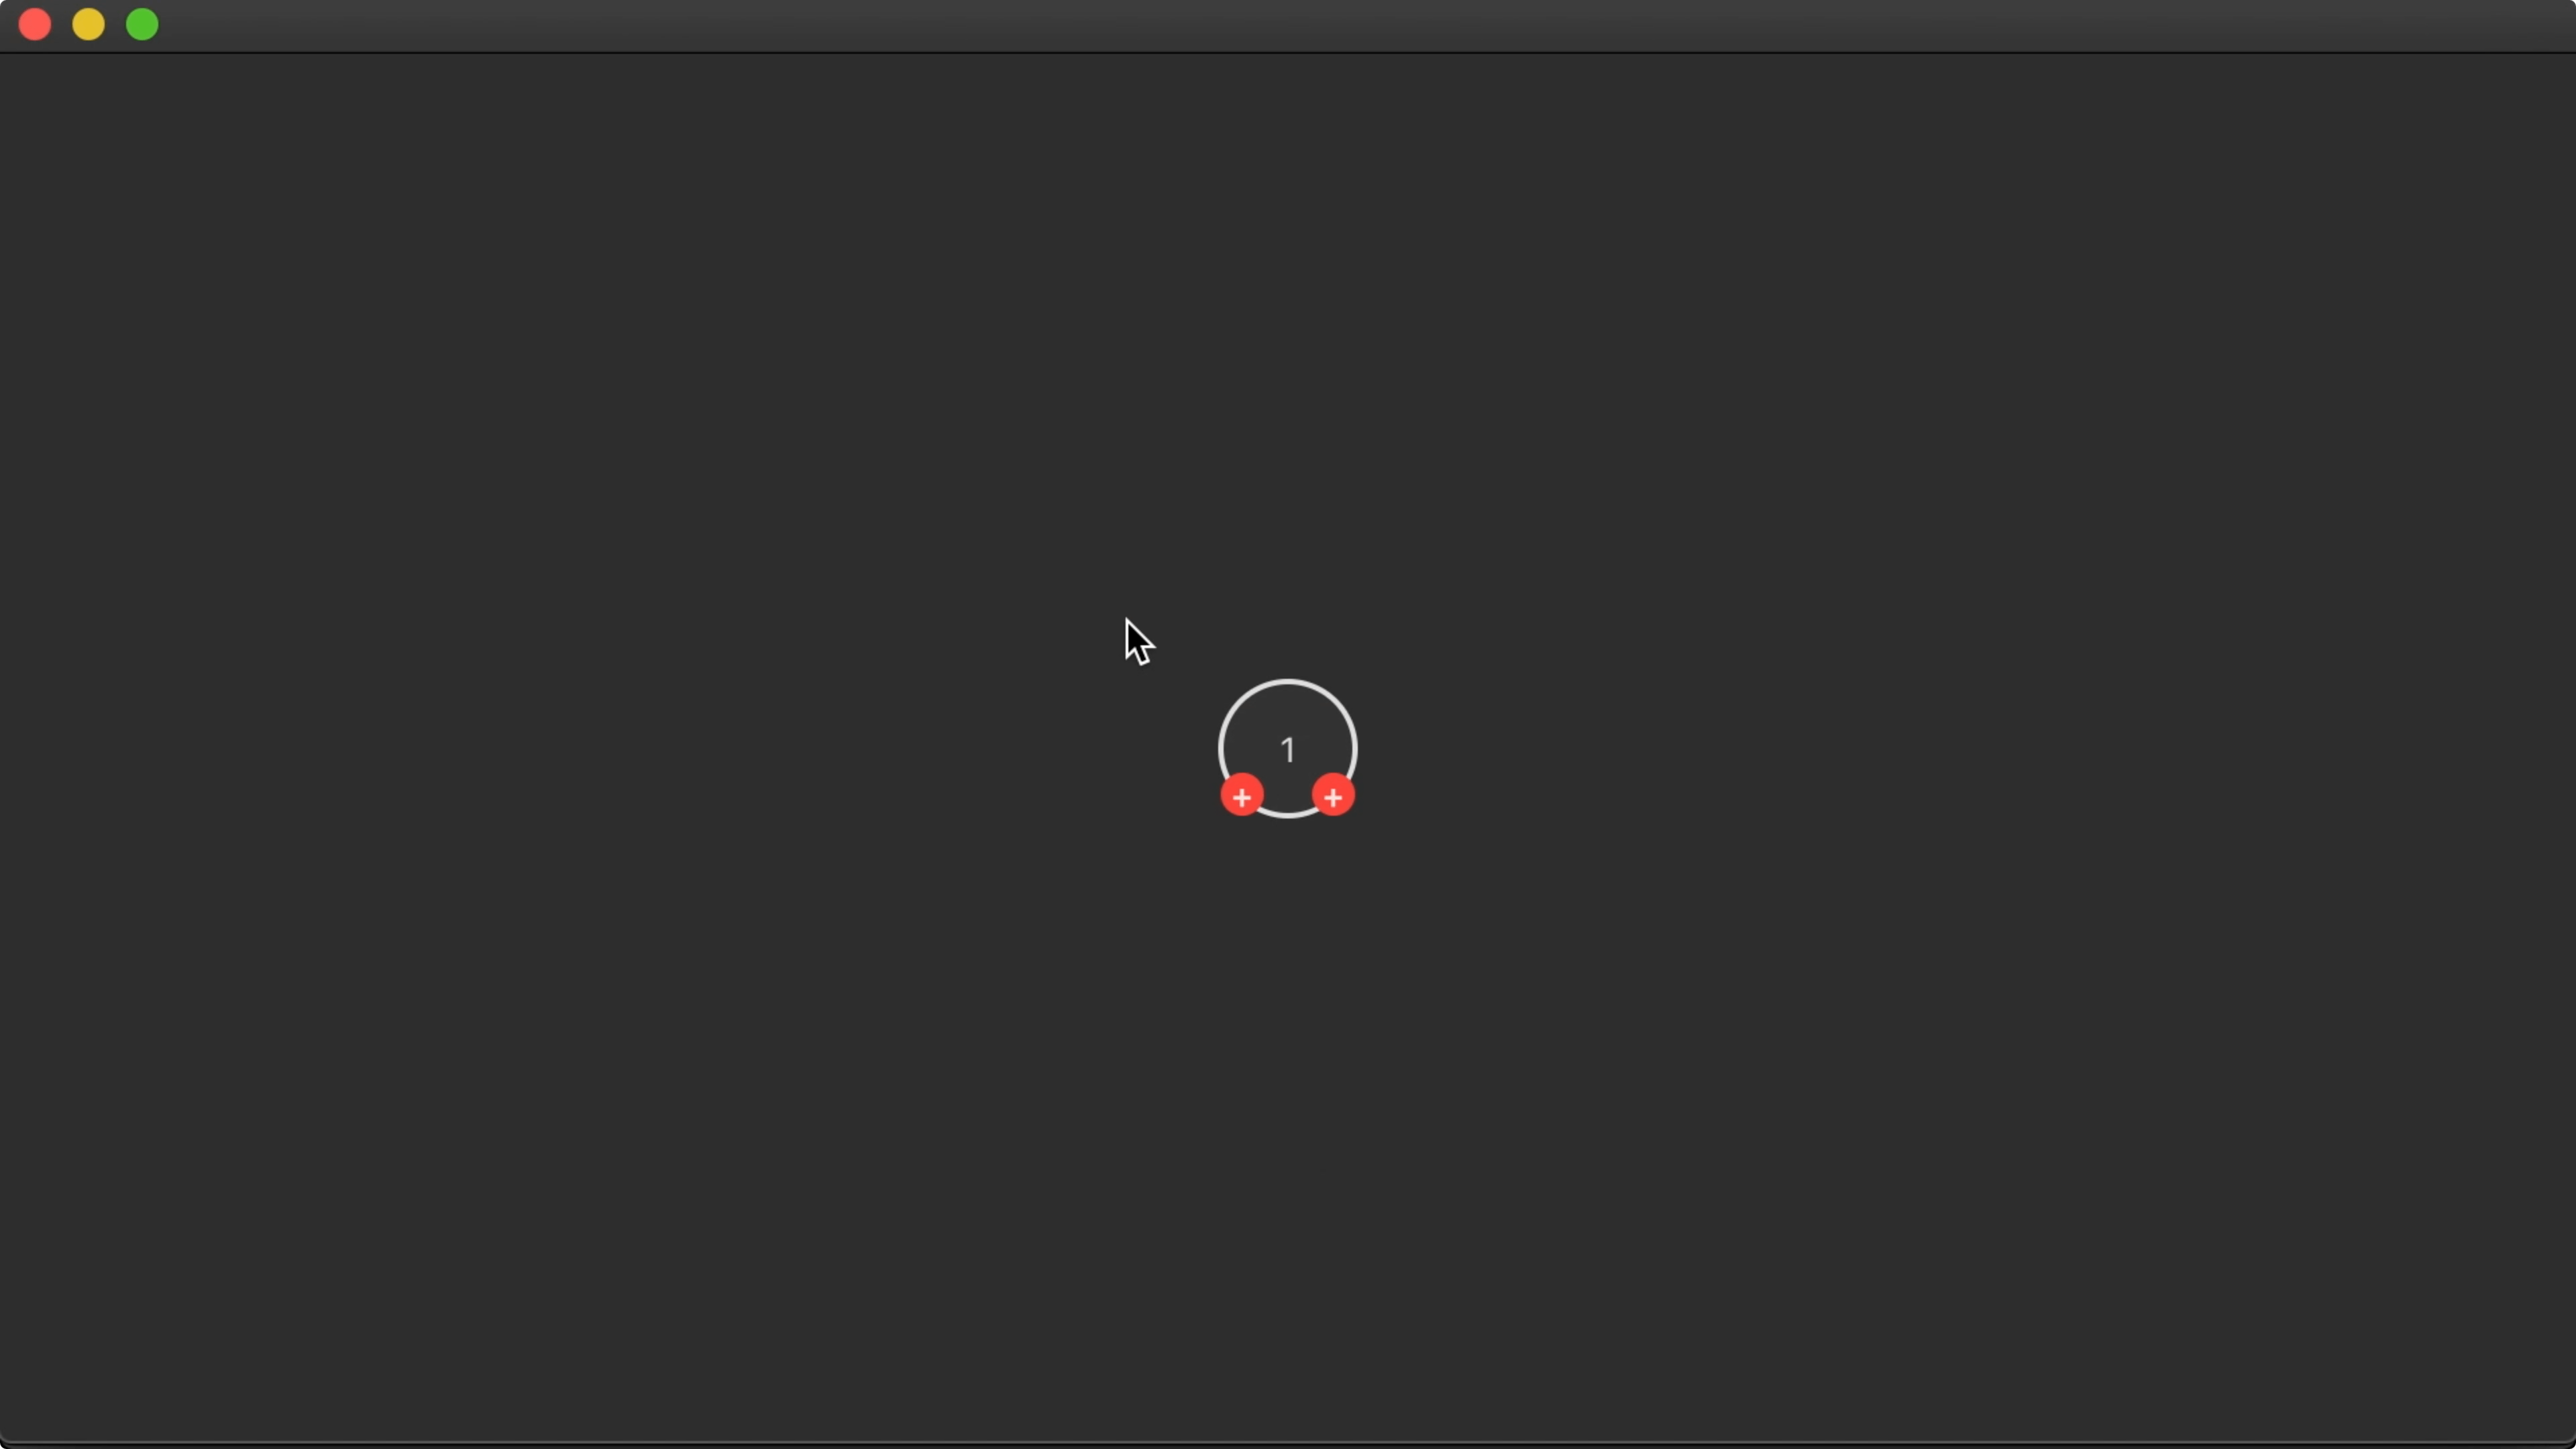
01:35 We've prepared most of the stuff we need, so we don't have to waste
any time on the actual drawing of the nodes and the connecting lines. Each node
is presented as a circle with buttons for adding left and right subtrees. Only
the layout logic is still missing, so when we add a child node, it currently
gets drawn over the parent node:
Tree Class
02:09 The data structure with which we build up the tree is a class,
Tree. It holds a value and optional left and right subtrees. It also has
a point property that contains two integer coordinates, x and y:
struct Point: Hashable {
var x: Int
var y: Int
static let zero = Point(x: 0, y: 0)
}
final class Tree<A>: ObservableObject, Identifiable, CustomStringConvertible {
@Published var value: A
@Published var point: Point = .zero
@Published var left: Tree<A>? {
didSet { left?.parent = self }
}
@Published var right: Tree<A>? {
didSet { right?.parent = self }
}
weak var parent: Tree<A>? = nil
}
02:40 The point value defines a node's position in the tree. We lay
out all nodes according to these values, and then we draw edges between each
node and its parent.
03:00 Most of the time in SwiftUI, we model data using structs and
enums, but a reference type makes demoing today's algorithms much easier, so
that's why we chose to implement Tree as a class.
03:38 The first algorithm we'll implement is a straightforward one by
Donald Knuth. Starting with the root node, it lays out the left subtree, then
the node itself, and then the right subtree. Each node's x coordinate comes
from a running counter, and its y coordinate is equal to its depth in the
tree.
Layout
04:36 But before we implement the algorithm, we have to implement the
relayout method stub. This method gets called on the node whose subtrees have
changed. If this happens, we have to lay out the entire tree again. So we
traverse up to the root node and we call layout on it:
final class Tree<A>: ObservableObject, Identifiable, CustomStringConvertible {
func relayout() {
var root = self
while let p = root.parent {
root = p
}
root.layout()
}
}
Knuth
05:31 In an extension on Tree, we can implement the algorithm itself
in the layout method. We need a running x coordinate, which we model as an
in-out parameter. And we add another parameter for passing in the depth of the
node we're laying out:
extension Tree {
    func layout() {
        var x = 0
        knuth(depth: 0, x: &x)
    }

    func knuth(depth: Int, x: inout Int) {

    }
}
06:35 We first lay out the left subtree recursively. Then we assign the
current node's coordinates, incrementing the running x by 1. Finally, we lay
out the right subtree:
extension Tree {
    func layout() {
        var x: [Int:Int] = [:]
        alt(depth: 0, x: &x)
    }

    func knuth(depth: Int, x: inout Int) {
        left?.knuth(depth: depth + 1, x: &x)
        point.x = x
        point.y = depth
        x += 1
        right?.knuth(depth: depth + 1, x: &x)
    }
07:44 This works well for simple trees. But because there will never be
nodes that share an x coordinate, the algorithm can result in suboptimal
layouts, depending on the tree structure:
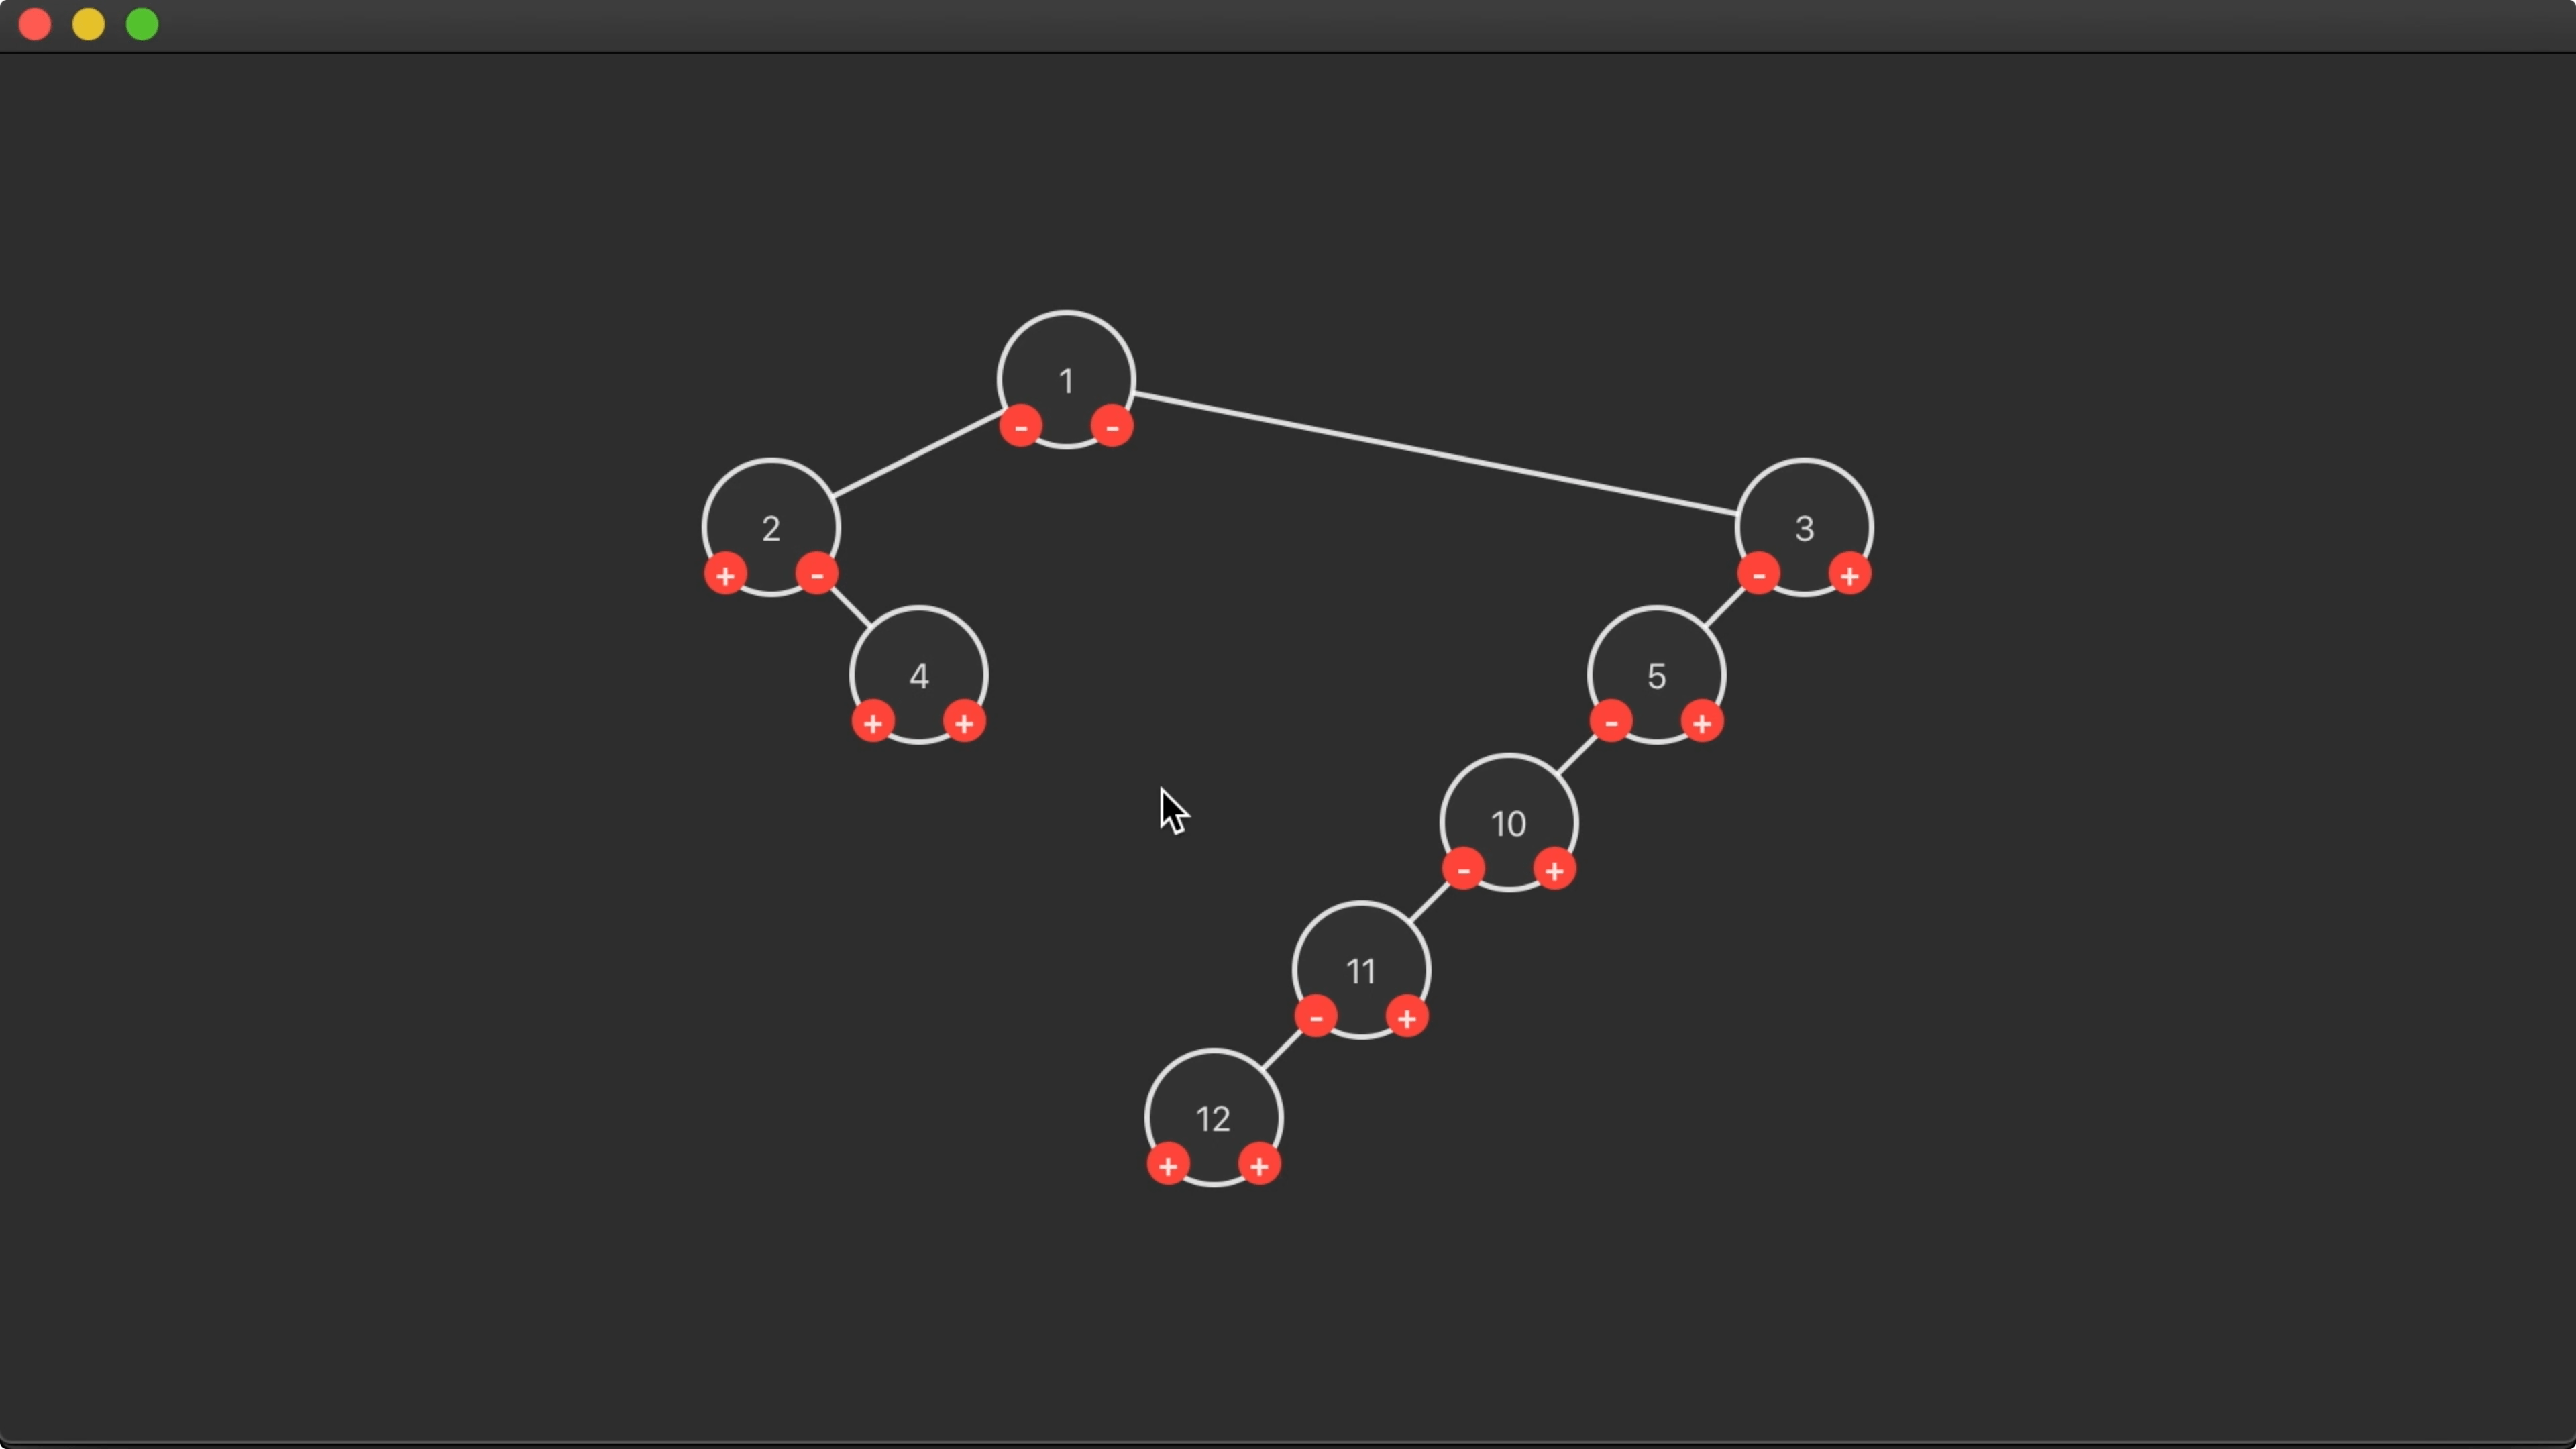
In this case, it would be fine for the right subtree to move to the left, with
some nodes below each other sharing the same x coordinate.
Alternative
09:02 We can improve the algorithm by keeping a running x for every
depth. So instead of a single x value, we use a dictionary that maps depths to
available x positions. When setting a node's point, we use the x entry for
the node's depth — defaulting to zero — and then we increment the available
position for that depth by 1:
extension Tree {
    func layout() {
        var x: [Int:Int] = [:]
        alt(depth: 0, x: &x)
    }

    func alt(depth: Int, x: inout [Int:Int]) {
        left?.alt(depth: depth+1, x: &x)
        point.x = x[depth, default: 0]
        point.y = depth
        x[depth, default: 0] += 1
        right?.alt(depth: depth+1, x: &x)
    }
}
10:59 This produces extremely compact trees, but the layout actually
makes it hard to read the tree:
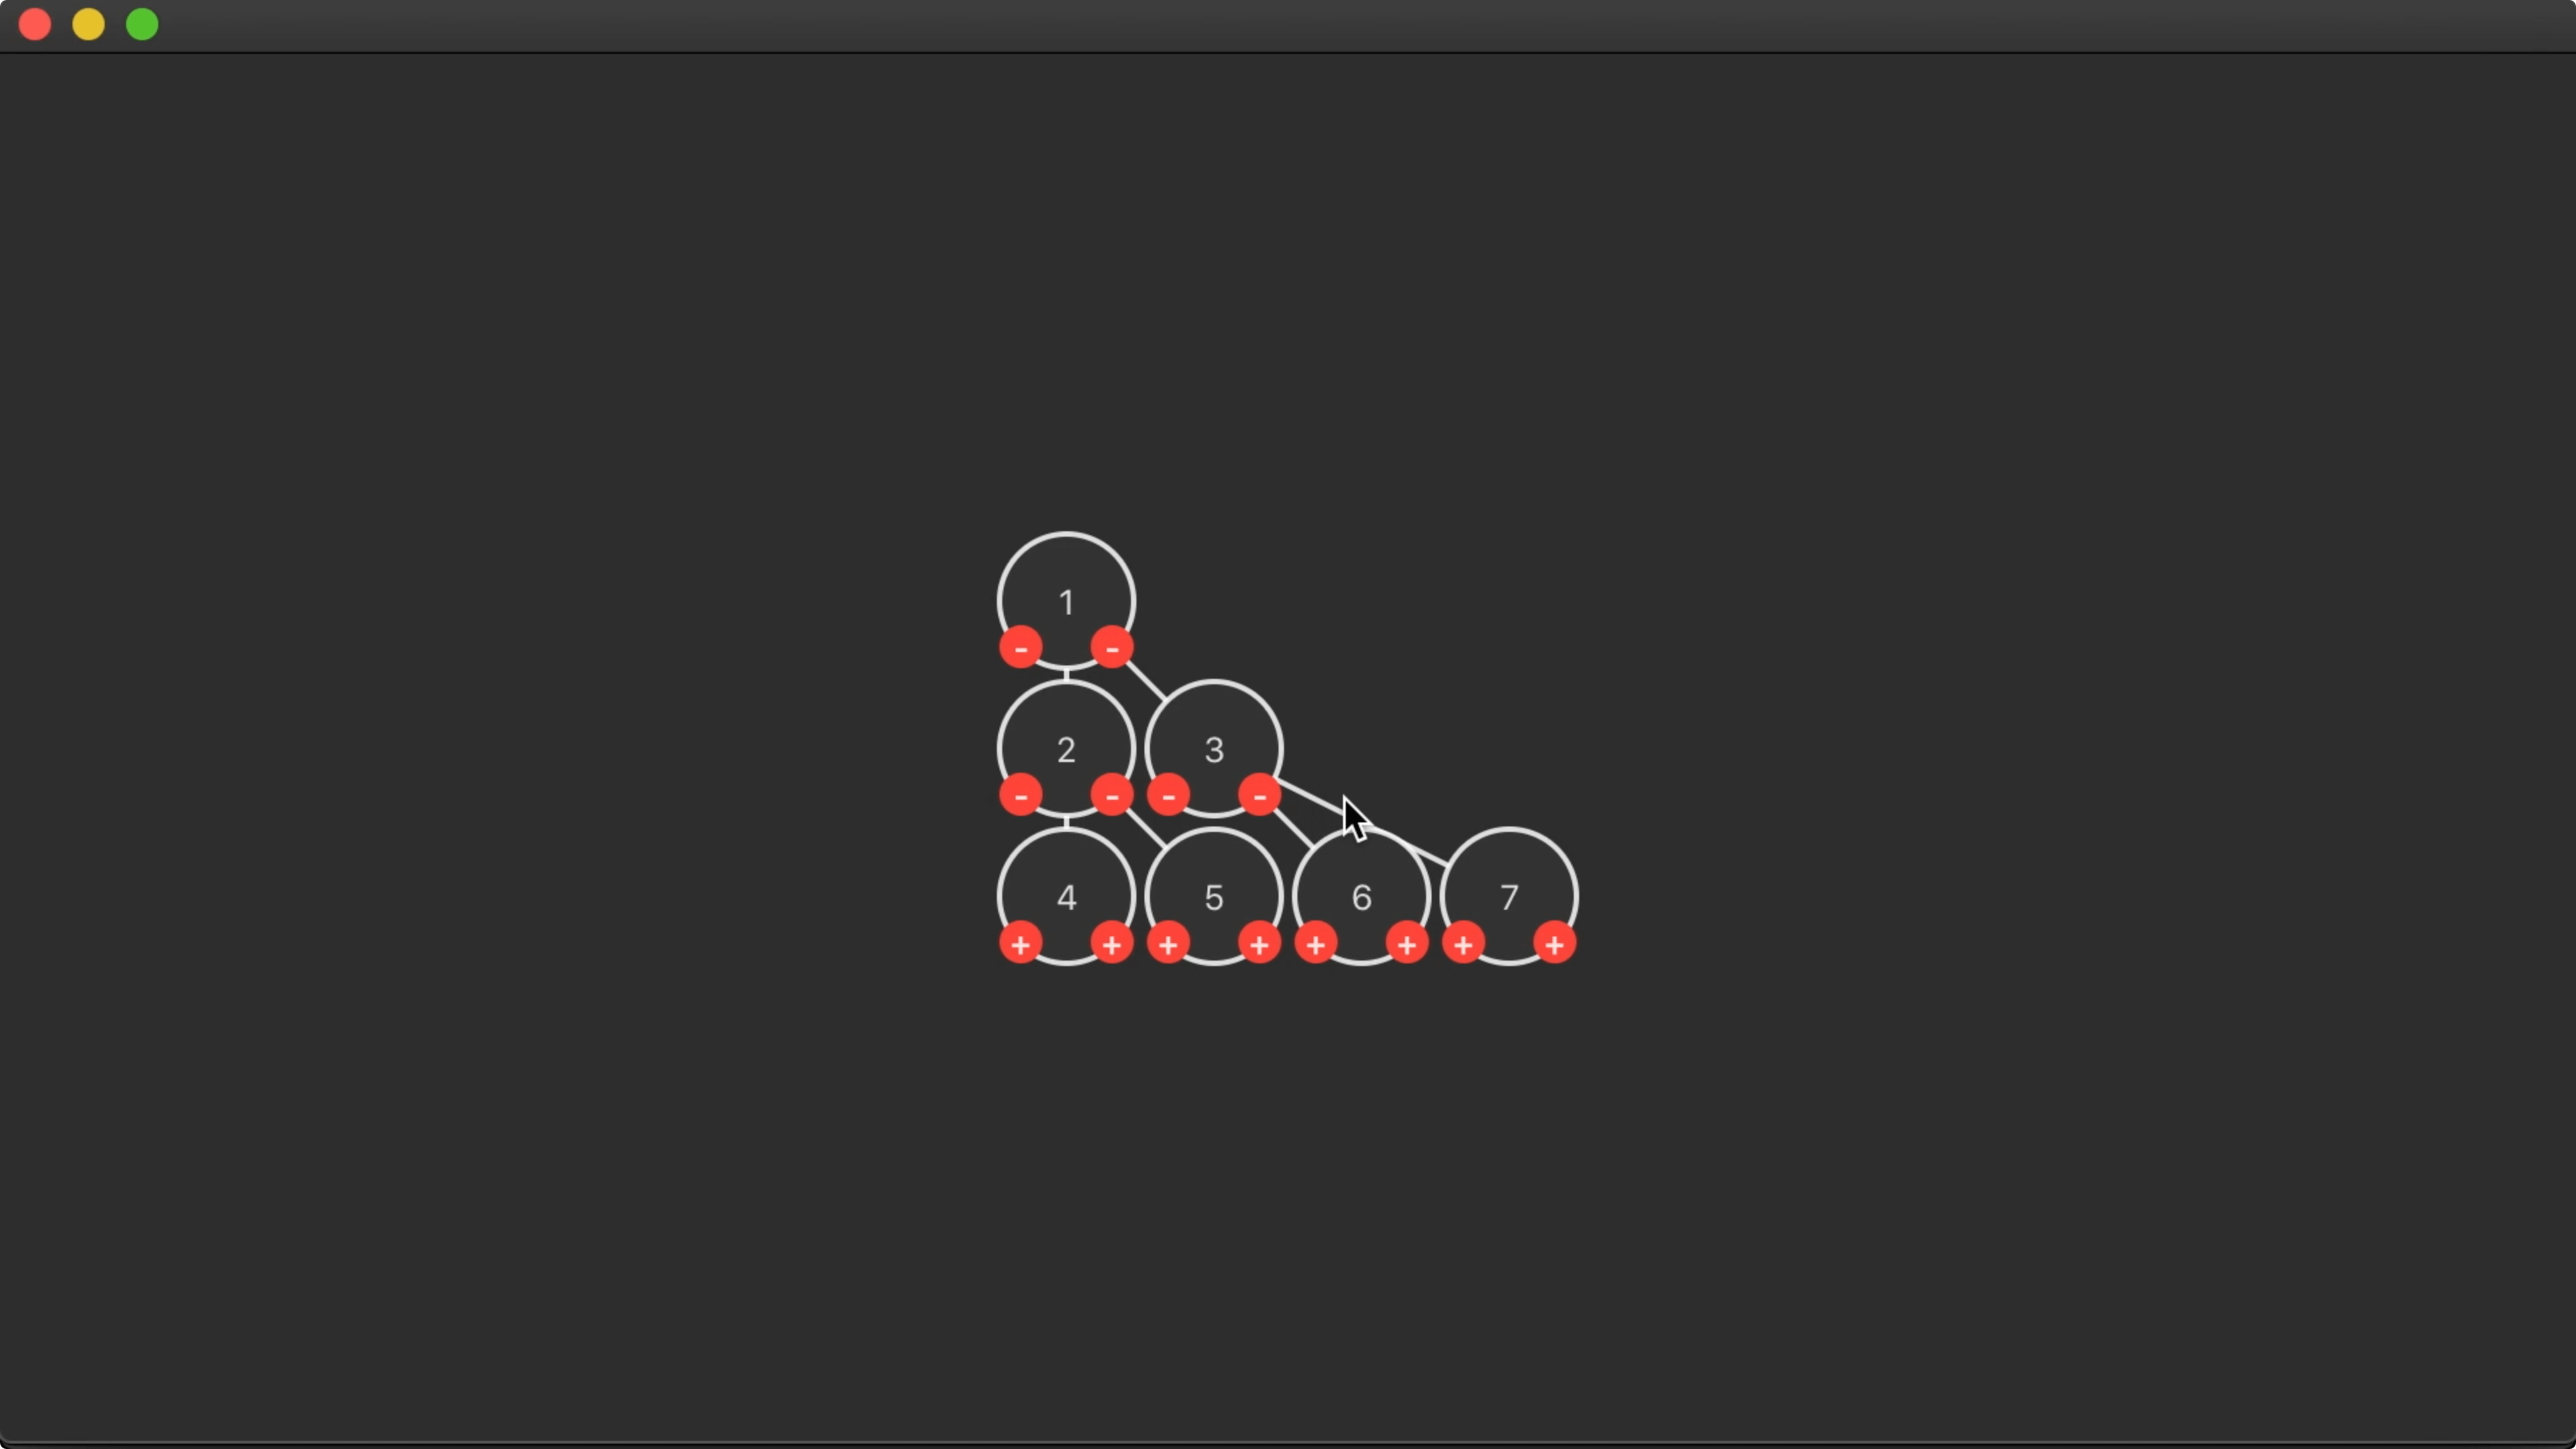
11:55 Both the article we're basing this work on and the papers it cites
offer a few principles for drawing aesthetically pleasing trees. We're already
adhering to some principles — e.g. nodes at the same depths are drawn on the
same horizontal line — but we should adopt another important one: each parent
node is centered above its children.
12:34 We went from a readable but space-wasting tree to a very compact
tree that's hard to read. We can try to get some readability back by adding more
space where needed. For one, we should move a node to the right if it has a left
subtree:
extension Tree {
func layout() {
var x: [Int:Int] = [:]
alt(depth: 0, x: &x)
}
func alt(depth: Int, x: inout [Int:Int]) {
left?.alt(depth: depth+1, x: &x)
point.x = x[depth, default: 0]
if let _ = left {
point.x += 1
}
}
14:28 And to balance the tree, we also have to move the right subtree to
the right by one position. We do so, after laying out the right subtree, by
using the modifyAll method on Tree to transform every node:
extension Tree {
    func layout() {
        var x: [Int:Int] = [:]
        alt(depth: 0, x: &x)
    }

    func alt(depth: Int, x: inout [Int:Int]) {
        left?.alt(depth: depth+1, x: &x)
        point.x = x[depth, default: 0]
        if let _ = left {
            point.x += 1
        }
        point.y = depth
        x[depth, default: 0] = point.x + 1
        right?.alt(depth: depth+1, x: &x)
        right?.moveRight(1)
    }

    func moveRight(_ amount: Int) {
        modifyAll { $0.point.x += amount }
    }
}
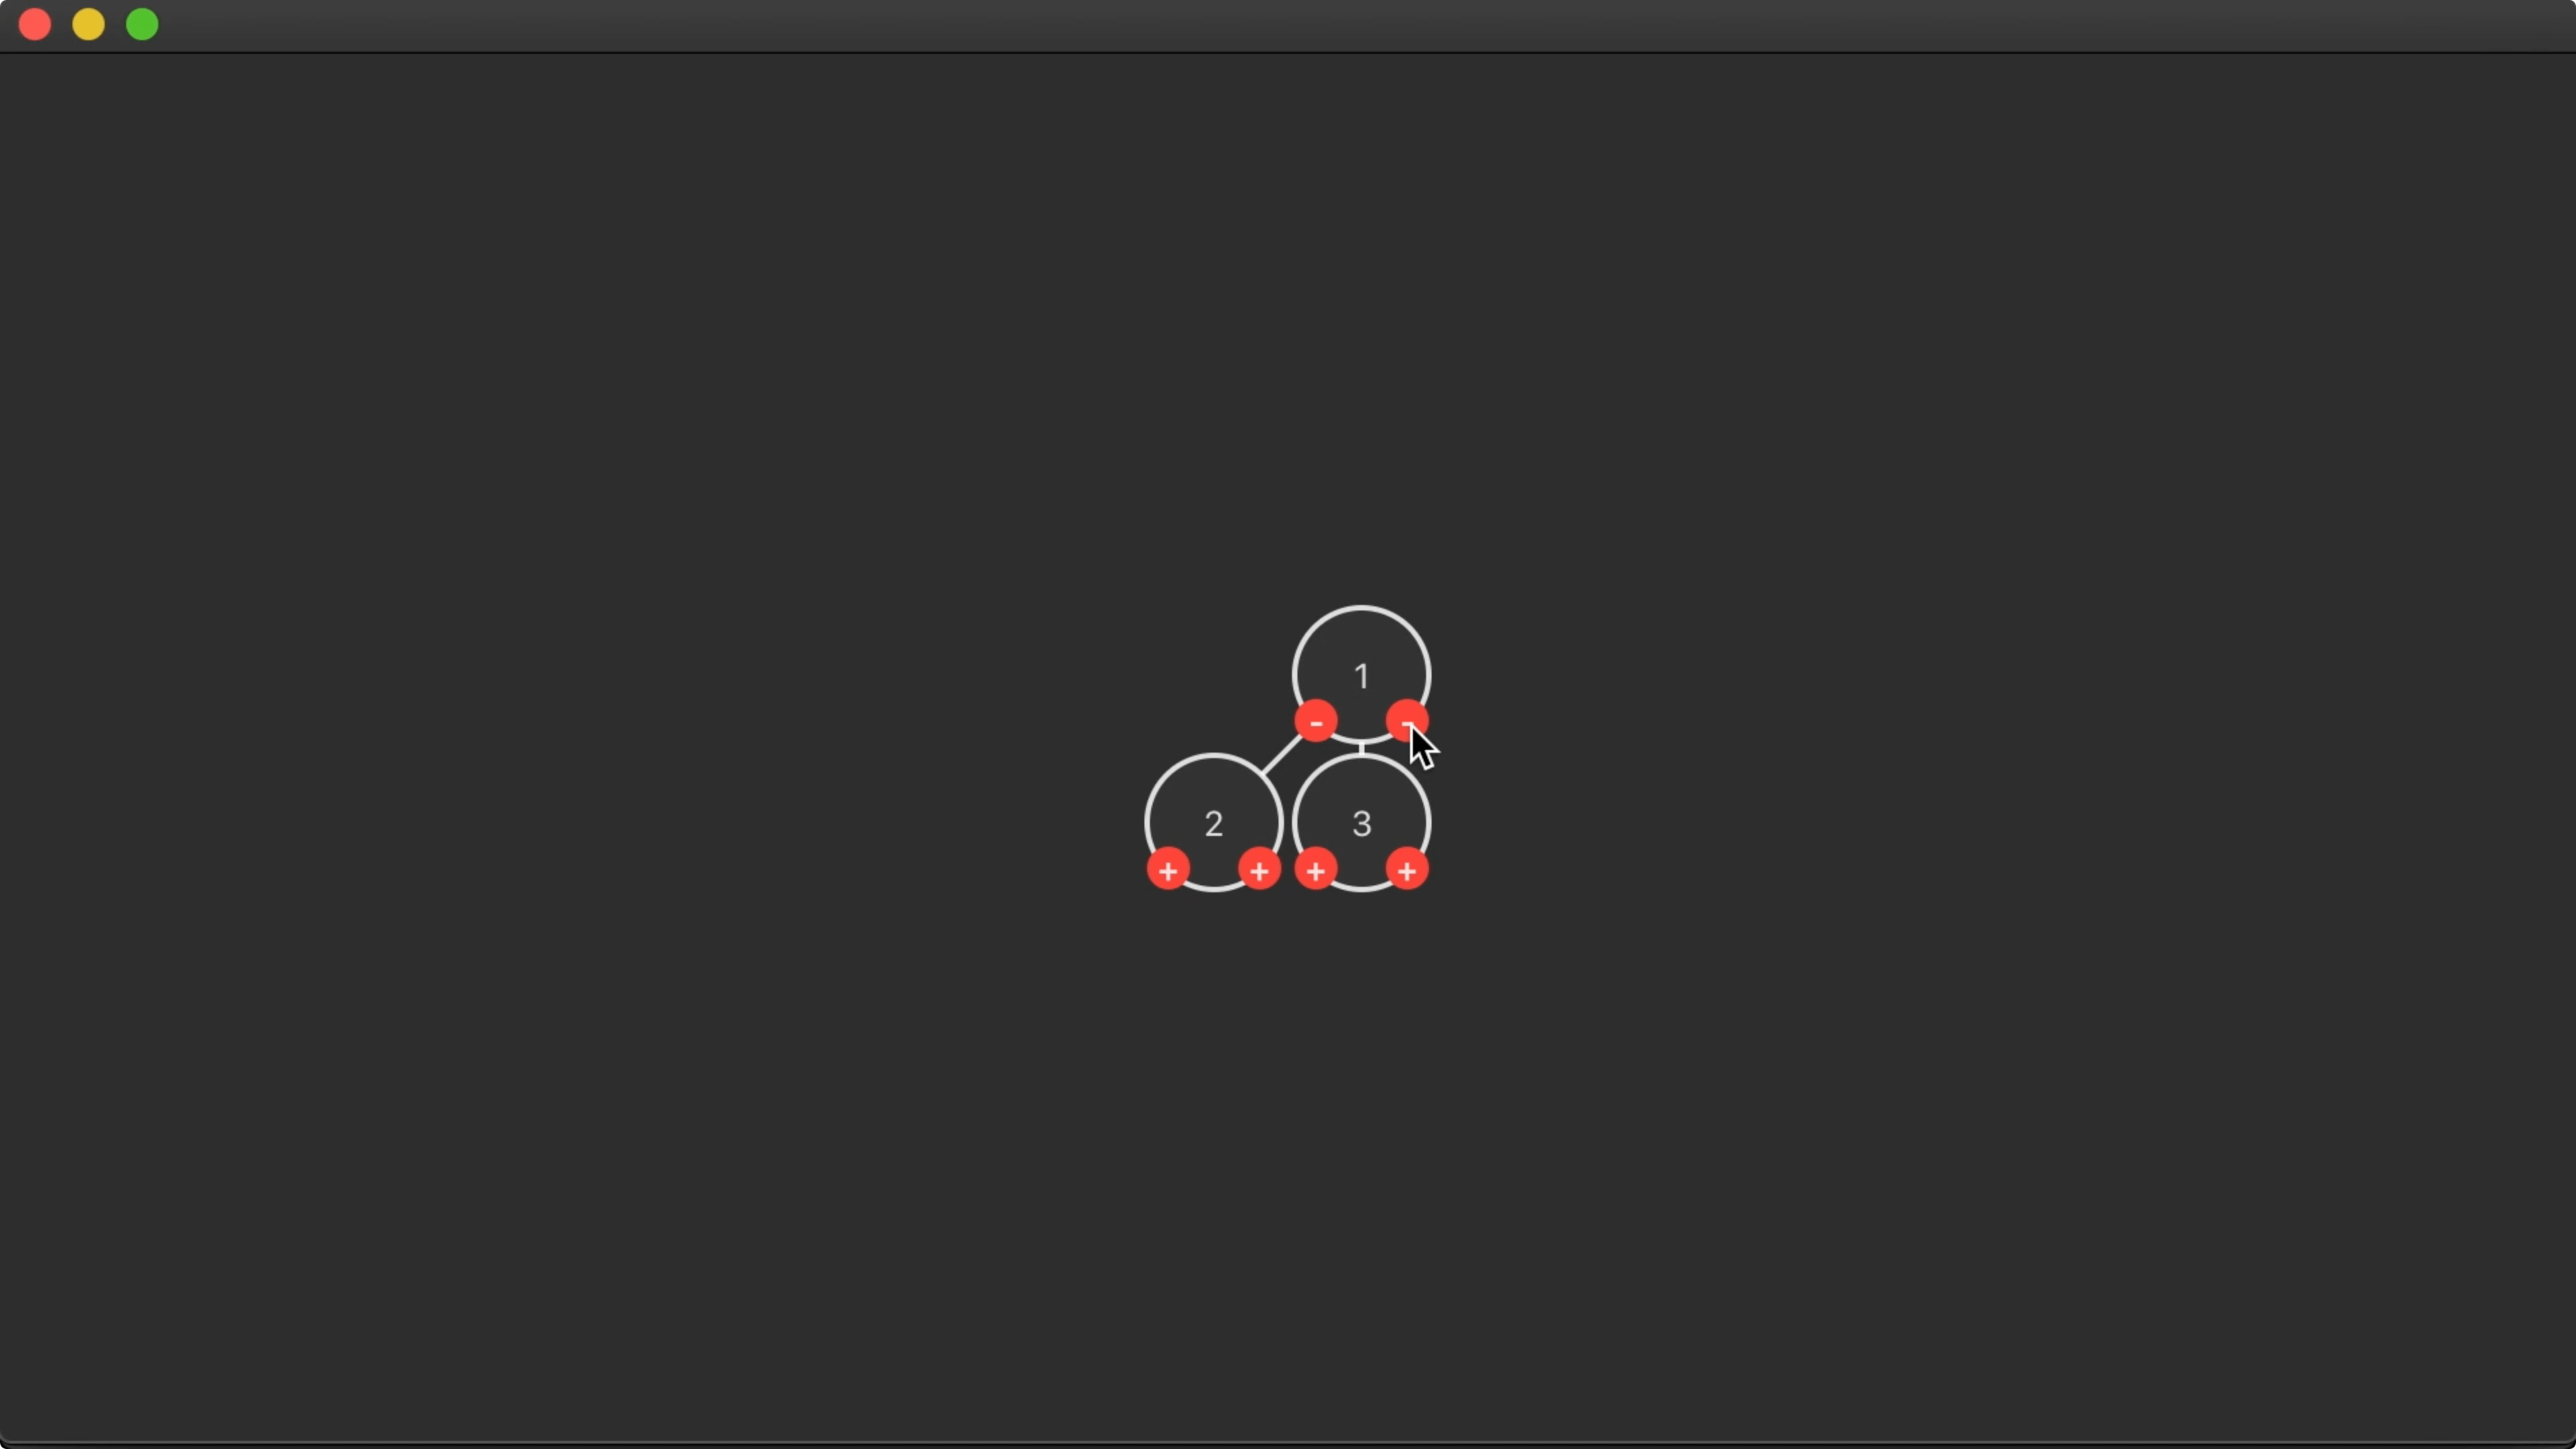
15:52 This works great for a simple tree:

16:05 But things get weird when we add more nodes. Here we can see that
the tree is left-biased and nodes can overlap each other:
Adjustments
16:33 As we move the right subtree to the right, we should adjust the
dictionary with available x positions accordingly:
extension Tree {
func alt(depth: Int, x: inout [Int:Int]) {
right?.moveRight(1)
for (d, v) in x {
if d > depth {
x[d] = v + 1
}
}
}
}
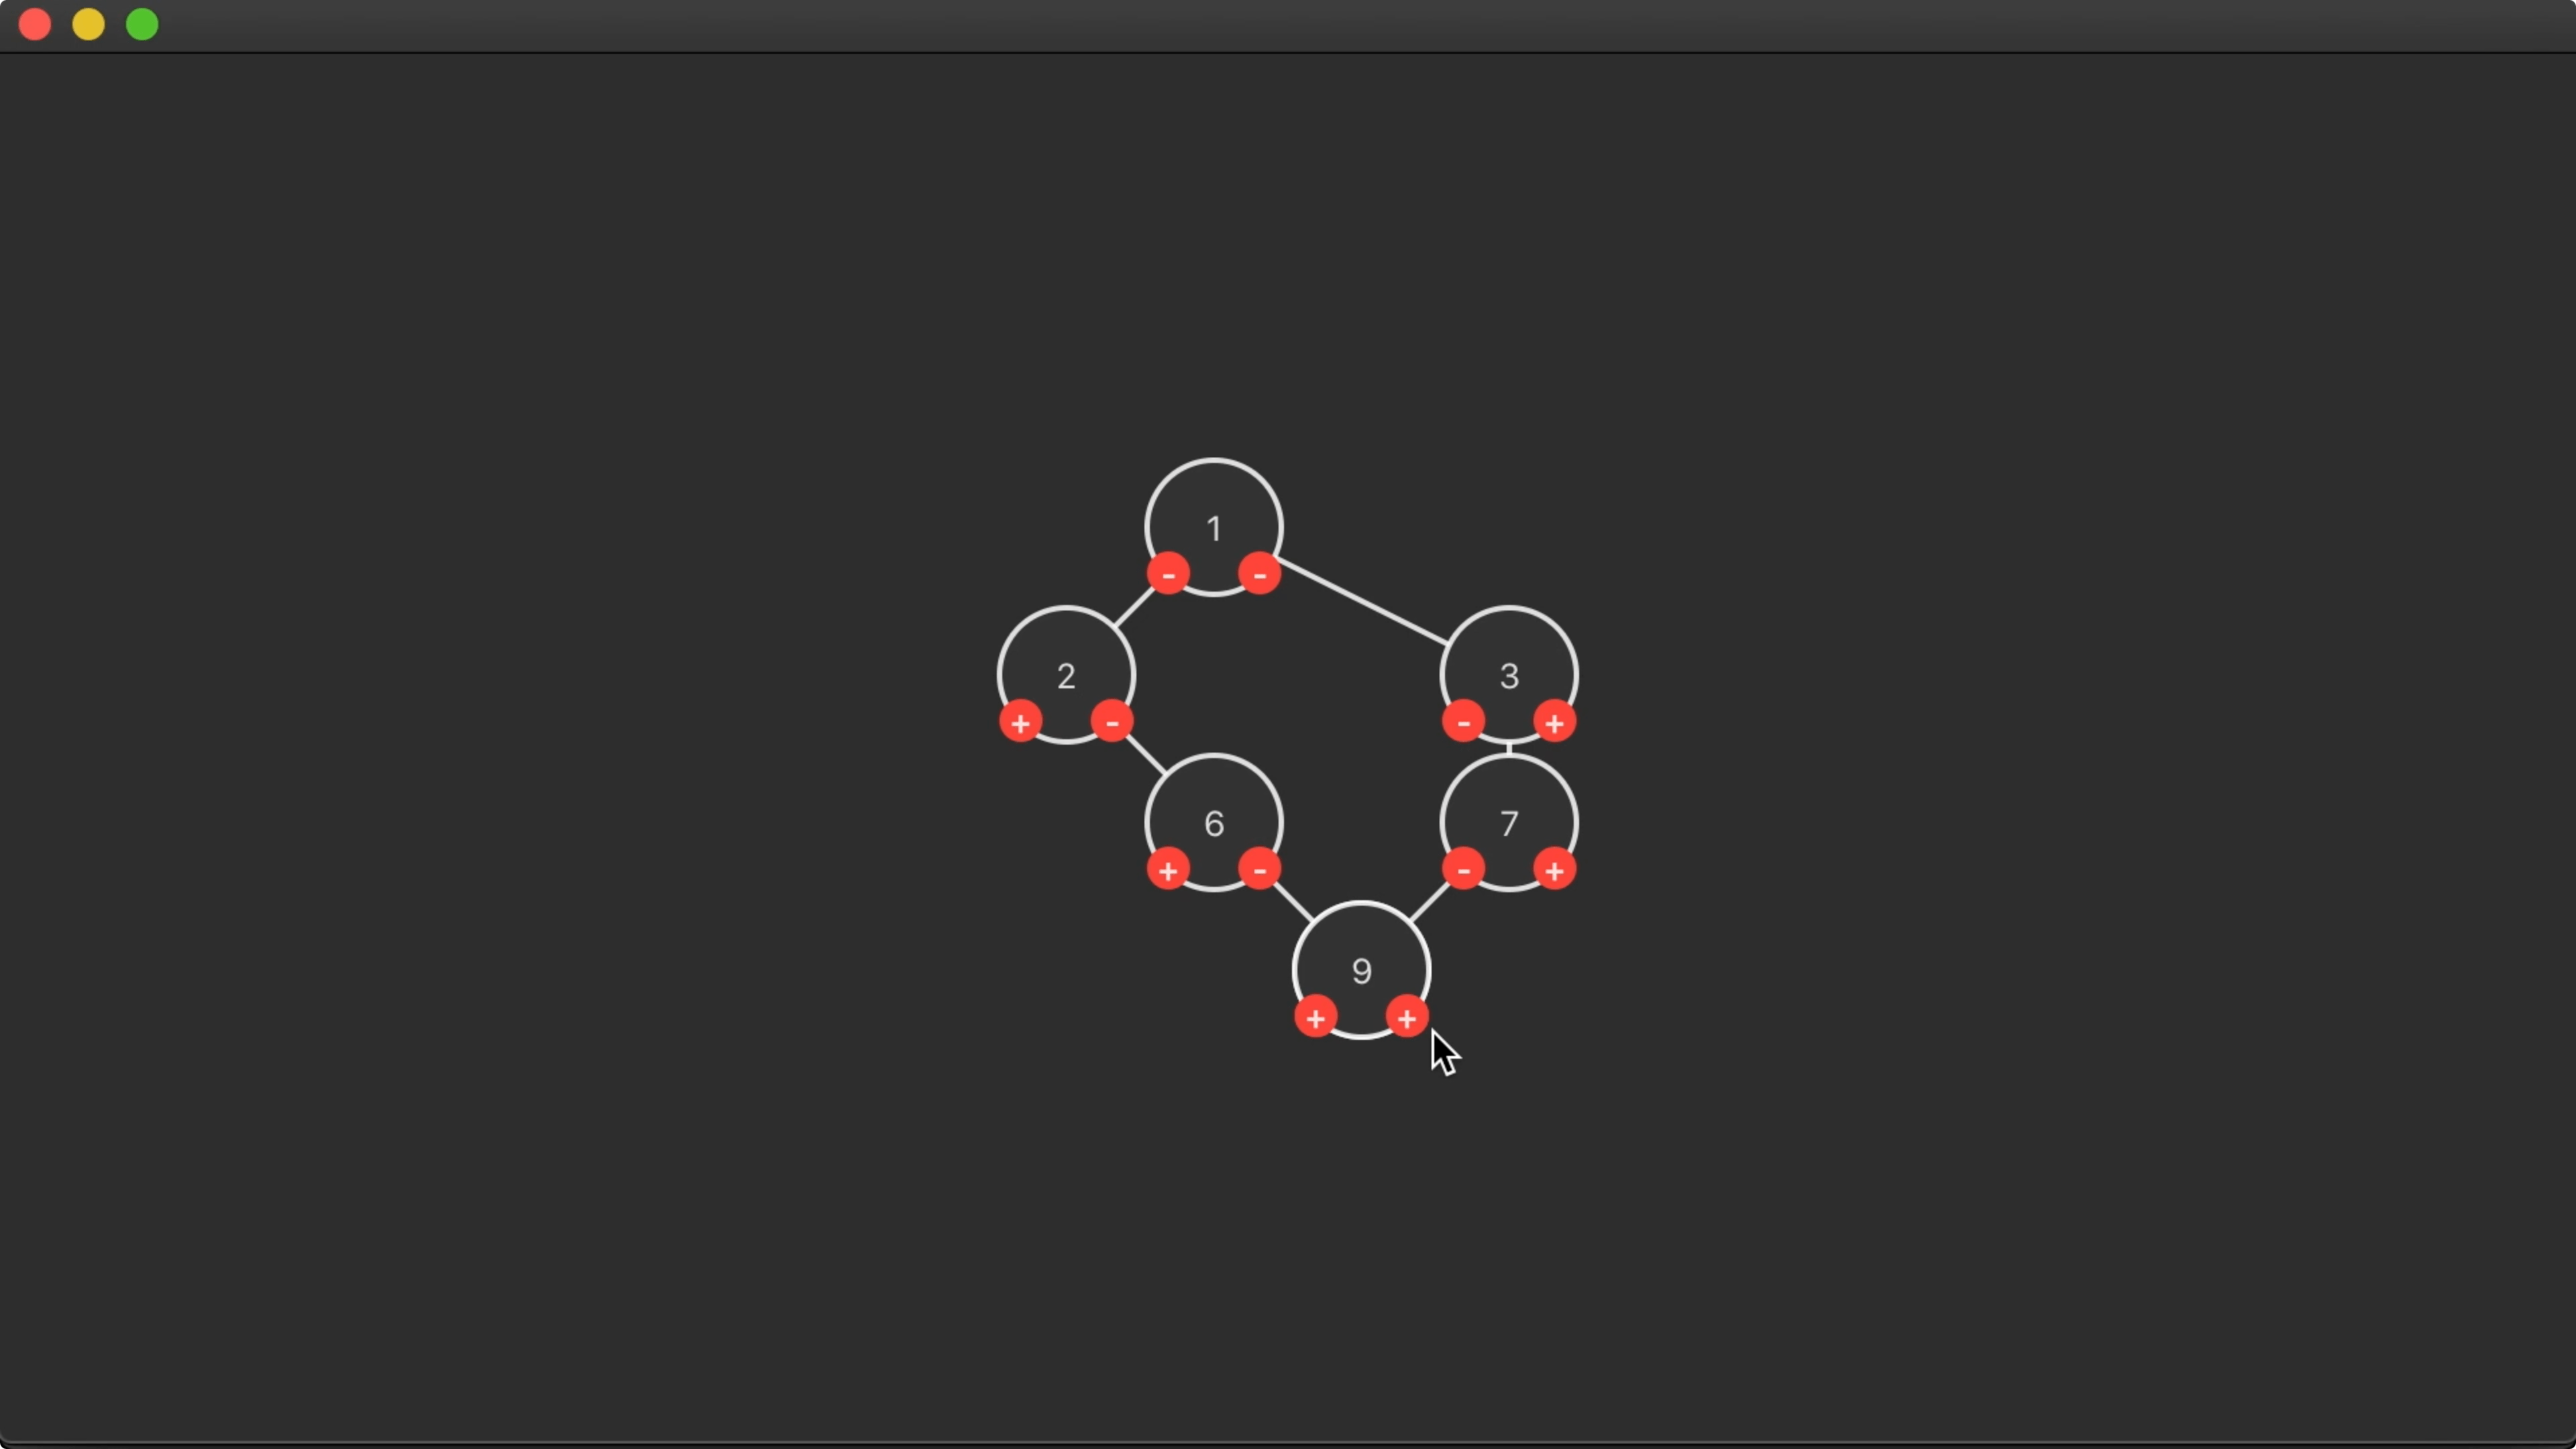
17:44 However, we might be updating some x entries unnecessarily,
causing nodes to be placed too far to the right. In some cases, this makes it
hard to see whether a subtree is to the left or right of its parent node:
18:23 We can partially fix this by making sure each node is positioned
to the right of its left subtree:
extension Tree {
func alt(depth: Int, x: inout [Int:Int]) {
left?.alt(depth: depth+1, x: &x)
point.x = x[depth, default: 0]
if let l = left {
point.x = l.point.x + 1
}
point.y = depth
x[depth, default: 0] = point.x + 1
}
}
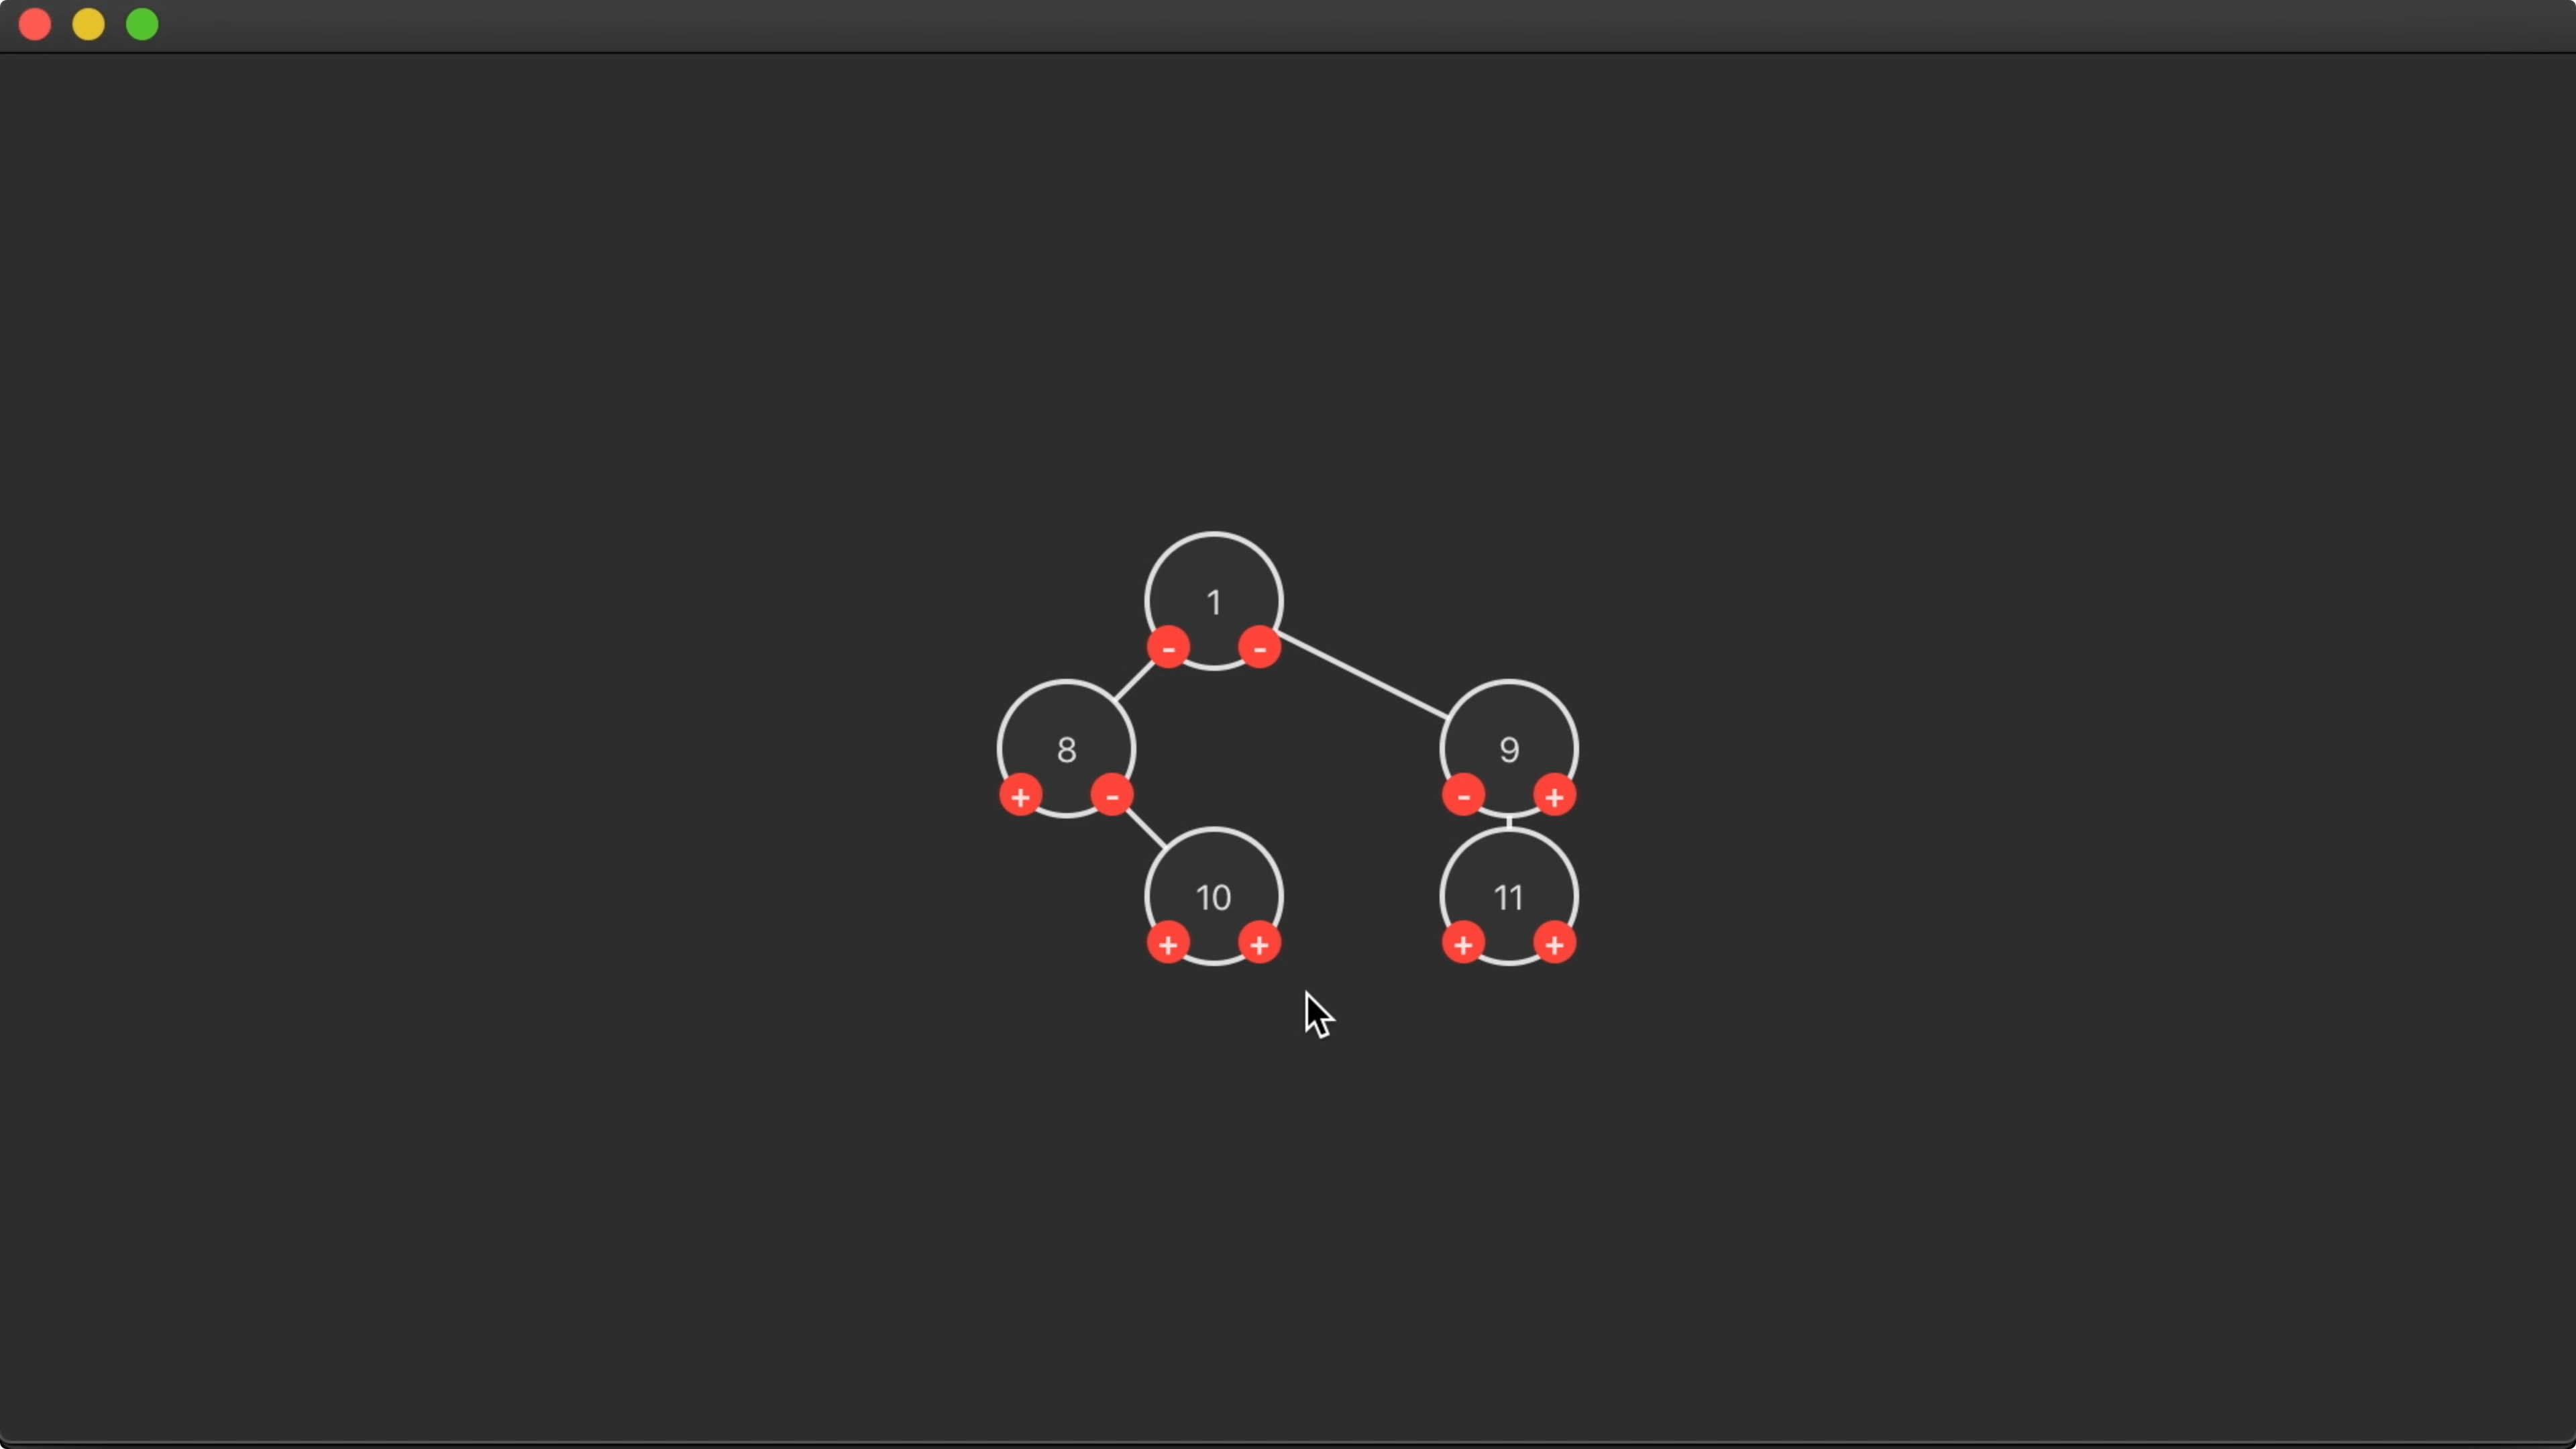
18:48 That fixes the configuration of parents and children, but we're
still seeing some gaps that could be smaller. Also, some nodes aren't centered
correctly above their children:
Next Time
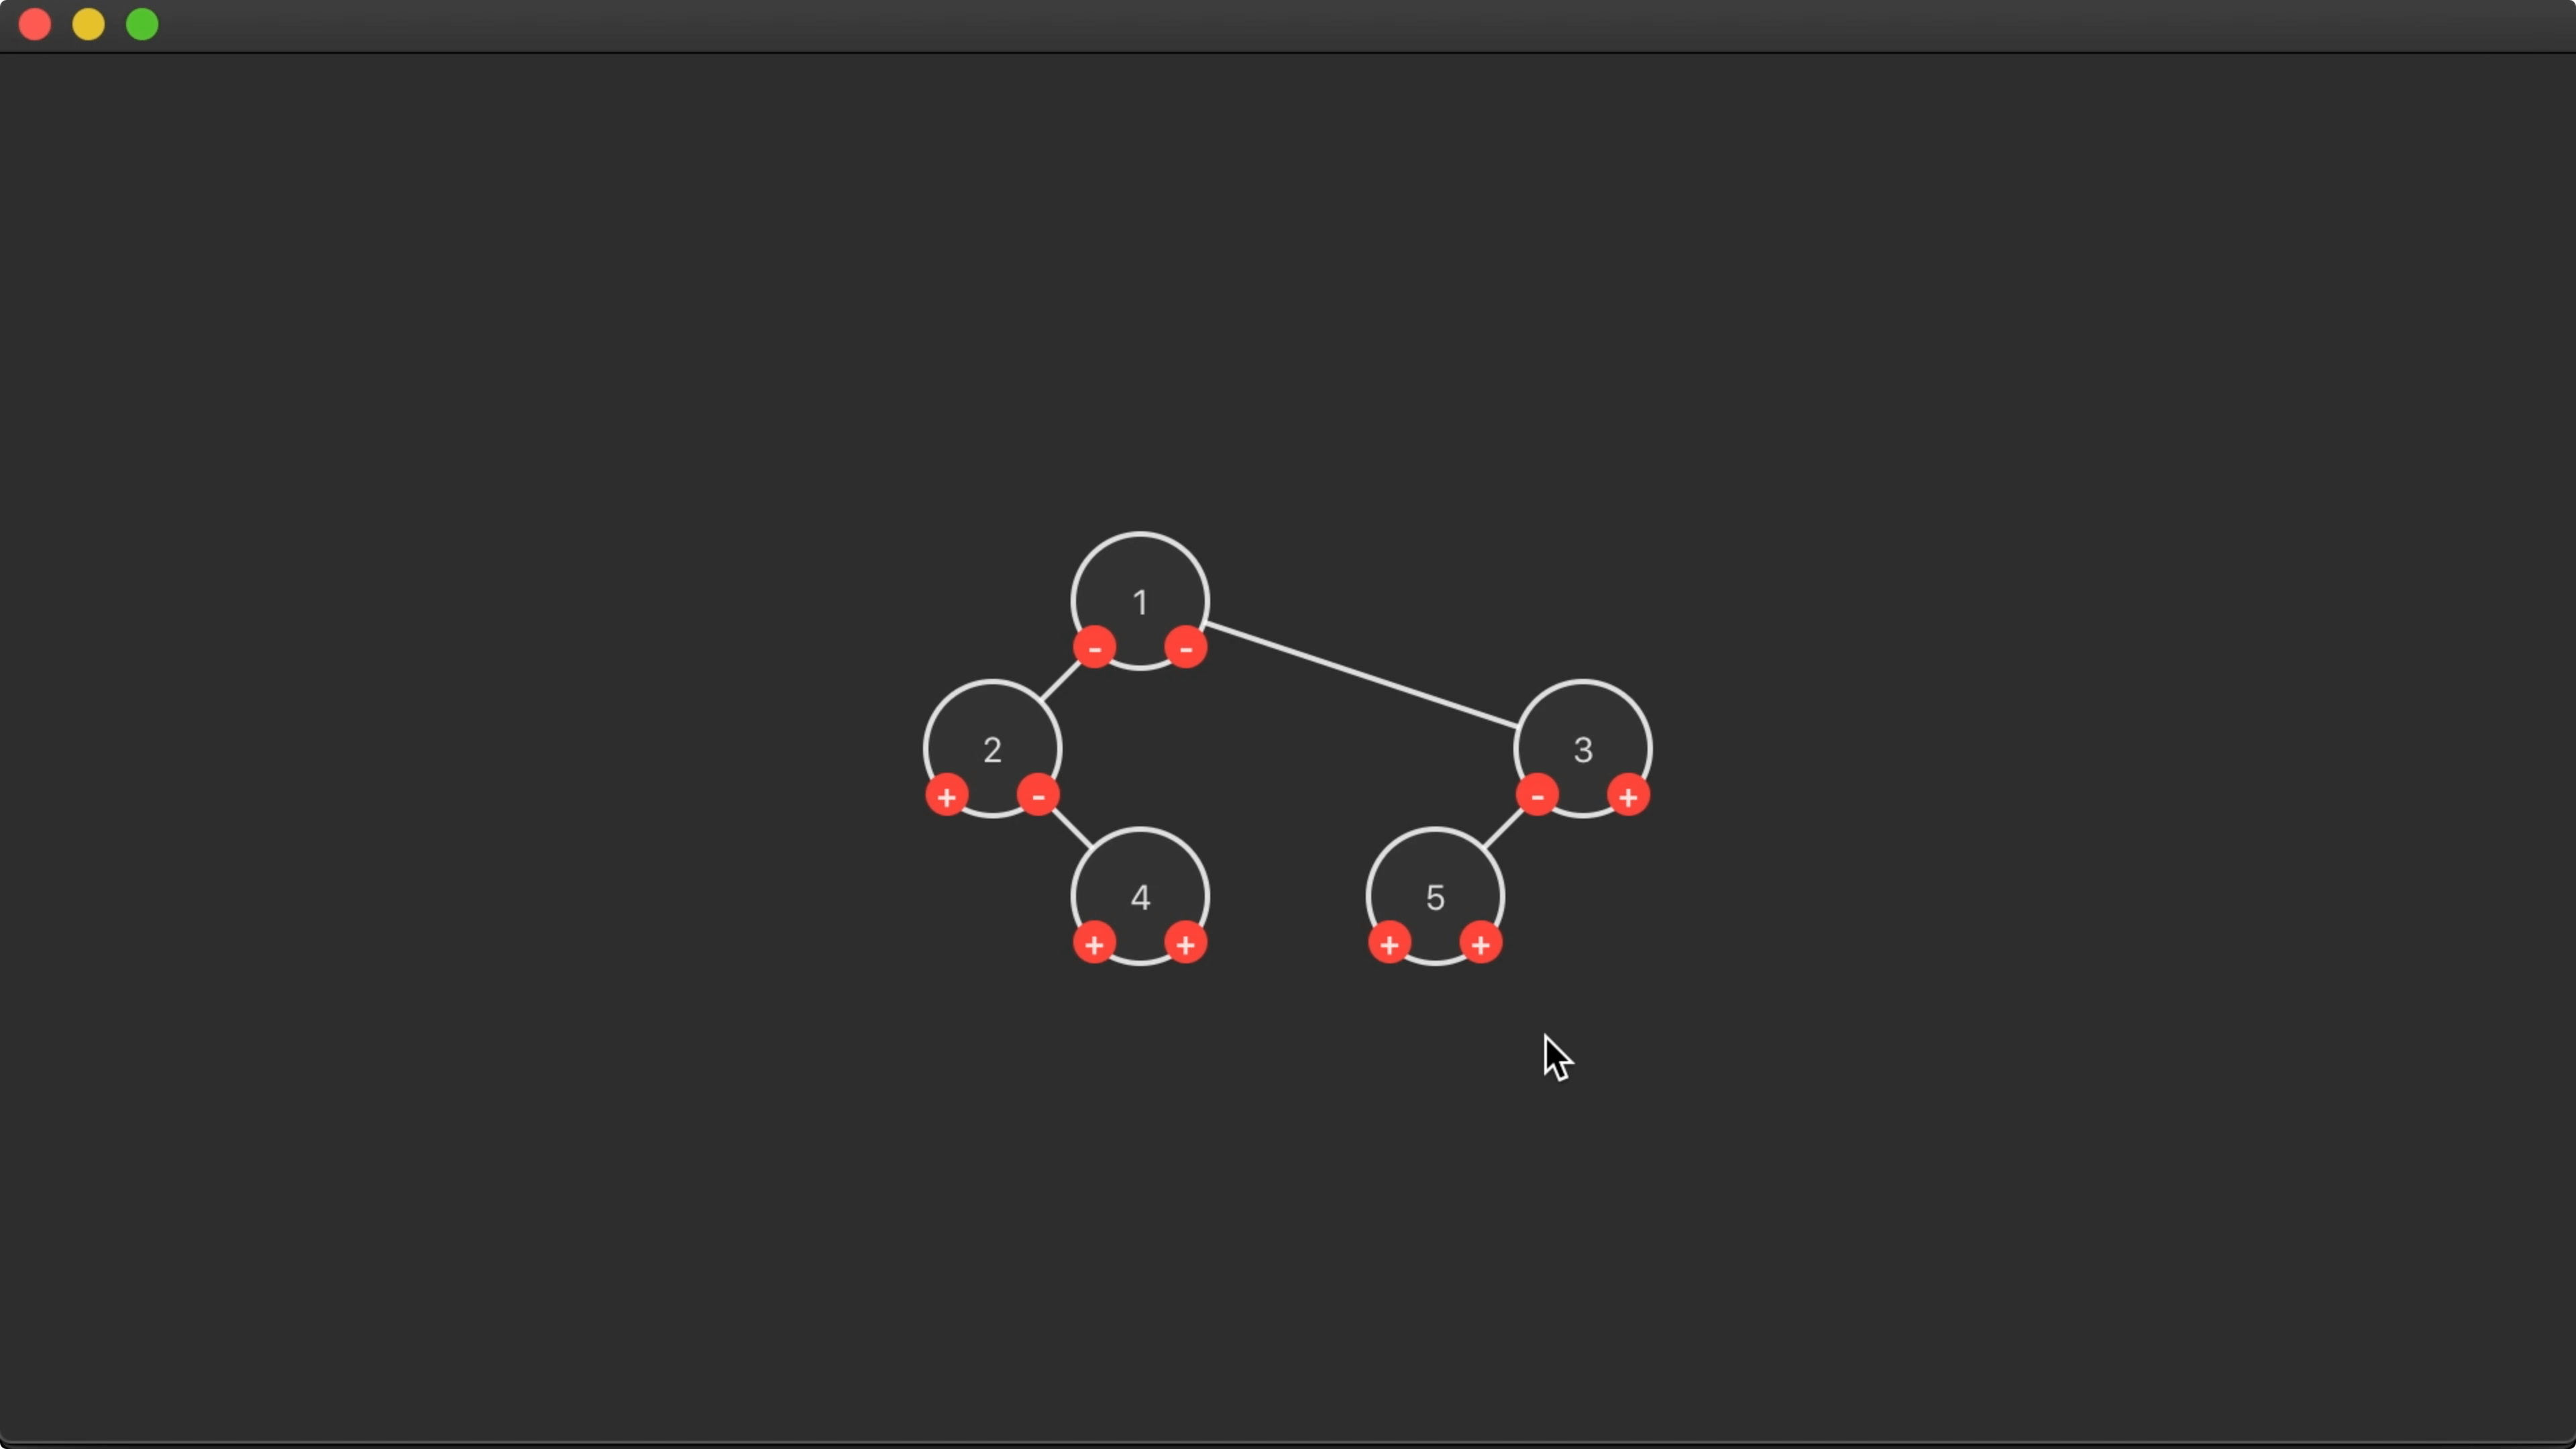
19:28 The overall result is a slightly more compact yet readable tree.
But it isn't perfect. The tree is left biased, which makes the right subtrees
look a little funny. And we're not sure if we can efficiently improve this
algorithm to yield better results.
20:31 In the next episode, we'll take a different approach and build
the tree from the bottom up. By laying out the left and right subtrees and then
figuring out how to position the subtrees so that they don't overlap, we can
hopefully draw a more symmetrical tree.
