00:06 We've used stack views a lot, especially for prototyping, as they're
very convenient for quickly throwing together some views. 00:36 However,
since we're setting our views up in code (see the Connecting View
Controllers episode for one
reason why we're doing this), we still have to write quite a bit of boilerplate
code to set up a stack view. As such, it would make sense to create an
abstraction to simplify this process.
Creating a UIStackView in Code
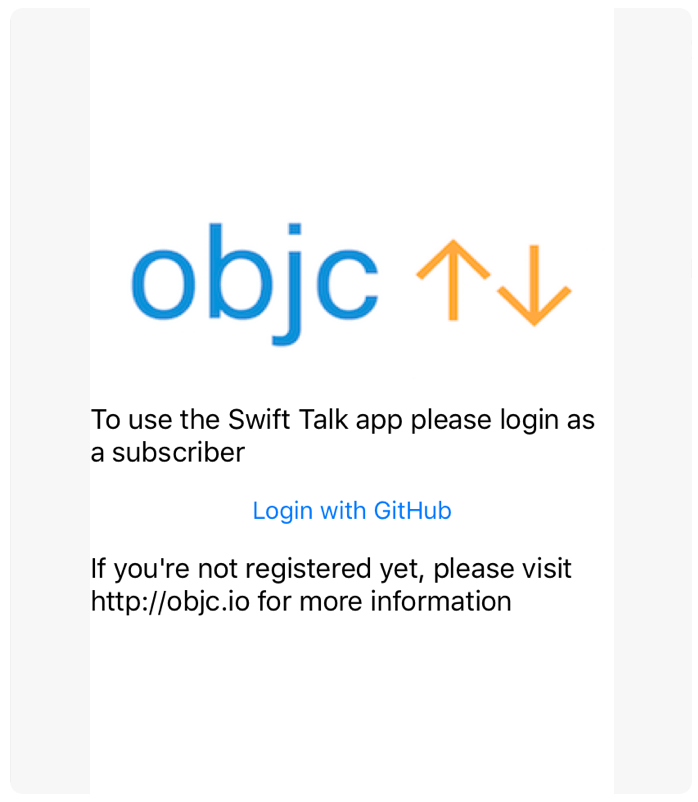
01:16 We start out with a simple view controller, which sets up a stack
view in the traditional way in its viewDidLoad method:
final class ViewController: UIViewController {
    override func viewDidLoad() {
        super.viewDidLoad()
        view.backgroundColor = .whiteColor()

        let stack = UIStackView()
        stack.translatesAutoresizingMaskIntoConstraints = false
        stack.axis = .Vertical
        stack.spacing = 10
        view.addSubview(stack)

        stack.constrainEqual(.Width, to: view)
        stack.center(in: view)

        let image = UIImageView(image: [#Image(imageLiteral: "objc-logo-white.png")#])
        stack.addArrangedSubview(image)

        let text1 = UILabel()
        text1.numberOfLines = 0
        text1.text = "To use the Swift Talk app please login as a subscriber"
        stack.addArrangedSubview(text1)

        let button = UIButton(type: .System)
        button.setTitle("Login with GitHub", forState: .Normal)
        stack.addArrangedSubview(button)

        let text2 = UILabel()
        text2.numberOfLines = 0
        text2.text = "If you're not registered yet, please visit http://objc.io for more information"
        stack.addArrangedSubview(text2)
    }
}
01:33 For the image, we use playground's image literals, which are super
convenient for quickly loading an image from the playground's resources.
01:51 The button is not yet hooked up to an action, but we'll take care
of this later on.
01:57 We instantiate this view controller in the playground and preview
its view:
let vc = ViewController()
vc.view.frame = CGRect(x: 0, y: 0, width: 320, height: 480)
vc.view
Describing Views with Enums
02:12 While using a stack view like this is really convenient because it
handles all the layout for you, it's still a lot of code to write. 02:38
There's also a lot of duplication when creating the views, like setting the
numberOfLines property on UILabel — especially since most of the labels in
our app will be configured very similarly.
02:51 One approach to building an abstraction around stack views is to
define an enum for the different content types we want to display:
enum ContentElement {
case label(String)
case button(String) case image(UIImage)
}
03:29 Now we could build a description of what we want to show using
ContentElements and then somehow convert them into views. 03:38 Before
we do that though, we have to remember that the button case still needs a way to
associate an action with it. We'll look at this at the end.
04:10 To create the views for the different cases of ContentElement,
we add an extension with a computed property, view, which is of type UIView.
04:24 Here, we switch on self to handle each case. 04:31 For
the .label case, we return a UILabel; to do this, we can copy from the
viewDidLoad method we wrote before. We just have to change the name from
text1 to label and replace the hardcoded string with the associated value
from the .label case. 05:10 We build the other two cases, .button
and .image, in the same way:
extension ContentElement {
    var view: UIView {
        switch self {
        case .label(let text):
            let label = UILabel()
            label.numberOfLines = 0
            label.text = text
            return label
        case .button(let title):
            let button = UIButton(type: .System)
            button.setTitle(title, forState: .Normal)
            return button
        case .image(let image):
            return UIImageView(image: image)
        }
    }
}
05:56 Let's use ContentElements to create the views we add to our
stack view:
let image = ContentElement.image([#Image(imageLiteral: "objc-logo-white.png")#]).view
stack.addArrangedSubview(image)

let text1 = ContentElement.label("To use the Swift Talk app please login as a subscriber").view
stack.addArrangedSubview(text1)

let button = ContentElement.button("Login with GitHub").view
stack.addArrangedSubview(button)

let text2 = ContentElement.label("If you're not registered yet, please visit http://objc.io for more information").view
stack.addArrangedSubview(text2)
06:15 In the image case, the code hasn't improved considerably.
06:27 The setup of the labels and the button is a bit nicer though.
07:03 Overall, it's a modest win, but there's much more we can do with
ContentElements.
Building Stack Views from Enums
07:15 As a next step, we'll add an initializer to UIStackView. This
initializer takes an array of ContentElements and adds their views to the
stack view in one batch. 07:34 Without subclassing, we can only add a
convenience initializer to existing classes:
extension UIStackView {
	convenience init(elements: [ContentElement]) {
        self.init()
		for element in elements {
            addArrangedSubview(element.view)
        }
	}
}
08:28 Now we can delete all the calls to addArrangedSubview in
viewDidLoad and pass the content elements into the new initializer:
let image = ContentElement.image([#Image(imageLiteral: "objc-logo-white.png")#])
let text1 = ContentElement.label("To use the Swift Talk app please login as a subscriber")
let button = ContentElement.button("Login with GitHub")
let text2 = ContentElement.label("If you're not registered yet, please visit http://objc.io for more information")

let stack = UIStackView(elements: [image, text1, button, text2])
09:16 If we pull out the elements array and specify a type on the
variable, we can also get rid of all the ContentElement. prefixes:
let elements: [ContentElement] = [
    .image([#Image(imageLiteral: "objc-logo-white.png")#]),
    .label("To use the Swift Talk app please login as a subscriber"),
    .button("Login with GitHub"),
    .label("If you're not registered yet, please visit http://objc.io for more information")
]

let stack = UIStackView(elements: elements)
10:12 This is a declarative way of describing our user interface, in
that it's very readable. 10:21 Additionally, we can move the
configuration of the stack view into the initializer, since most stack views
will be configured similarly in our project. This allows us to remove more
boilerplate code from the viewDidLoad method:
extension UIStackView {
    convenience init(elements: [ContentElement]) {
        self.init()
        translatesAutoresizingMaskIntoConstraints = false
        axis = .Vertical
        spacing = 10

        for element in elements {
            addArrangedSubview(element.view)
        }
    }
}
Building a Stack View Controller
10:59 To remove even more code, we can create an entire view controller
that is initialized with an array of content elements. 11:20 This way,
we avoid repeating the steps that are still necessary in the view controller's
viewDidLoad method.
11:29 Our StackViewController class has a custom initializer that
takes a parameter of type [ContentElement], just as the convenience
initializer on UIStackView did. 11:51 Here we call the designated
super initializer and store the content elements in a property:
final class StackViewController: UIViewController {
let elements: [ContentElement]
init(elements: [ContentElement]) {
self.elements = elements
super.init(nibName: nil, bundle: nil)
}
}
12:09 To set up the stack view, we can start with our existing
implementation of viewDidLoad. We just have to cut out the definition of the
elements array; we'll paste it back in later when we instantiate our stack
view controller. 12:24 Lastly, we also have to add the default
implementation of the required initializer to make the code compile:
final class StackViewController: UIViewController {
    let elements: [ContentElement]

    init(elements: [ContentElement]) {
        self.elements = elements
        super.init(nibName: nil, bundle: nil)
    }

    required init?(coder aDecoder: NSCoder) {
        fatalError("init(coder:) has not been implemented")
    }

    override func viewDidLoad() {
        super.viewDidLoad()
        view.backgroundColor = .whiteColor()

        let stack = UIStackView(elements: elements)
        view.addSubview(stack)
        stack.constrainEqual(.Width, to: view)
        stack.center(in: view)
    }
}
12:52 To test the StackViewController class, we paste our elements
array back in where we instantiate the view controller:
let elements: [ContentElement] = [
    .image([#Image(imageLiteral: "objc-logo-white.png")#]),
    .label("To use the Swift Talk app please login as a subscriber"),
    .button("Login with GitHub", {
        print("Button tapped")
    }),
    .label("If you're not registered yet, please visit http://objc.io for more information")
]

let vc = StackViewController(elements: elements)
13:03 The resulting view is still the same as what we started with, but
the code to create it is short and descriptive. 13:17 An abstraction
like StackViewController allows us to quickly prototype a screen. This is
useful for communicating with other people involved, and we can always make it
look nice later.
A Button with a Callback
13:32 We still have to make the ContentElement.button case work. So
far, it does nothing, and we have no way of specifying an action. 13:40
The easy part is adding a callback to the enum case, which should be executed
when the user taps on the button:
enum ContentElement {
case button(String, () -> ())
}
14:29 However, getting this callback to work with UIButton is a bit
problematic. 14:41 We could try to subclass UIButton and keep a
reference to the callback there, but that doesn't work too well. 15:04
For example, the documentation of the initializer UIButton(type:) tells us
that it won't return an instance of a custom subclass, so subclassing is a bit
fragile, and it gets tricky to do it right.
15:52 Another approach is to create a simple wrapper around UIButton,
which receives the .TouchUpInside event of the button and calls our callback.
16:12 We call this class CallbackButton, and it inherits from
UIView. 16:23 The initializer takes the button title and the callback.
It stores the callback in a property, sets up the button instance as a subview,
and adds constraints to the button:
final class CallbackButton: UIView {
let onTap: () -> ()
let button: UIButton
init(title: String, onTap: () -> ()) {
self.onTap = onTap
self.button = UIButton(type: .System)
super.init(frame: .zero)
addSubview(button)
button.translatesAutoresizingMaskIntoConstraints = false
button.constrainEdges(to: self)
button.setTitle(title, forState: .Normal)
button.addTarget(self, action: #selector(tapped), forControlEvents: .TouchUpInside)
}
}
18:26 Now we can add the tapped method, which finally calls the
callback we handed into the initializer:
func tapped(sender: AnyObject) {
    onTap()
}
18:41 Lastly, we again have to add the default implementation for the
required initializer. The complete CallbackButton class looks like this:
final class CallbackButton: UIView {
    let onTap: () -> ()
    let button: UIButton

    init(title: String, onTap: () -> ()) {
        self.onTap = onTap
        self.button = UIButton(type: .System)
        super.init(frame: .zero)
        addSubview(button)
        button.translatesAutoresizingMaskIntoConstraints = false
        button.constrainEdges(to: self)
        button.setTitle(title, forState: .Normal)
        button.addTarget(self, action: #selector(tapped), forControlEvents: .TouchUpInside)
    }

    required init?(coder aDecoder: NSCoder) {
        fatalError("init(coder:) has not been implemented")
    }

    func tapped(sender: AnyObject) {
        onTap()
    }
}
18:49 The CallbackButton class is kind of a crutch, because we have
to bridge UIKit's target/action mechanism to our button callback. But at least
it works and it's safe.
19:07 Now we just have to make use of the CallbackButton in
ContentElement's view property. We change the .button case like this:
extension ContentElement {
var view: UIView {
switch self {
case .button(let title, let callback):
return CallbackButton(title: title, onTap: callback)
}
}
}
19:35 We ended up with a very declarative way of building our stack
view, which we've found to be a helpful prototyping tool.
20:05 We can extend our implementation in a few obvious ways in the
future — for example, by adding a custom case to display arbitrary instances of
UIView. 20:18 Adding an asynchronous case would also be interesting.
This could give us a chance to load data from the network and swap the view in
once the result comes back. 20:27 On the other hand, adding more and
more cases will make this simple abstraction increasingly more complicated.
20:32 As a result, we might just end up implementing it for all of
UIKit, so we should stick to the things we really need for our project.
20:52 Another interesting use case for this abstraction could be to
construct the view hierarchy out of data we receive, e.g. from the server.
21:06 We could easily transform a JSON dictionary into
ContentElements and build a StackViewController on the fly.
21:27 There are many interesting possibilities, but even in this simple
form, the abstraction helps us iterate faster and write cleaner code.
