
6 Episodes · 2h21min
- Simple Fuzzy Matching 19:00
- Scoring Results 17:53
- Complete Matching 21:42
- From Recursion to Loops 32:19
- Optimizing Performance 32:18
- Optimizing Performance (Part 2) 17:51
Swift Talk # 211
Subscribers get exclusive access to new and all previous subscriber-only episodes, video downloads, and 30% discount for team members. Become a Subscriber →
We start building a Quick Open feature by implementing a simple fuzzy matching algorithm.
00:06 Today we'll start building a Quick Open dialog like the one in Xcode. We need this for an app we're working on, in which we want to easily search through a huge list of files.
00:32 The search algorithm needs to be fast, responsive, and correct. And the correctness actually depends on the use case, so the solution we'll build might not be suitable for every app. But we'll come up with a scoring system that works well for our use case.
01:02 We won't worry much about the UI so that we can focus primarily on the search algorithm itself.
01:22 We set up a simple SwiftUI app with a search field, and we display the first 30 search results in a list below the search field. We'll be using a list of file paths from the Swift repository to search through:
struct ContentView: View {
    @State var needle: String = ""

    var body: some View {
        VStack(spacing: 0) {
            HStack(spacing: 0) {
                Image(nsImage: search)
                    .padding(.leading, 10)
                TextField("", text: $needle)
                    .textFieldStyle(PlainTextFieldStyle())
                    .padding(10)
                    .font(.subheadline)
                Button(action: {
                    self.needle = ""
                }, label: {
                    Image(nsImage: close)
                        .padding()
                })
                    .disabled(needle.isEmpty)
                    .buttonStyle(BorderlessButtonStyle())
            }
            List(files.prefix(30), id: \.self) {
                Text($0)
            }
        }
    }
}
01:58 The naivest thing to do is filter the list of files by the search string — or needle. We create a computed property that returns only the files that contain the needle, and we now display the filtered-down list:
struct ContentView: View {
    @State var needle: String = ""

    var filtered: [String] {
        files.filter { $0.contains(needle) }
    }

    var body: some View {
        VStack(spacing: 0) {
            // ...
            List(filtered.prefix(30), id: \.self) {
                Text($0)
            }
        }
    }
}
02:53 In a real app, it would be better to cache the results instead of
performing the filtering every time we read the filtered property. But as long
as we only read the property once per render cycle, our current setup will be
fine.
03:07 Searching for the word "string" now gives us the file names that contain that word:
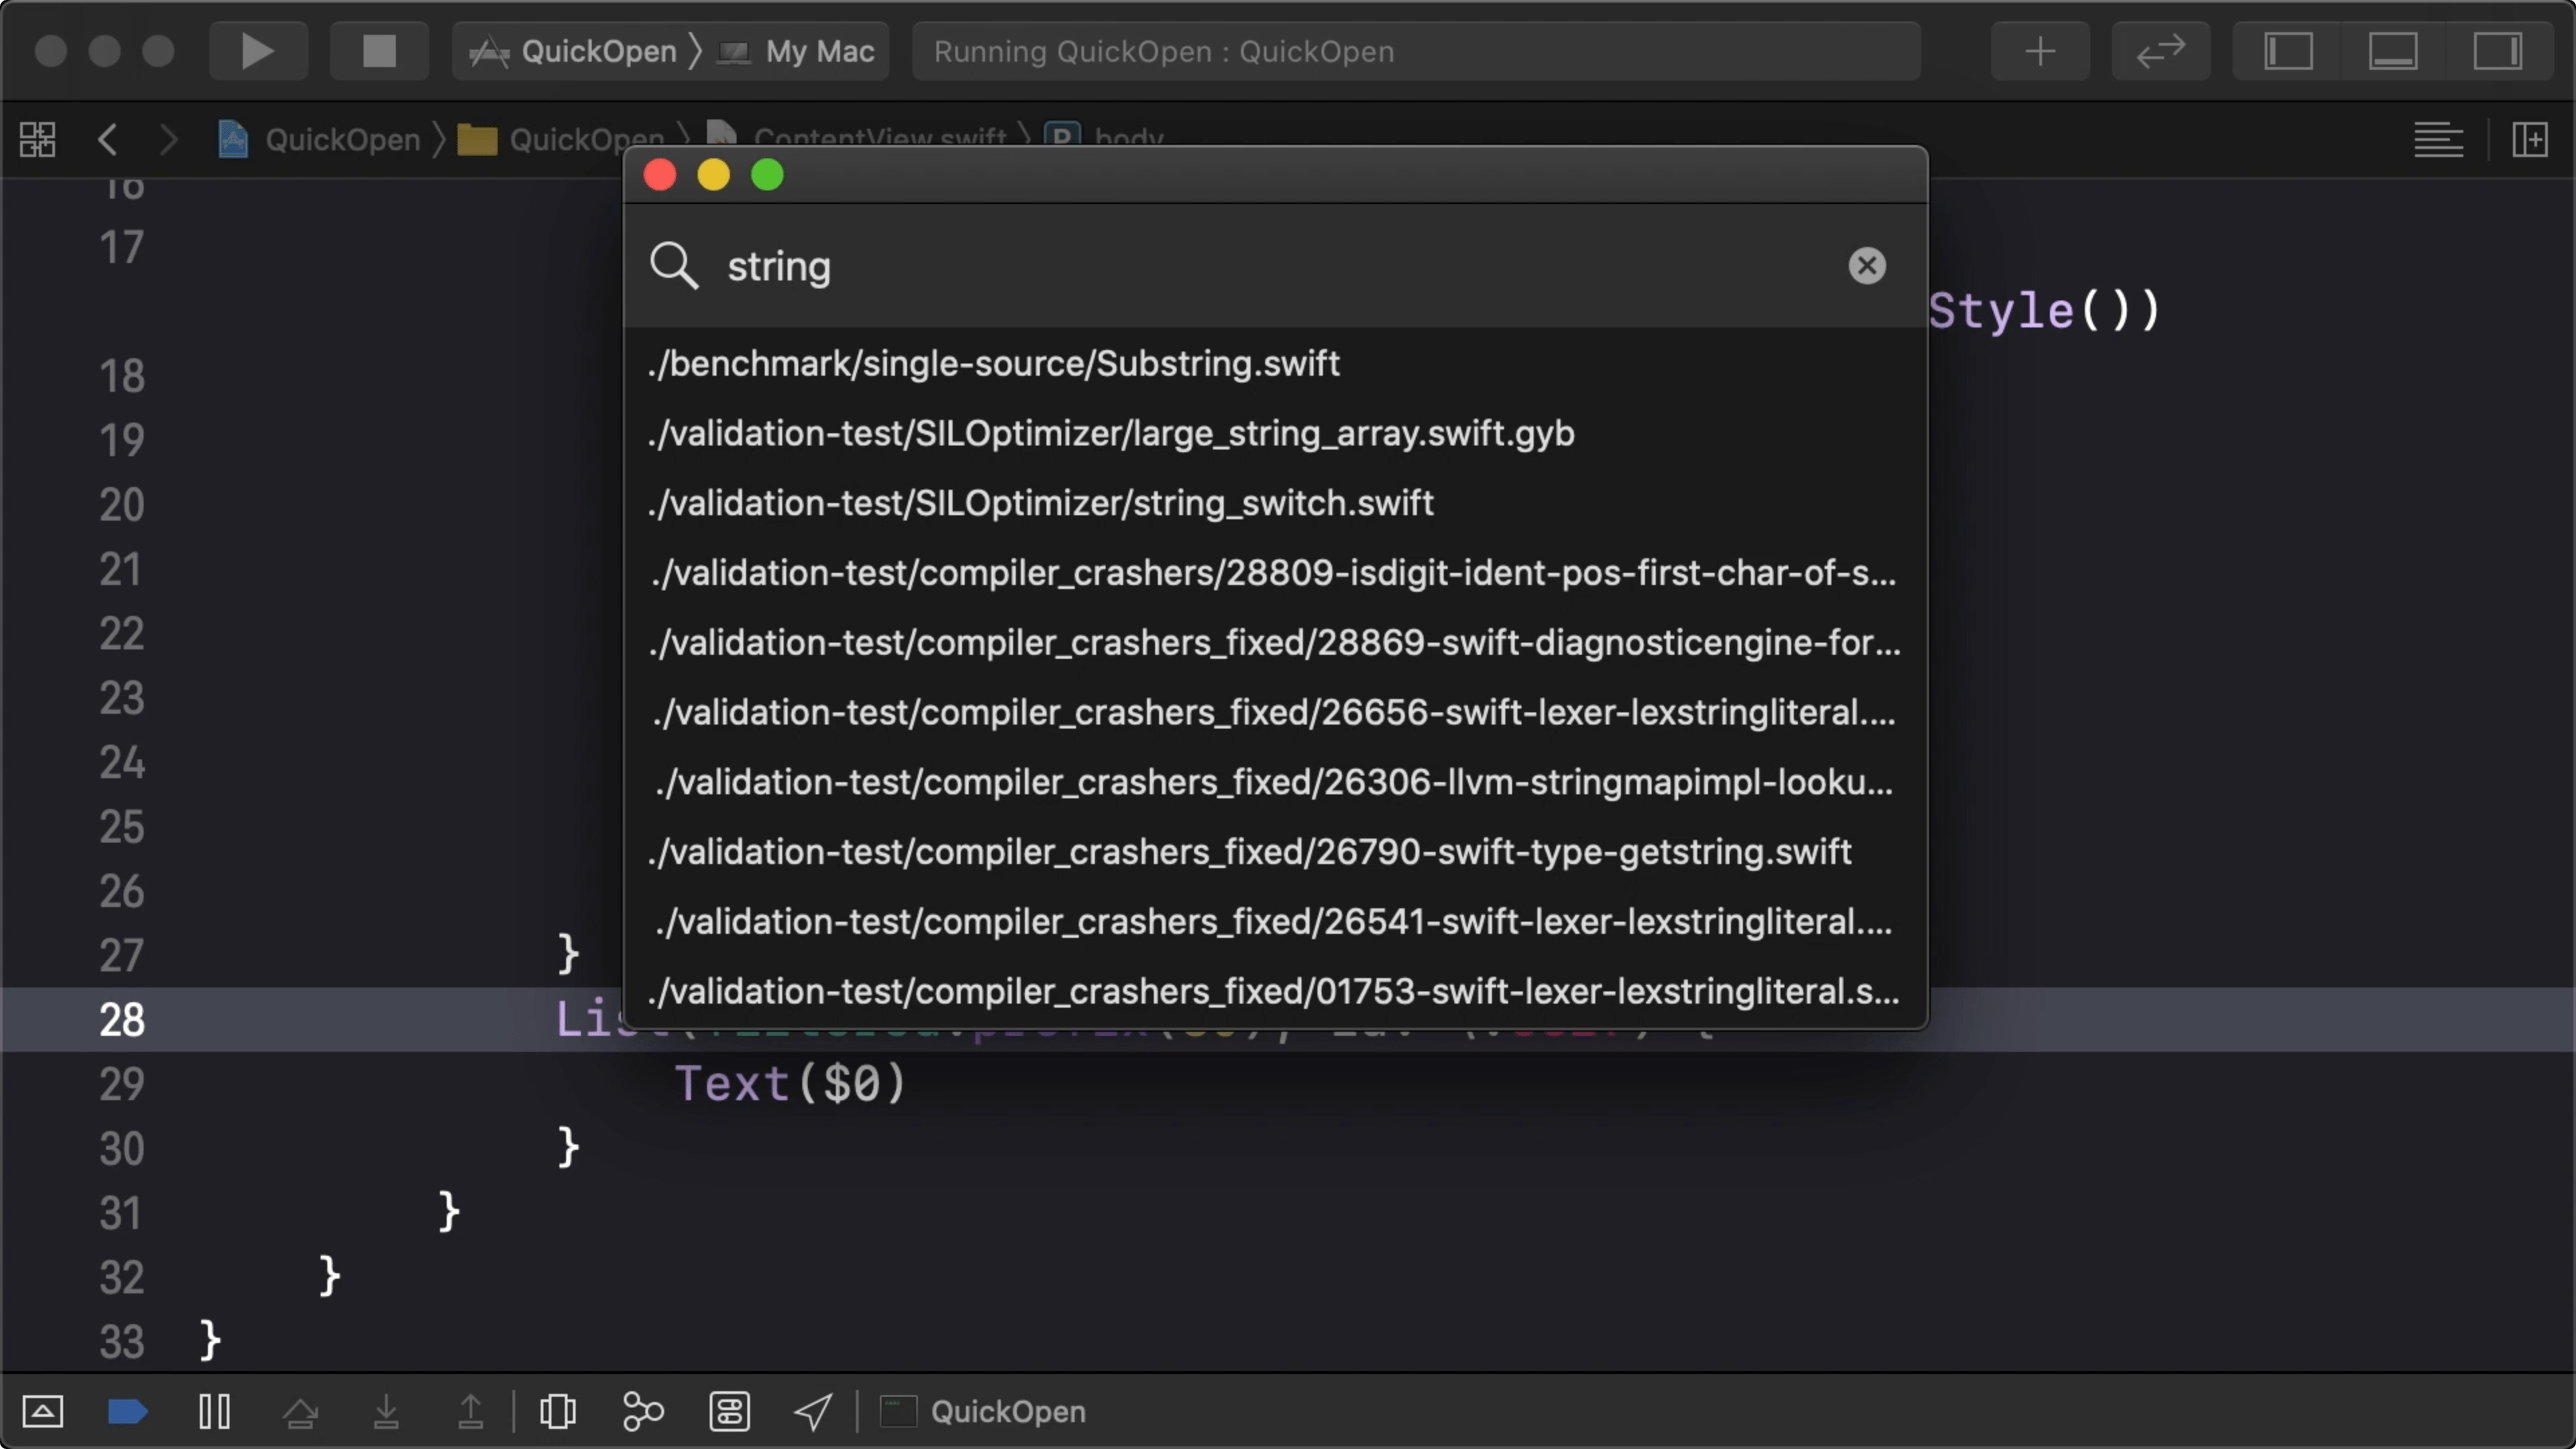
03:20 But this isn't exactly the result we want. In the end, we don't just want to find the files that contain the needle in one piece, but also the ones that contain each of the needle's characters, in order.
That's how a Quick Open dialog typically works: for example, in order to find
the first hit we saw above — ./benchmark/single-source/Substring.swift — we
want to be able to search for bsS, e.g. where the letters in the needle form a
pattern that matches up with the first letters of the result's path components.
04:23 So let's start implementing this fuzzy matching. As a first step,
we check whether or not the needle is empty. If it is, this means any string is
a match and we return true. Otherwise, we continue.
We then construct a substring from the needle to efficiently remove characters from the beginning. Iterating over the characters of the string, we look for a character that's equal to the first character in the needle, and we remove it from the needle. The string is a match if we end up with an empty needle:
extension String {
    func fuzzyMatch(_ needle: String) -> Bool {
        if needle.isEmpty { return true }
        var remainder = needle[...]
        for char in self {
            if char == remainder[remainder.startIndex] {
                remainder.removeFirst()
                if remainder.isEmpty { return true }
            }
        }
        return false
    }
}
06:14 This algorithm is a naive version of fuzzy matching because it only determines whether all characters of the search string are contained in the results without scoring the results based on how the characters are positioned.
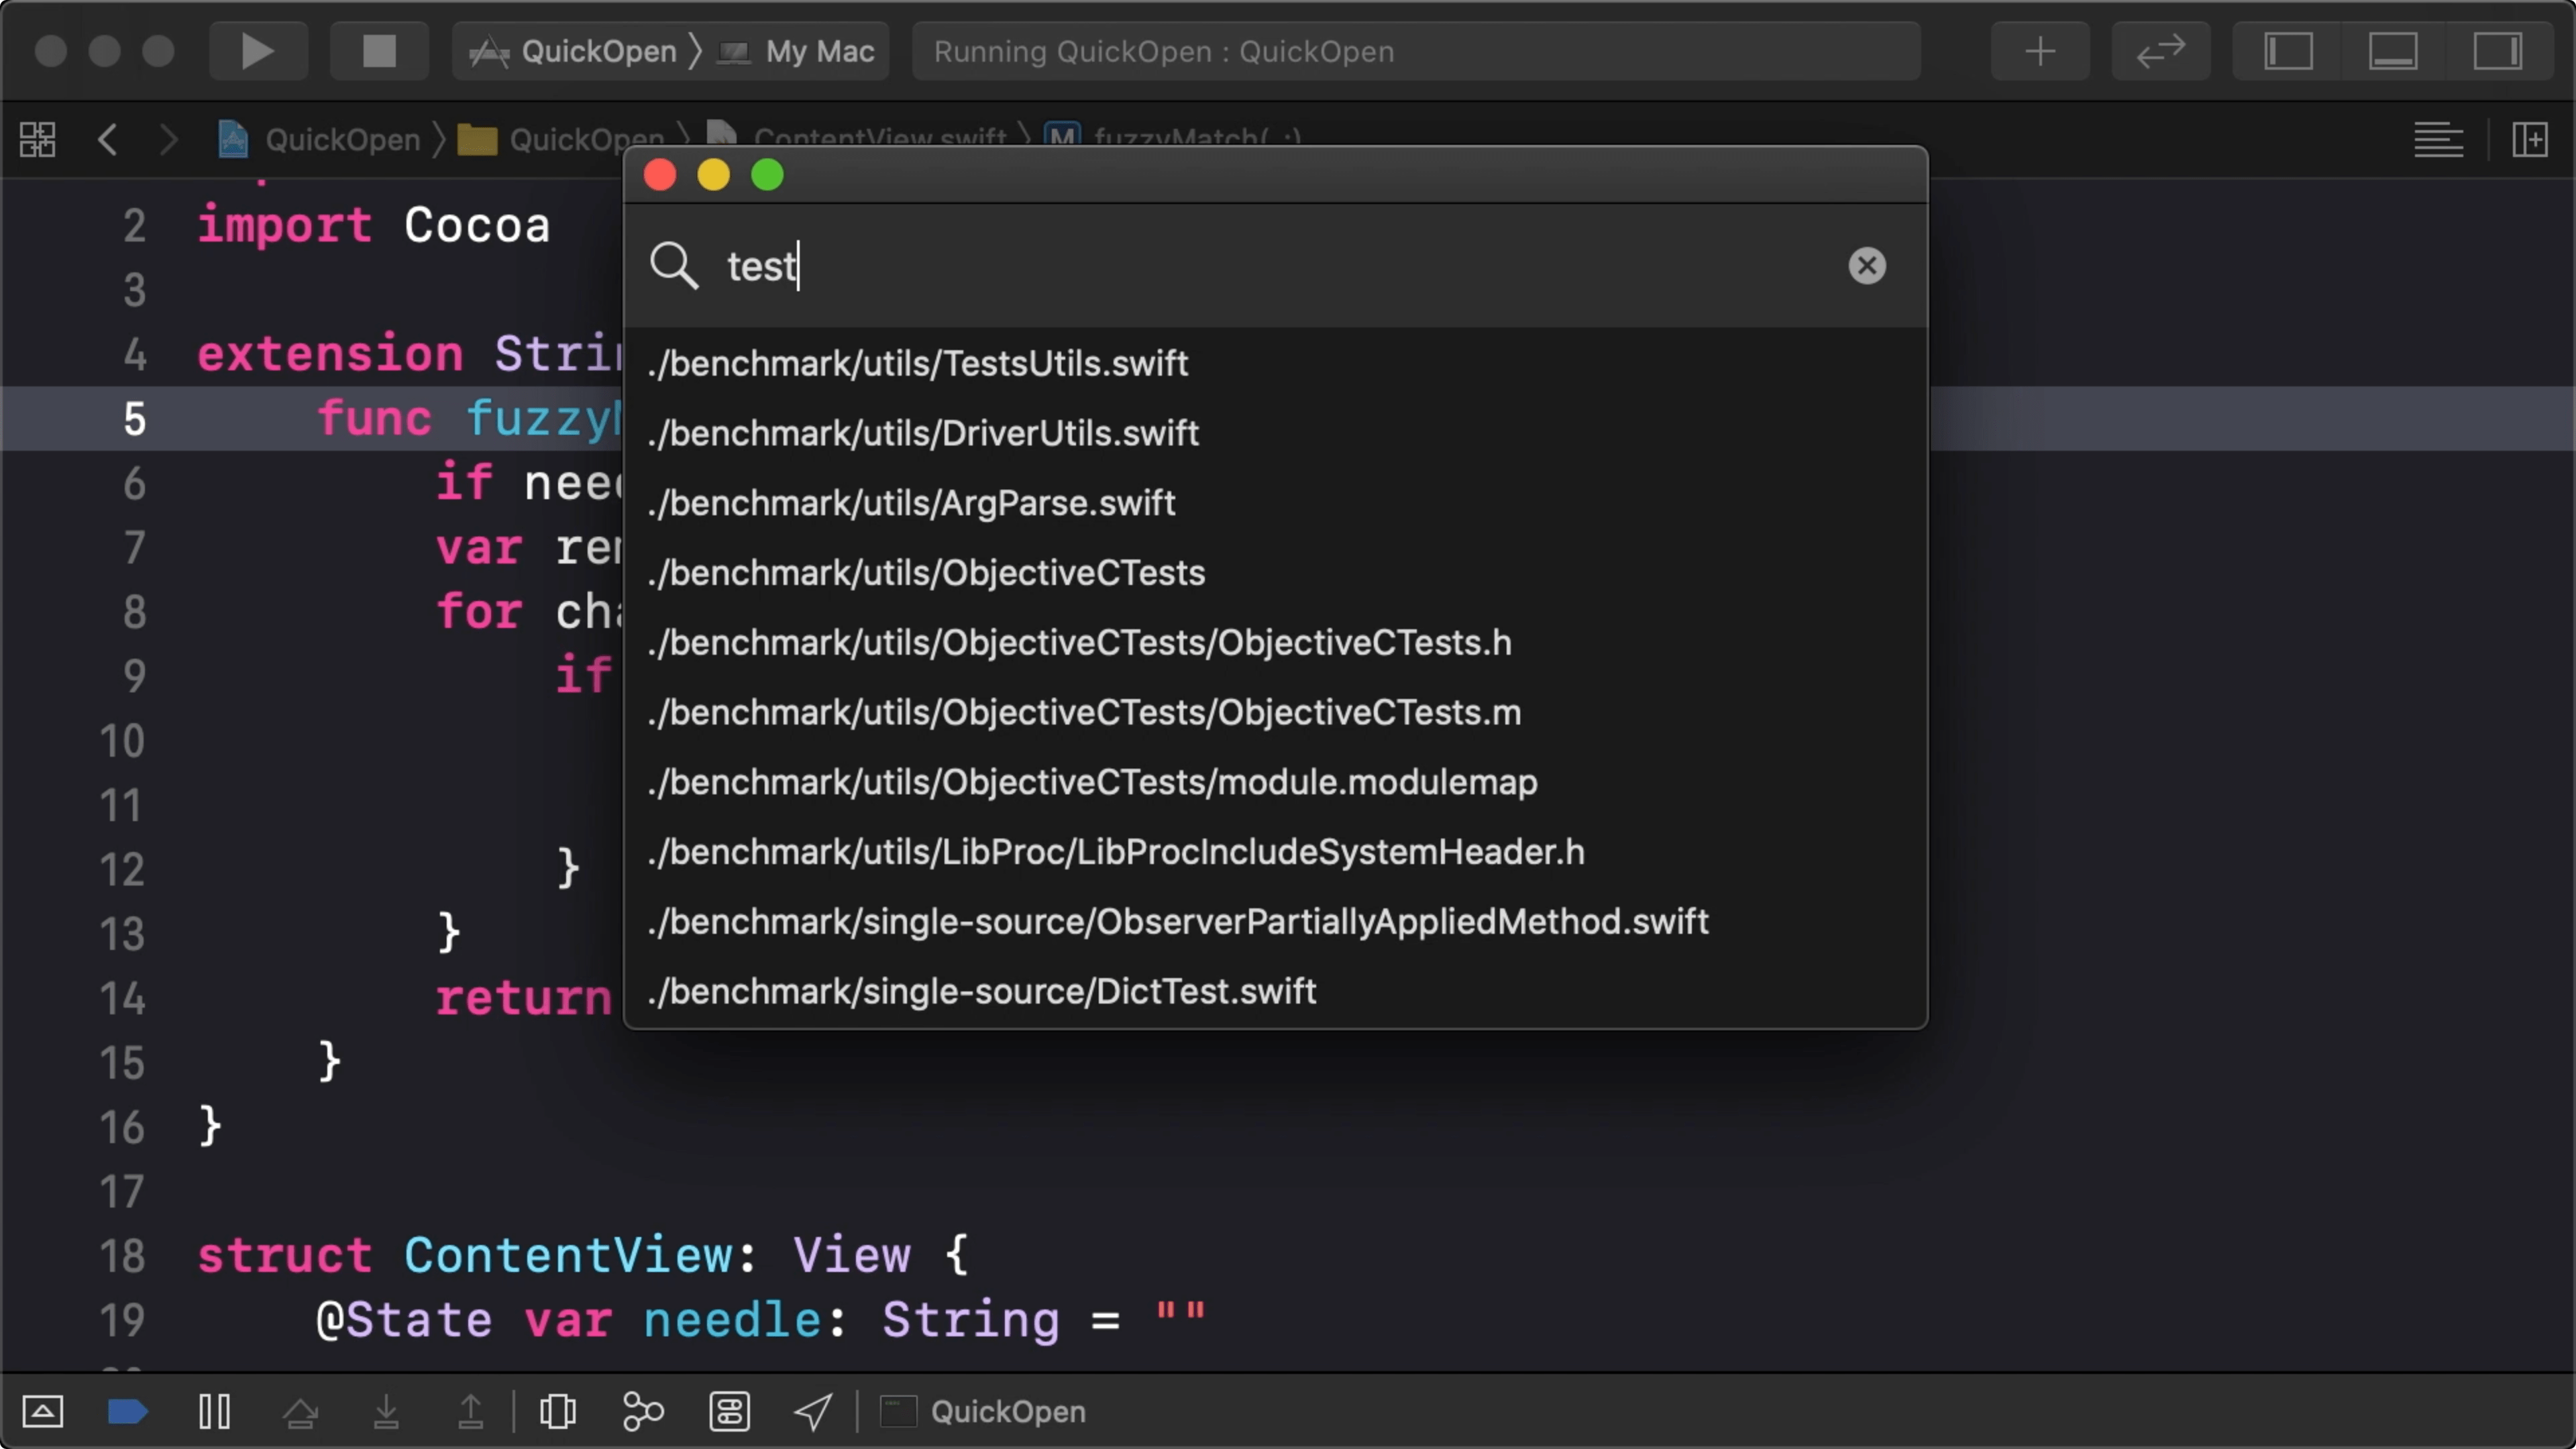
06:58 It's a little difficult to see why a result is included, e.g. when we search for the word "test." Instead, it would be nice to highlight the characters that were used for matching:
07:36 But before we improve our code, let's do some benchmarking to see how this simple version performs. We'll use signposts before and after filtering to record the performance of searching for a string:
import OSLog

let log = OSLog(subsystem: "objc.io", category: "FuzzyMatch")

// ...

struct ContentView: View {
    @State var needle: String = ""

    var filtered: [String] {
        os_signpost(.begin, log: log, name: "Search", "%@", needle)
        defer { os_signpost(.end, log: log, name: "Search", "%@", needle) }
        return files.filter { $0.fuzzyMatch(needle) }
    }

    // ...
}
09:07 By putting the ending signpost in a defer block, we can be
certain it gets executed before the function returns, even as our function gets
more complicated.
09:16 Now we can run the app with the os_signpost instrument in
Xcode's Instruments app. After typing "test" in the search field, we can find
logged measurements of filtering the results in the signpost track:
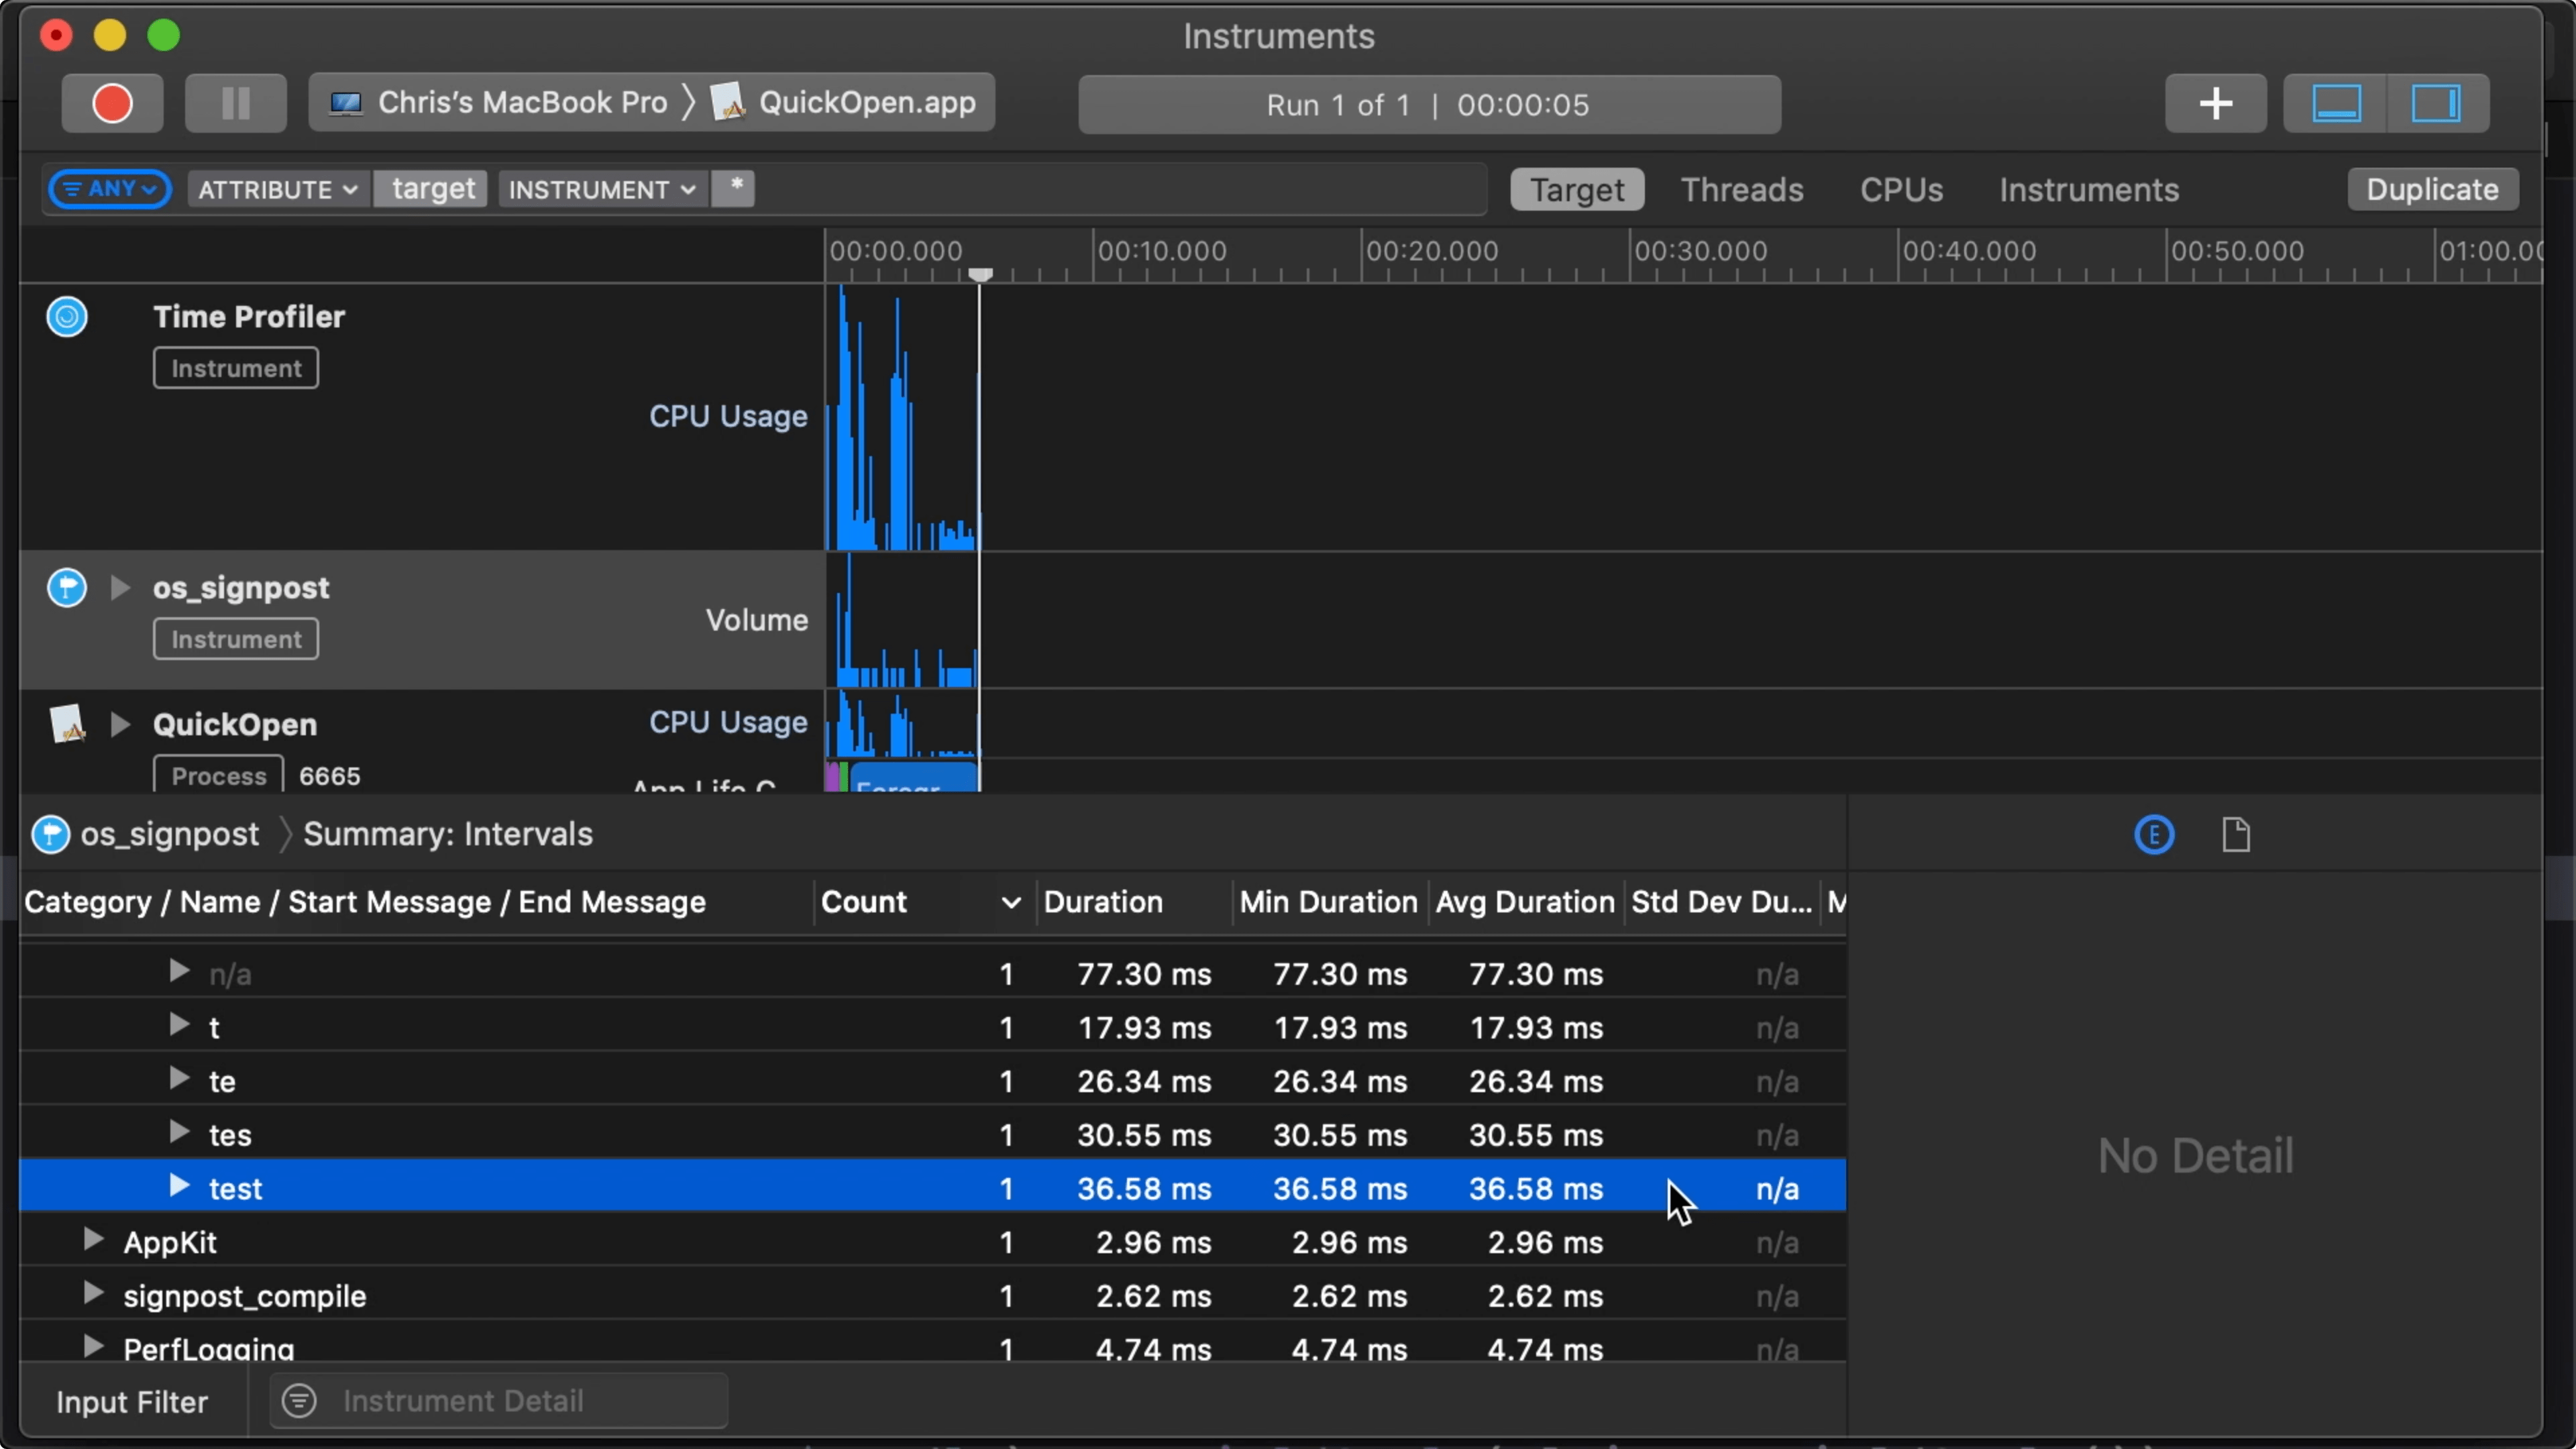
10:00 It took around 20–40 ms to perform the search. We'll keep these numbers in mind as a baseline. Later, when we're happy with our algorithm, we can see what we have to do to get comparable results.
10:37 Let's return to our code and add the highlighting. Instead of
returning a Boolean value, we let fuzzyMatch return an optional array of
indices. That way, we can return nil if there's no match, or an empty array if
there's a match without highlighted characters.
11:11 Instead of looping over the string's characters, we now loop over the indices. For each matching character, we add its index to the result array:
extension String {
    func fuzzyMatch(_ needle: String) -> [String.Index]? {
        var ixs: [Index] = []
        if needle.isEmpty { return [] }
        var remainder = needle[...]
        for idx in indices {
            let char = self[idx]
            if char == remainder[remainder.startIndex] {
                ixs.append(idx)
                remainder.removeFirst()
                if remainder.isEmpty { return ixs }
            }
        }
        return nil
    }
}
11:59 We change the filtered property to pass on the found indices and
to use compactMap to filter out the non-matching strings:
struct ContentView: View {
    @State var needle: String = ""

    var filtered: [(string: String, indices: [String.Index])] {
        os_signpost(.begin, log: log, name: "Search", "%@", needle)
        defer { os_signpost(.end, log: log, name: "Search", "%@", needle) }
        return files.compactMap {
            guard let match = $0.fuzzyMatch(needle) else { return nil }
            return ($0, match)
        }
    }

    // ...
}
13:22 And we fix the view code so that it works with the new version of
filtered:
struct ContentView: View {
    // ...

    var body: some View {
        VStack(spacing: 0) {
            // ...
            List(filtered.prefix(30), id: \.string) { result in
                Text(result.string)
            }
        }
    }
}
13:52 For each result, we can now highlight the matched characters to show how the needle is contained inside the string:
struct ContentView: View {
    // ...

    var body: some View {
        VStack(spacing: 0) {
            // ...
            List(filtered.prefix(30), id: \.string) { result in
                highlight(string: result.string, indices: result.indices)
            }
        }
    }
}
14:38 We write a free function that wraps each character of a string in
a SwiftUI Text view, applying different modifiers depending on whether or not
the character's index is included in the indices parameter. Here, we're
appending multiple Text views with the + operator, which results in a single
Text view with concatenated strings, almost like a lightweight version of
NSAttributedString:
func highlight(string: String, indices: [String.Index]) -> Text {
    var result = Text("")
    for i in string.indices {
        let char = Text(String(string[i]))
        if indices.contains(i) {
            result = result + char.bold()
        } else {
            result = result + char.foregroundColor(.secondary)
        }
    }
    return result
}
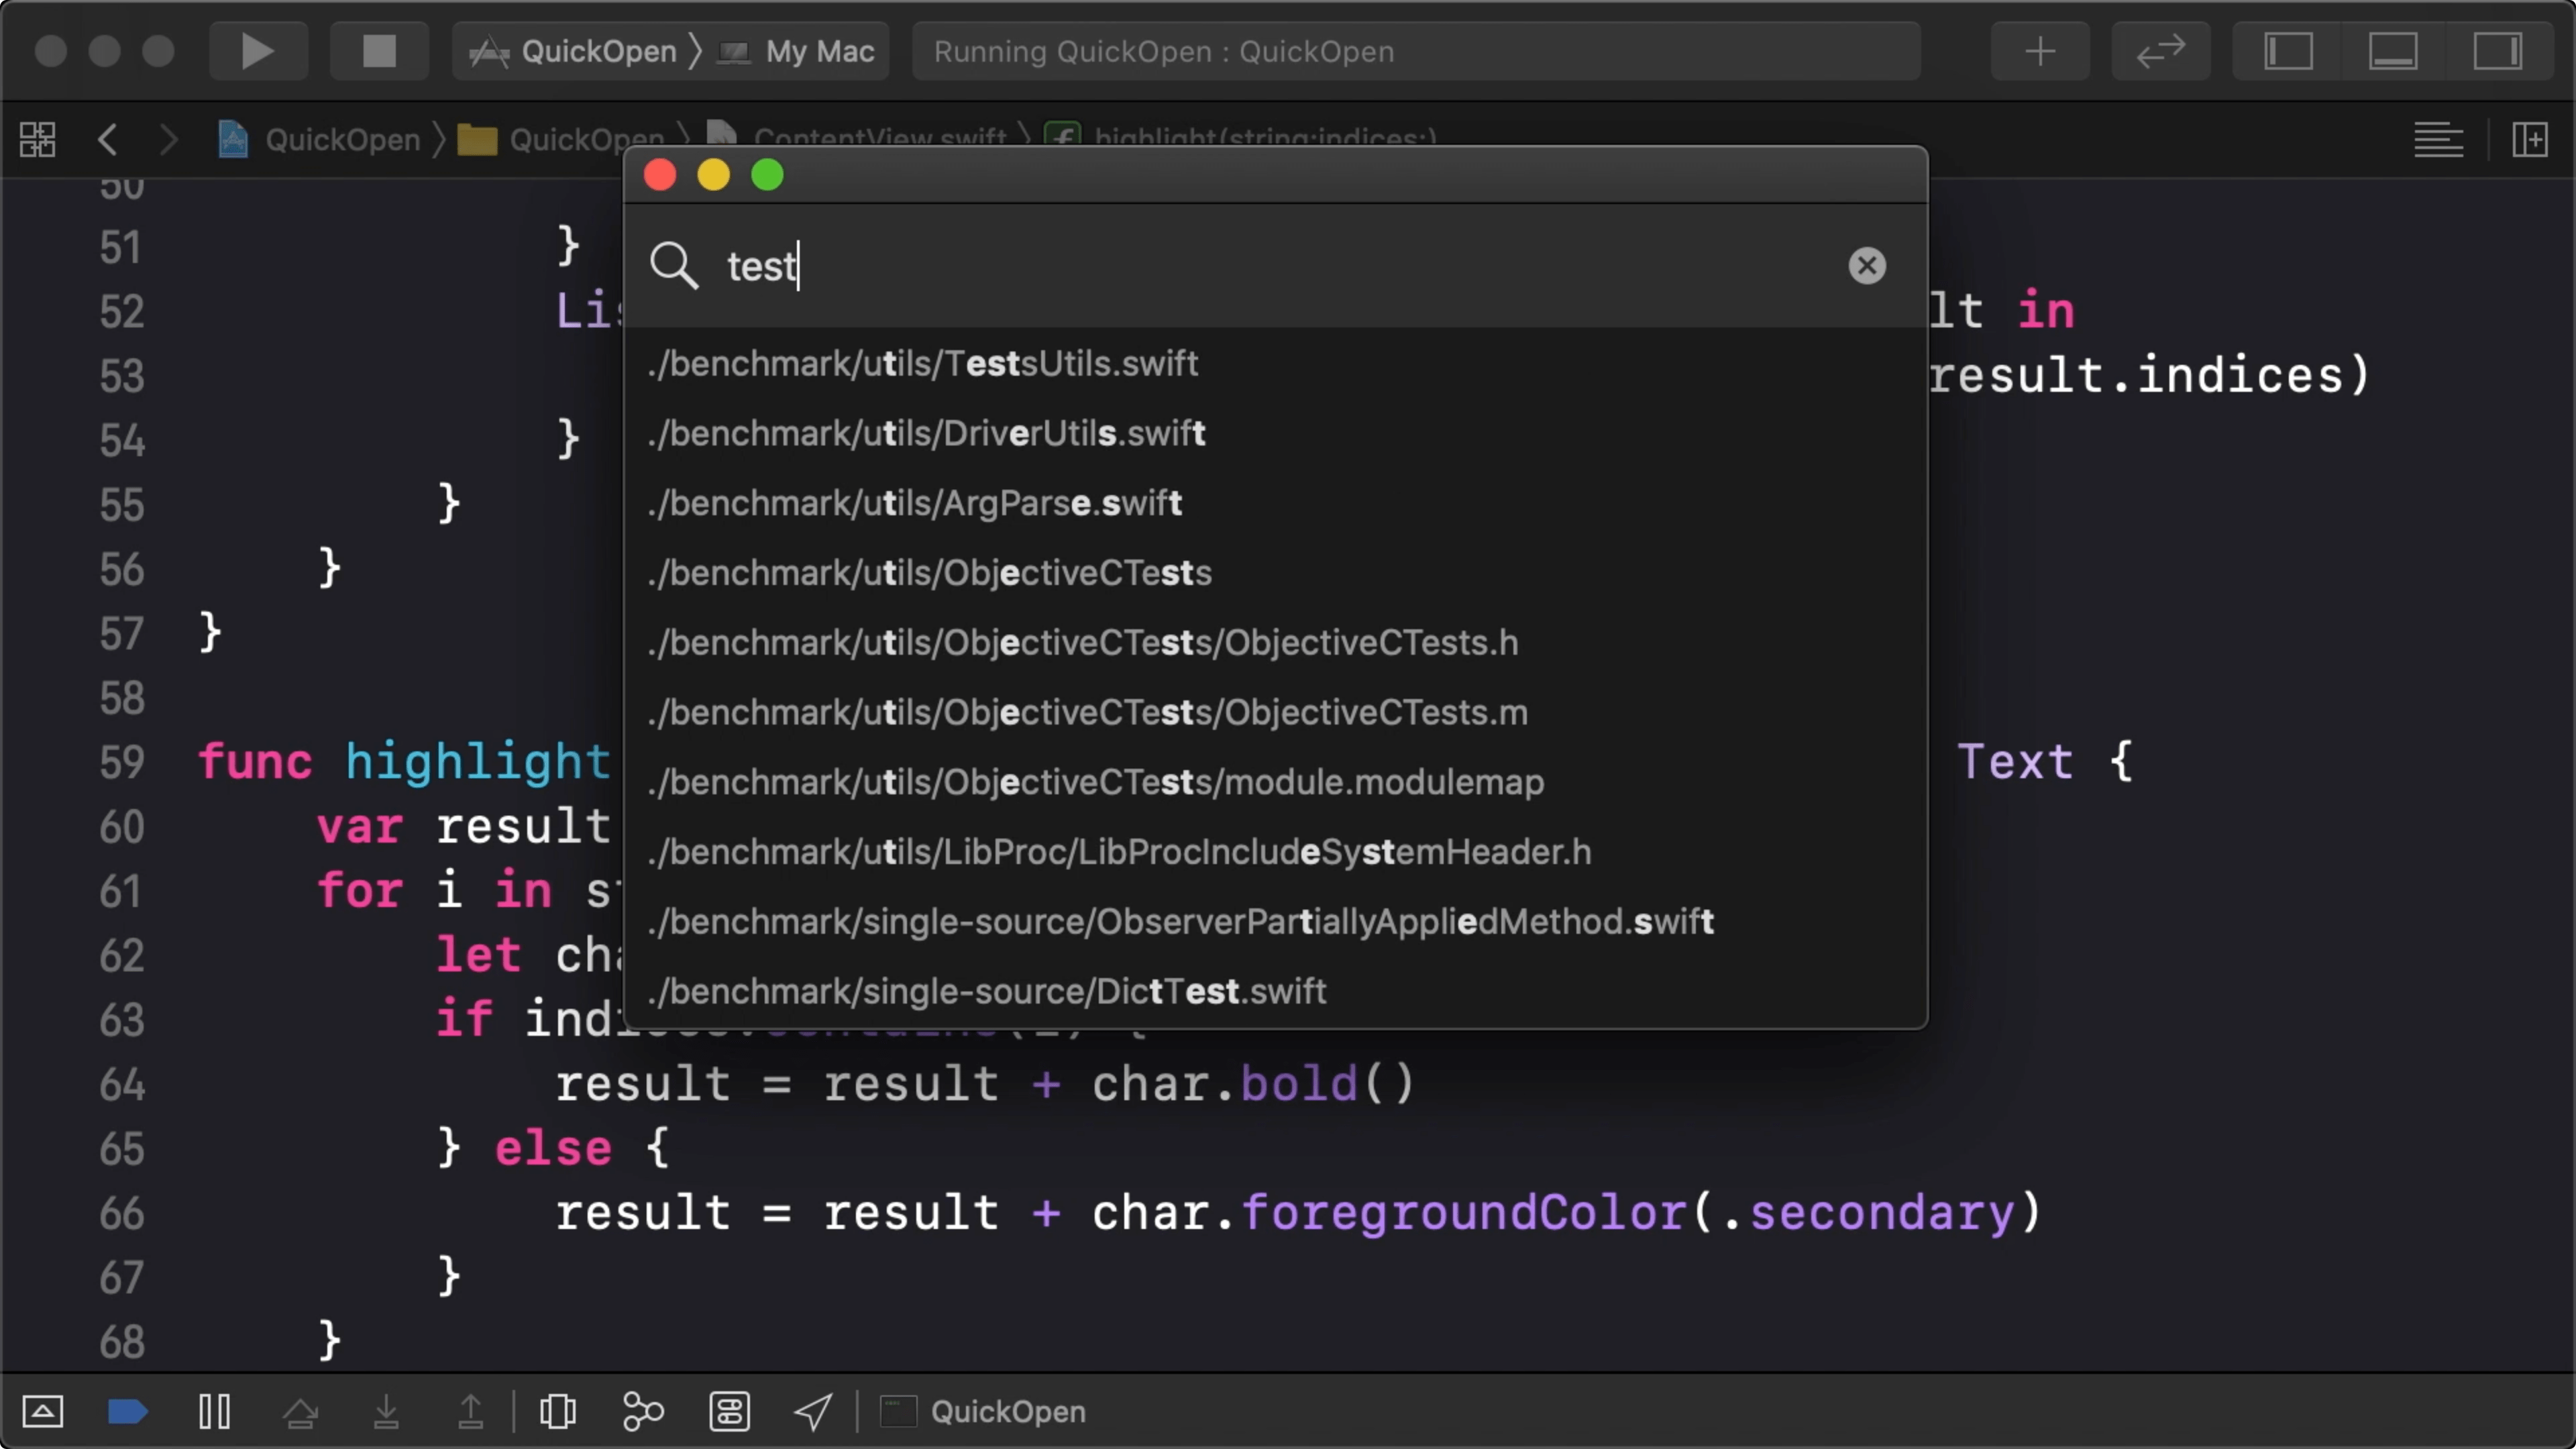
16:39 If we now perform a search, we see the needle's characters highlighted in each result:
16:47 Searching feels a little slower now, so we check the signpost measurements again: performance has decreased only slightly, to around 48 ms. In the end, we'll have to be faster, but it's not a bad starting point, considering we're searching through 20,000 files.
17:20 A simple way to improve performance is to operate on the UTF-8 views of the needle and the search strings:
extension String {
    func fuzzyMatch(_ needle: String) -> [String.Index]? {
        var ixs: [Index] = []
        if needle.isEmpty { return [] }
        var remainder = needle[...].utf8
        for idx in utf8.indices {
            let char = utf8[idx]
            if char == remainder[remainder.startIndex] {
                ixs.append(idx)
                remainder.removeFirst()
                if remainder.isEmpty { return ixs }
            }
        }
        return nil
    }
}
18:14 That slightly lowers the time it takes to search — down to around 20 ms — but we'll need to do better still. And our search algorithm also needs to become much more capable than it is now.
Written in Swift 5
Become a subscriber to download episode videos.
6 Episodes · 2h21min
Episode 495 · Jun 12
Episode 494 · Jun 05
Episode 493 · May 29
Episode 492 · May 15
Episode 491 · May 07
Episode 490 · May 01
Episode 489 · Apr 24
Episode 488 · Apr 17
Unlock Full Access
A new episode every week
Take Swift Talk with you when you're offline
With your help we can keep producing new episodes