
4 Episodes · 2h01min
- View Models 33:58
- Deep Linking 27:12
- Playground-Driven Development 21:24
- Test-Driven Reactive Programming 38:47
Swift Talk # 51
with special guest Brandon Williams
Subscribers get exclusive access to new and all previous subscriber-only episodes, video downloads, and 30% discount for team members. Become a Subscriber →
Brandon from Kickstarter demos how the company uses playgrounds to prototype and style individual view controllers.
00:06 Today we're joined by Brandon from Kickstarter once again. Together we'll build an interface in a playground and then move it into a framework that can be used in an actual application. At Kickstarter, the developers only construct a basic view hierarchy in Interface Builder, whereas all of its styling is done in a playground.
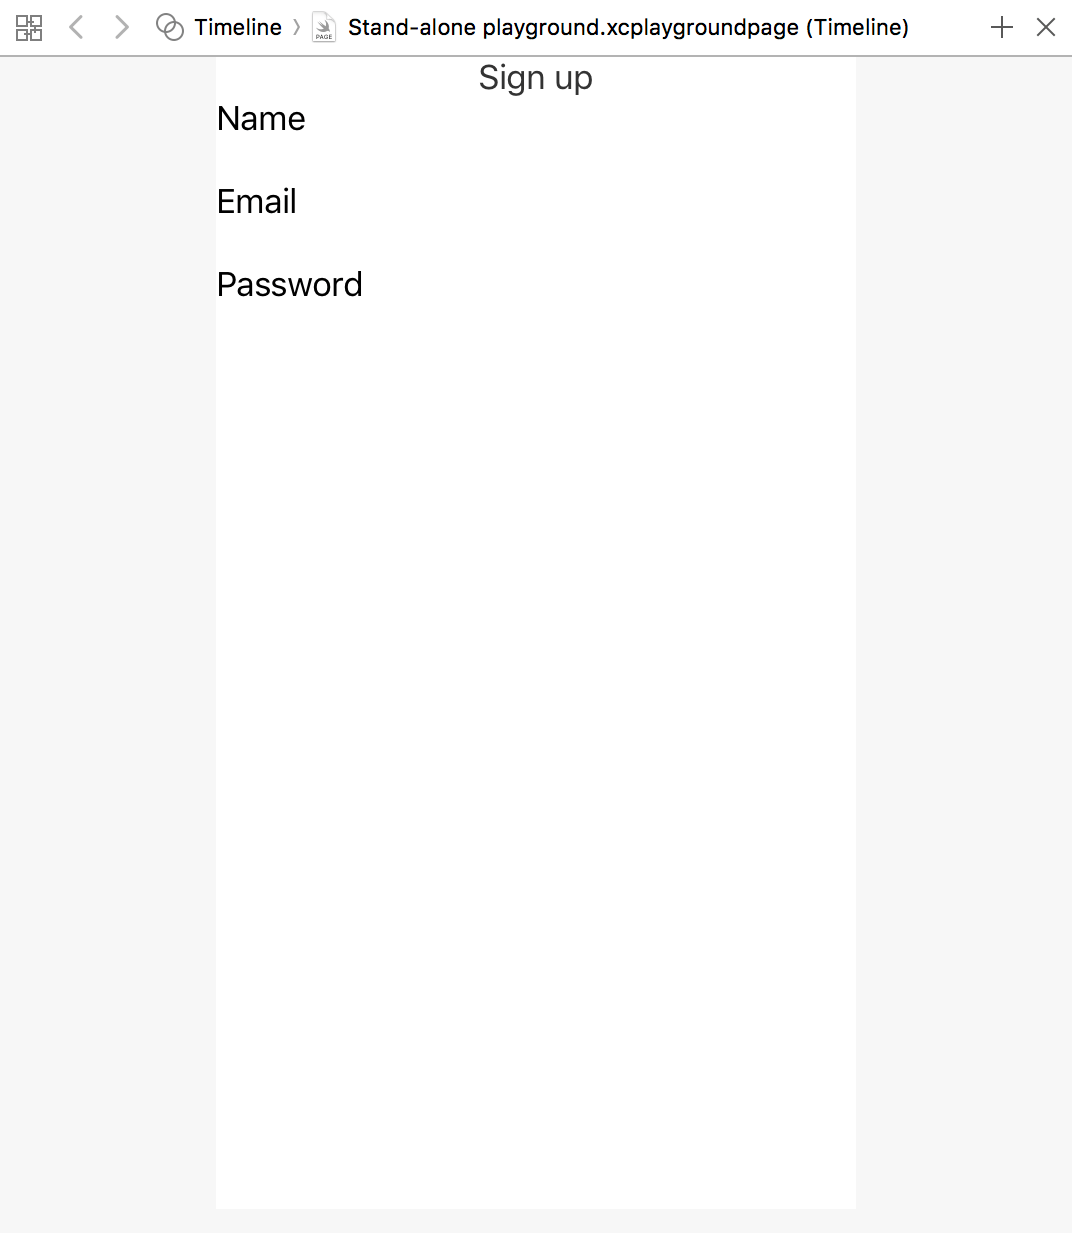
00:47 We've prepared a view controller that will serve as a sign-up form.
It features a header, three input fields, and a submit button, all contained in
a root UIStackView:
import UIKit
import PlaygroundSupport

class MyViewController: UIViewController {
  let rootStackView = UIStackView()
  let titleLabel = UILabel()
  let emailLabel = UILabel()
  let emailTextField = UITextField()
  let emailStackView = UIStackView()
  let nameLabel = UILabel()
  let nameTextField = UITextField()
  let nameStackView = UIStackView()
  let passwordLabel = UILabel()
  let passwordTextField = UITextField()
  let passwordStackView = UIStackView()
  let submitButton = UIButton()

  override func viewDidLoad() {
    super.viewDidLoad()

    self.view.backgroundColor = UIColor(white: 0.95, alpha: 1)

    self.rootStackView.translatesAutoresizingMaskIntoConstraints = false
    self.rootStackView.axis = .vertical

    self.titleLabel.text = "Sign up"
    self.titleLabel.textAlignment = .center
    self.titleLabel.textColor = UIColor.init(white: 0.2, alpha: 1)

    self.nameLabel.text = "Name"
    self.nameStackView.axis = .vertical
    self.nameStackView.addArrangedSubview(self.nameLabel)
    self.nameStackView.addArrangedSubview(self.nameTextField)

    self.emailLabel.text = "Email"
    self.emailStackView.axis = .vertical
    self.emailStackView.addArrangedSubview(self.emailLabel)
    self.emailStackView.addArrangedSubview(self.emailTextField)

    self.passwordLabel.text = "Password"
    self.passwordStackView.axis = .vertical
    self.passwordStackView.addArrangedSubview(self.passwordLabel)
    self.passwordStackView.addArrangedSubview(self.passwordTextField)

    self.submitButton.setTitle("Submit", for: .normal)

    self.view.addSubview(self.rootStackView)
    self.rootStackView.addArrangedSubview(self.titleLabel)
    self.rootStackView.addArrangedSubview(self.nameStackView)
    self.rootStackView.addArrangedSubview(self.emailStackView)
    self.rootStackView.addArrangedSubview(self.passwordStackView)
    self.rootStackView.addArrangedSubview(self.submitButton)

    NSLayoutConstraint.activate([
      self.rootStackView.leadingAnchor.constraint(equalTo: self.view.leadingAnchor),
      self.rootStackView.trailingAnchor.constraint(equalTo: self.view.trailingAnchor),
      self.rootStackView.topAnchor.constraint(equalTo: self.view.topAnchor),
      self.rootStackView.bottomAnchor.constraint(lessThanOrEqualTo: self.view.bottomAnchor),
      ])
  }
}
01:23 We import PlaygroundSupport and set the view controller's view as
the playground's live view in order to immediately see any changes we make:
let vc = MyViewController()
PlaygroundPage.current.liveView = vc
01:36 Our first improvement of the view controller is to style the submit
button, because it's barely visible now. To do this, we'll give it a background
color and make the corners rounded. These are pretty simple changes, but it's
nice to see the live view updating. In viewDidLoad, we add the following:
self.submitButton.backgroundColor = .blue
self.submitButton.layer.cornerRadius = 6
self.submitButton.layer.masksToBounds = true
02:25 Next we'll tweak the form's text field labels to improve the UI's
hierarchy, because it'd be better if the input labels' fonts are smaller than
the title font. Before, we'd set the font size explicitly with
UIFont.systemFont(ofSize:), but it's better to use
UIFont.preferredFont(forTextStyle:) and choose a semantic text style:
self.nameLabel.font = UIFont.preferredFont(forTextStyle: .caption1)
03:33 With another overload of this method, we can request the font that's suited to the view controller's current trait collection, so it'll adapt to screen size, orientation, accessibility settings, etc.:
self.nameLabel.font = UIFont.preferredFont(forTextStyle: .caption1, compatibleWith: self.traitCollection)
04:23 We give the text fields a border style:
self.nameTextField.borderStyle = .roundedRect
05:15 The form elements are too tight. The rootStackView holds all the
elements, so we can simply set spacing on it:
self.rootStackView.spacing = 16
06:00 We paste in the remaining styles: a preferred font for the title label and the submit button, and a different text color for the button's highlighted state. Because we're working in a playground, we can actually click the button and see it changing colors:
self.submitButton.titleLabel?.font = UIFont.preferredFont(forTextStyle: .callout, compatibleWith: self.traitCollection)
self.submitButton.setTitleColor(UIColor(white: 1, alpha: 0.5), for: .highlighted)

06:20 The real power of working in a playground is the ability to dynamically swap the view controller's trait collection. This allows us to test the view controller with the characteristics of different devices and orientations. We wrap the view controller in a parent view controller, which can override the trait collection. The playground's live view should now be the parent view. We also paste in some standard layout code, making the child view fill the parent view:
let parent = UIViewController()
let vc = MyViewController()
parent.addChildViewController(vc)

parent.view.translatesAutoresizingMaskIntoConstraints = false
parent.view.addSubview(vc.view)

NSLayoutConstraint.activate([
    vc.view.leadingAnchor.constraint(equalTo: parent.view.leadingAnchor),
    vc.view.trailingAnchor.constraint(equalTo: parent.view.trailingAnchor),
    vc.view.topAnchor.constraint(equalTo: parent.view.topAnchor),
    vc.view.bottomAnchor.constraint(equalTo: parent.view.bottomAnchor)
    ])

PlaygroundPage.current.liveView = parent
07:18 We'll let the parent view controller feed a trait collection to
the child view controller. We can initialize a UITraitCollection for a
particular trait, like contentSizeCategory, sizeClass, or
forceTouchCapability. We can also pass in an array of trait collections, which
is composed to emulate a specific device. We create a trait collection emulating
an iPhone 6:
let traits = UITraitCollection(
    traitsFrom: [
        UITraitCollection(verticalSizeClass: .regular),
        UITraitCollection(horizontalSizeClass: .compact),
        UITraitCollection(preferredContentSizeCategory: .extraExtraLarge)
    ]
)

parent.setOverrideTraitCollection(traits, forChildViewController: vc)
09:08 Finally, we can set the parent's preferred content size, which will be useful later when we want to emulate an iPad with a larger size:
parent.preferredContentSize = .init(width: 320, height: 568)
10:07 The developers at Kickstarter wrote a helper method called
playgroundWrapper. This method takes a child view controller and some
parameters and returns a parent view controller configured with the correct size
and trait collection. We simply use a couple enums to describe the configuration
we want to emulate:
let anotherVc = MyViewController()
let anotherParent = playgroundWrapper(child: anotherVc, device: .phone4inch, orientation: .portrait, contentSizeCategory: .accessibilityExtraExtraExtraLarge)

PlaygroundPage.current.liveView = anotherParent
12:10 It's easy to change parameters and test a smaller
contentSizeCategory or set the device to .pad. The live view automatically
updates with the correct layout.
12:58 In order to use this code in an actual app, we need to create a framework. In the project settings in Xcode, we add a new Cocoa Touch framework to the targets.
13:46 This adds a directory to the project outline. We've prepared a view controller and a storyboard based on the code above, so we drag these two files into the framework directory and make sure to "Copy items if needed."
14:12 We've prepared a version of the signup view controller class with
outlets for the UI components and everything made public. The storyboard has
the most basic setup of the view hierarchy, without styling or even names put in
the labels, which is something that's all done in the view controller.
14:43 Now we want to use the framework's view controller from within the playground, but before we can do so, we have to build the framework.
14:58 We can now import the framework in a blank playground page. We
need access to the Storyboard, from which we'll instantiate the signup view
controller. We can initialize a UIStoryboard from both its name and a
Bundle:
import UIKit
import PlaygroundSupport
import MyFramework

let bundle = Bundle(for: StoryboardSignupViewController.self)
let storyboard = UIStoryboard(name: "StoryboardSignupViewController", bundle: bundle)

let vc = storyboard.instantiateInitialViewController()!
16:21 We use the playground helper to create a parent, which will be shown in the playground's live view:
let parent = playgroundWrapper(child: vc, device: .phone4_7inch, orientation: .landscape, contentSizeCategory: .large)
PlaygroundPage.current.liveView = parent
17:23 As an additional UI element, the storyboard has a disclaimer label for terms and conditions. We can use this to see how styling works in the current setup. We go back into the framework's view controller and style the label:
self.disclaimerLabel.font = UIFont.preferredFont(forTextStyle: .caption2, compatibleWith: self.traitCollection)
self.disclaimerLabel.textAlignment = .center
18:09 With that, we build the framework. Switching back to the playground, we see the updated layout of the view controller. It's important to remember to build the framework so that the playground has the newest code.
18:44 Kickstarter does playground-driven development in its real app. By using this technique, Kickstarter can provide some entry points to customizing interfaces. This allows project managers or designers who haven't worked on the interface to test and play with the view controller while tweaking its parameters.
19:03 We look at a playground that shows off the user's dashboard of the Kickstarter app, which features various stats of the user's projects. The playground has some top-level variables that can be used to see how different parameters affect the interface:
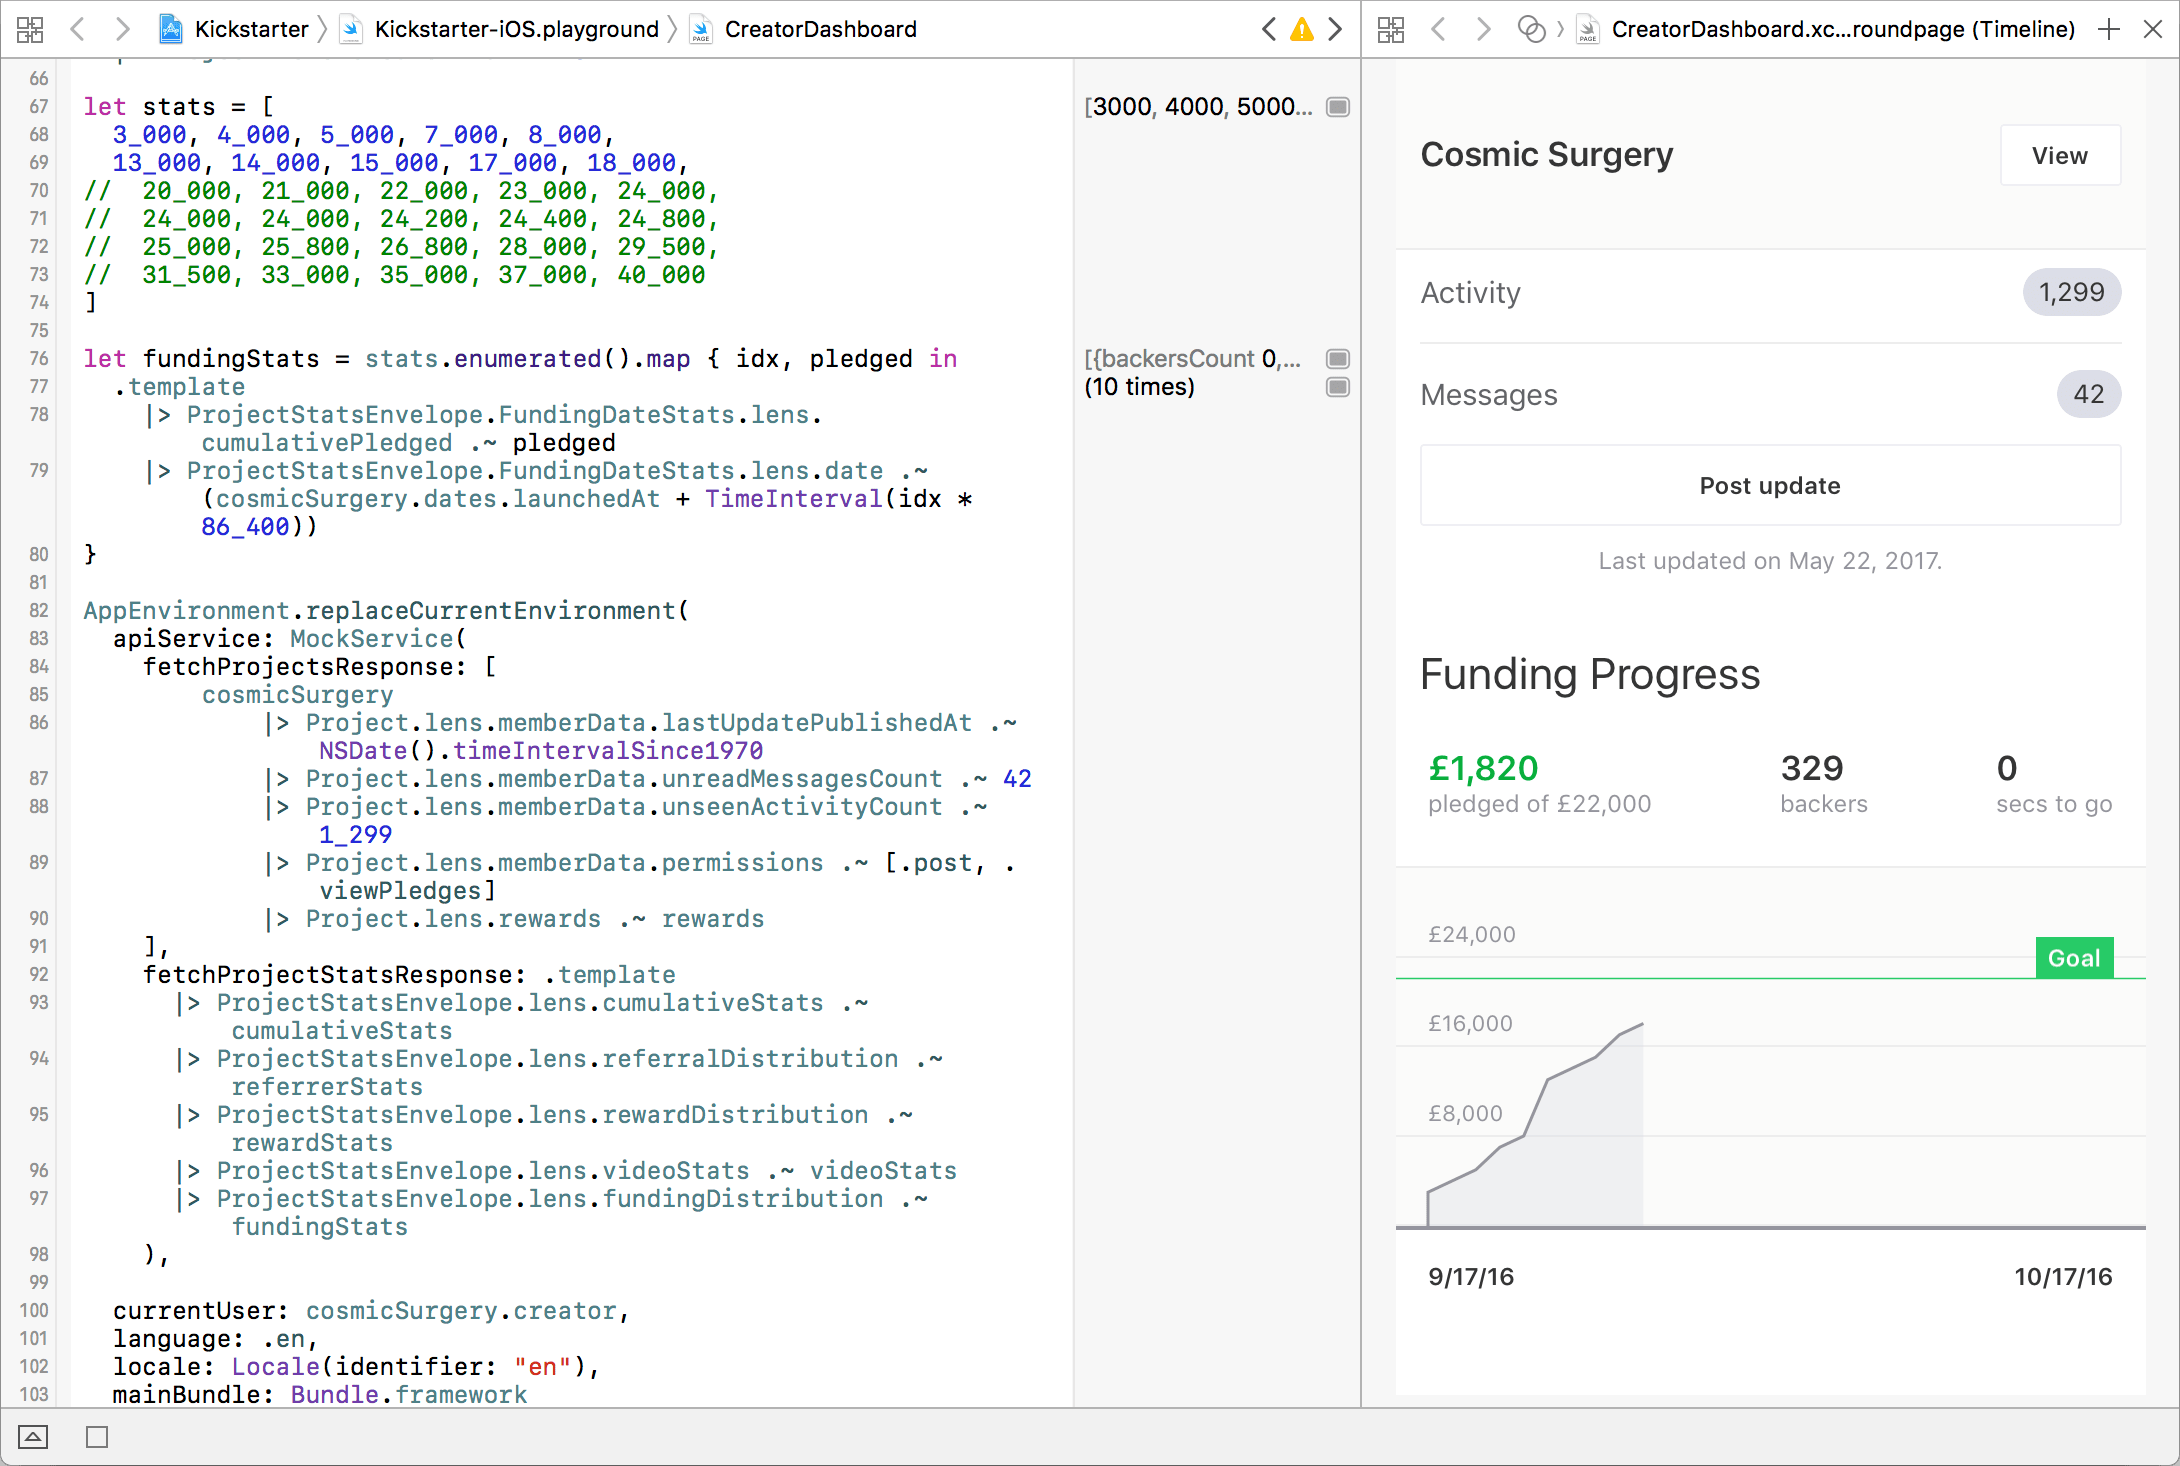
19:51 It's even possible to switch the UI language — e.g. to German, which typically has words which are 30 percent longer than in English — in order to quickly check how the interface behaves in different localizations.
20:49 Playground-driven development allows us to see how the interface works in various configurations. As it's interactive, we can click our interface's buttons in the playground and see the various button states.
20:56 We've been playing around with playground-driven development and we're impressed with how smart and fun it is.
Written in Swift 3.1
Become a subscriber to download episode videos.
4 Episodes · 2h01min
Episode 499 · Jul 10
Episode 498 · Jul 03
Episode 497 · Jun 26
Episode 496 · Jun 19
Episode 495 · Jun 12
Episode 494 · Jun 05
Episode 493 · May 29
Episode 492 · May 15
Unlock Full Access
A new episode every week
Take Swift Talk with you when you're offline
With your help we can keep producing new episodes